# UserView Documentation

> UserView is a no-download screen-sharing tool that enables customer support teams to view and assist users on their website in real-time.

Source: https://userview.com/docs

## Table of contents

- [Getting Started](https://userview.com/docs/getting-started.md)
  - [Implementation Overview](https://userview.com/docs/getting-started/implementation-overview.md)
  - [Invite Your Team](https://userview.com/docs/getting-started/invite-team.md)
  - [Co-Browsing FAQ](https://userview.com/docs/getting-started/co-browsing-faq.md)
- [SDK Documentation](https://userview.com/docs/sdk.md)
  - [Web SDK](https://userview.com/docs/sdk/web.md)
    - [Installation](https://userview.com/docs/sdk/web/installation.md)
    - [Configuration Options](https://userview.com/docs/sdk/web/configuration-options.md)
    - [SDK Functions](https://userview.com/docs/sdk/web/sdk-functions.md)
    - [Listening for Events](https://userview.com/docs/sdk/web/listening-for-events.md)
    - [Multi-Language Support](https://userview.com/docs/sdk/web/translations.md)
  - [iOS SDK](https://userview.com/docs/sdk/ios.md)
    - [Installation](https://userview.com/docs/sdk/ios/installation.md)
    - [Configuration Options](https://userview.com/docs/sdk/ios/configuration-options.md)
    - [SDK Functions](https://userview.com/docs/sdk/ios/sdk-functions.md)
    - [Listening for Events](https://userview.com/docs/sdk/ios/listening-for-events.md)
    - [Full Device Screen Sharing](https://userview.com/docs/sdk/ios/full-device-screen-sharing.md)
  - [Android SDK](https://userview.com/docs/sdk/android.md)
    - [Installation](https://userview.com/docs/sdk/android/installation.md)
    - [Configuration Options](https://userview.com/docs/sdk/android/configuration-options.md)
    - [SDK Functions](https://userview.com/docs/sdk/android/sdk-functions.md)
    - [Listening for Events](https://userview.com/docs/sdk/android/listening-for-events.md)
    - [Full Device Screen Sharing](https://userview.com/docs/sdk/android/full-device-screen-sharing.md)
  - [Flutter SDK](https://userview.com/docs/sdk/flutter.md)
    - [Installation](https://userview.com/docs/sdk/flutter/installation.md)
    - [Configuration Options](https://userview.com/docs/sdk/flutter/configuration-options.md)
    - [SDK Functions](https://userview.com/docs/sdk/flutter/sdk-functions.md)
    - [Listening for Events](https://userview.com/docs/sdk/flutter/listening-for-events.md)
    - [Full Device Screen Sharing](https://userview.com/docs/sdk/flutter/full-device-screen-sharing.md)
  - [React Native SDK](https://userview.com/docs/sdk/react-native.md)
    - [Installation](https://userview.com/docs/sdk/react-native/installation.md)
    - [Configuration Options](https://userview.com/docs/sdk/react-native/configuration-options.md)
    - [SDK Functions](https://userview.com/docs/sdk/react-native/sdk-functions.md)
    - [Listening for Events](https://userview.com/docs/sdk/react-native/listening-for-events.md)
    - [Full Device Screen Sharing](https://userview.com/docs/sdk/react-native/full-device-screen-sharing.md)
  - [Element Masking](https://userview.com/docs/sdk/element-masking.md)
  - [Identifying the Visitor](https://userview.com/docs/sdk/identifying-the-visitor.md)
  - [The Lookup Code](https://userview.com/docs/sdk/the-lookup-code.md)
- [Setup](https://userview.com/docs/setup.md)
  - [How to Connect Your SAML Provider](https://userview.com/docs/setup/connect-saml.md)
  - [Embedding UserView Agent view on Another Page Using an Iframe](https://userview.com/docs/setup/crm-embed.md)
  - [Integrate your Live Chat Platform](https://userview.com/docs/setup/integrate-live-chat.md)
  - [On-premise](https://userview.com/docs/setup/on-premise.md)
- [Using UserView](https://userview.com/docs/using-userview.md)
  - [Initiating a Session](https://userview.com/docs/using-userview/initiate-session.md)
  - [UserView Session Basics](https://userview.com/docs/using-userview/userview-session-basics.md)
    - [UserView App](https://userview.com/docs/using-userview/initiate-session/userview-app.md)
    - [Lookup Code](https://userview.com/docs/using-userview/initiate-session/lookup-code.md)
    - [Request Agent Button](https://userview.com/docs/using-userview/initiate-session/agent-request-button.md)
    - [Troubleshooting](https://userview.com/docs/using-userview/initiate-session/troubleshooting.md)
  - [Browser-to-Browser Audio Calls](https://userview.com/docs/using-userview/audio-calls.md)
  - [Multi-Agent Session](https://userview.com/docs/using-userview/multi-agent-session.md)
  - [Picture-in-Picture](https://userview.com/docs/using-userview/picture-in-picture.md)
  - [Session Recording](https://userview.com/docs/using-userview/session-recording.md)
- [Customization](https://userview.com/docs/customization.md)
- [Integrations](https://userview.com/docs/integrations.md)
  - [Build Your Own Request Button](https://userview.com/docs/customization/custom-request-button.md)
  - [Chatra](https://userview.com/docs/integrations/chatra.md)
  - [Drift](https://userview.com/docs/integrations/drift.md)
  - [Freshchat](https://userview.com/docs/integrations/freshchat.md)
  - [Front](https://userview.com/docs/integrations/front.md)
  - [HelpScout](https://userview.com/docs/integrations/helpscout.md)
  - [Intercom](https://userview.com/docs/integrations/intercom.md)
  - [JivoChat](https://userview.com/docs/integrations/jivochat.md)
  - [LiveChat](https://userview.com/docs/integrations/livechat.md)
  - [Olark](https://userview.com/docs/integrations/olark.md)
  - [Re:amaze](https://userview.com/docs/integrations/reamaze.md)
  - [Salesforce](https://userview.com/docs/integrations/salesforce.md)
  - [Tawk.to](https://userview.com/docs/integrations/tawkto.md)
  - [Tidio](https://userview.com/docs/integrations/tidio.md)
  - [Trengo](https://userview.com/docs/integrations/trengo.md)
  - [Zendesk](https://userview.com/docs/integrations/zendesk.md)
    - [Setup](https://userview.com/docs/integrations/intercom/setup.md)
    - [Adding UserView to your Intercom Sidebar](https://userview.com/docs/integrations/intercom/adding-userview-to-your-intercom.md)
    - [User Guide](https://userview.com/docs/integrations/intercom/user-guide.md)
    - [Troubleshooting](https://userview.com/docs/integrations/intercom/troubleshooting.md)
    - [Salesforce Chat](https://userview.com/docs/integrations/salesforce/salesforce-chat.md)
    - [Salesforce CRM](https://userview.com/docs/integrations/salesforce/salesforce-crm.md)

---

## Getting Started

Source: https://userview.com/docs/getting-started

Welcome to the Getting Started Guide for UserView! This comprehensive guide will help you understand, set up, and leverage this powerful tool, designed to transform the way you interact with users on your website. UserView allows you to provide unparalleled customer support, onboarding experiences, and product tours by offering instant, no-download screen-sharing capabilities.

### Implementation Overview

Source: https://userview.com/docs/getting-started/implementation-overview

Implementing UserView is straightforward and can be completed quickly. This guide provides an overview of the steps involved in getting started with UserView.

#### Timeframe

Most implementations involve simply installing the code onto your site, which takes a **matter of minutes**. This requires one of your developers to copy and paste the installation code onto your backend.

#### Trial

You'll have two weeks for a trial and a month for a Proof of Concept (POC). During this time, you'll have access to all features to test them out.

**Contact Sales:**
For more information about the trial and POC, please contact our sales team.

#### Team Training

UserView is intuitive, and training your team on how to use it shouldn't take long. You can customize and send the following team training guide to your team. We're happy to help you customize it; just reach out to us!

[View Team Training Doc](https://docs.google.com/document/d/1CDrsA23QT8h8EUTGaH7bIc94gxD0MejdcIlu24wjttk/edit?usp=sharing)

#### Development

#### Installation

The level of development depends on the customization you are looking for. Installing the code itself is a simple copy and paste onto the pages you would like access to during a Co-Browsing session and will take minutes.

#### Masking Sensitive Information

You can hide parts of the page from your support agents. Elements like passwords and credit card credentials are automatically hidden, but if there are other parts of the page you want to omit, you can set this up.

[Element Masking](https://userview.com/docs/sdk/element-masking)

#### REST API

If you’re looking to embed Co-Browsing functionality into custom-made software either for your own team or to resell to your clients, you can use the Co-Browsing API. This will require more time and development.

[REST API Documentation](https://cobrowsingapi.com/docs/rest-api)

#### Integrations

Start sessions from your Live chat window and see what customers were doing before they reached out with automated screenshots. The typical integration can take 5 minutes to connect; however, there are a couple that require additional steps. Note that **all integrations still need the JavaScript code installed**.

Browse our list of integration partners to see how to connect yours.

#### App Customization

There are various customization options, such as the level of access your team has, as well as the app experience. You can explore and change these in your settings.

[App Customization Settings](https://app.upscope.io/settings/teams/_/co_browsing)

#### Functionality

- Enable or disable session clicking, scrolling, and typing
- Enable or disable audio calling
- Session notes
- Enable or disable session recording

#### Security

- Mask elements
- Prevent clicking on specific elements
- Enable or disable the ability to navigate to third-party sites
- Connect to specific database regions

#### App Experience

- Customize text throughout the experience for agents and users
- URL redirects

#### Team Members

- Authentication options like SSO, MFA, and login session expiration
- Give your team different levels of access to the application, allowing them to view reporting, billing, app settings, team management, session history, and client data.

#### Implementation Package

For a smooth journey, let us guide you through start to finish and beyond.

[What the Implementation Package Includes](https://www.canva.com/design/DAF2Hqncqaw/8RMRup3_nwHVsfFEcvhECw/view?utm_content=DAF2Hqncqaw&utm_campaign=designshare&utm_medium=link&utm_source=editor)

### Invite Your Team

Source: https://userview.com/docs/getting-started/invite-team
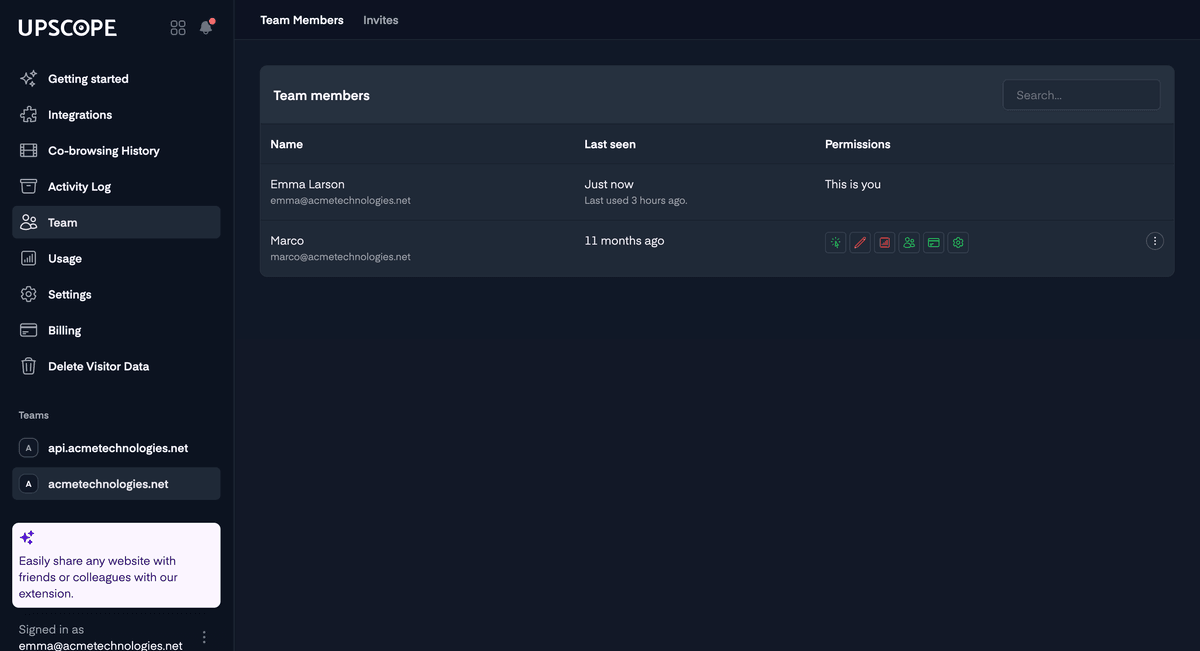
![Team Members Screenshot](https://cms-cdn.userview.com/www/docs/assets/screenshot-2025-02-11-at-15.22.22.png)

You can choose to:

1. Directly invite them by entering their email into the `Team` section in the left-hand menu.

2. Alternatively, enable the option in your **[general settings](https://app.upscope.io/settings/teams/_/team)** to let anyone with the same domain name sign up without an invite. For example, if you work at Snap.com, anyone with an email address @snap.com can sign up themselves once this option is enabled.

#### Add Teammates Without Being Charged

If you're on a payment plan with a set number of agents, you can still add additional teammates for managing team members or billing without extra charges. They're only counted as agents if they actively screen share.

**Changing Team Owner:**
If you'd like to transfer your team's ownership to another user, the team owner can select `Team` from the left-hand menu, click on the three dots to the right of the team members name they want to transfer ownership to, and click the button `Transfer Ownership`.

You will receive an email where you can confirm the transfer, and then you'll be converted to a regular user.

#### Team Access Levels

![Team Access Levels Screenshot](https://cms-cdn.userview.com/www/docs/assets/screenshot-2025-02-11-at-15.24.19.png)

Not all team members require the same type of permissions. If you're a team owner, you can set up team permissions and assign specific access to team members within your UserView app.

To do this, go to `Team` on the left-hand menu. Beside each team member, there are 8 icons indicating the types of permissions. To activate or deactivate each one, simply click on it to turn it green or red.

##### Icon Descriptions

- **UserView usage:** User can start UserView sessions.
- **Content:** User can remove visitor's data.
- **Reporting:** User can view reporting and usage analytics.
- **User Management:** User can manage the team's users.
- **Billing:** User can pay for the team and manage the billing settings.
- **General Settings:** User can access general settings and make changes.

### Co-Browsing FAQ

Source: https://userview.com/docs/getting-started/co-browsing-faq

#### Is there a timeout for sessions?

The session will end:

- After 10 minutes of inactivity from the agent
- After 1 minute of the user closing the tab

#### Is my customer's data secure?

Yes, UserView sessions are encrypted. We are SOC2 and ISO27001 certified, and GDPR and HIPAA compliant.

There are data masking options to hide elements like passwords and credit card numbers, ensuring the information doesn't leave their browser.

#### What if the user goes to another tab?

If the user navigates to another tab where UserView isn't installed, the session will continue. When they move to a tab where UserView is installed, your page automatically follows them.

#### Can I have more than one person on a session?

You may have multiple members of your team on the same session. However, since you are viewing one user's screen, you aren't able to invite another user.

#### Does UserView record everything?

Recording is optional. Once enabled, every co-browsing session is recorded. It only starts when a co-browsing session is initiated; anything a user does prior to you sending a co-browsing request is not captured in the recording.

#### Can I have multiple sessions open at the same time?

Yes, you can have more than one co-browsing session with multiple users running.

## SDK Documentation

Source: https://userview.com/docs/sdk

UserView needs to be installed on any web page or app you want to be visible to agents.

Choose your platform to get started with the SDK:

- **[Web](https://userview.com/docs/sdk/web/)** - JavaScript SDK for web applications
- **[iOS](https://userview.com/docs/sdk/ios/)** - Native iOS SDK for Swift/SwiftUI apps
- **[Android](https://userview.com/docs/sdk/android/)** - Native Android SDK for Kotlin apps
- **[Flutter](https://userview.com/docs/sdk/flutter/)** - Flutter SDK for cross-platform apps
- **[React Native](https://userview.com/docs/sdk/react-native/)** - React Native SDK for cross-platform apps

Once installed, check out these guides:

- **[Identifying the Visitor](https://userview.com/docs/sdk/identifying-the-visitor.md)** - Set user identities for agent search
- **[Element Masking](https://userview.com/docs/sdk/element-masking.md)** - Hide sensitive content during sessions
- **[The Lookup Code](https://userview.com/docs/sdk/the-lookup-code.md)** - Quick connection codes for agents

### Web SDK

Source: https://userview.com/docs/sdk/web

#### Installation

Source: https://userview.com/docs/sdk/web/installation

##### Overview

UserView can be installed using one of the following methods:

1. **Installing via Script Tag** - Directly add the code snippet to your web page.
2. **Installing via NPM** - Ideal for projects using a Node.js environment.
3. **Installing via React** - For React-based applications.

Choose the method that best fits your project's requirements.

**Installing via Script Tag:**

You'll find your installation code within your UserView dashboard. Simply add the code anywhere on your webpage, or, if you prefer, add it to a JavaScript file by removing the `<script>` and `</script>` tags from the code.

**Recommendation:** Make sure that the code loads as fast as possible by adding it as one of the first things that execute on the page.

**Warning:**
While you can install UserView through Google Tag Manager or Segment, the preferred method is to paste the installation code directly on your website, as this will result in faster load times.

Installation remains the same whatever front end framework you use. UserView works fine with React, Angular, and most other modern JavaScript frameworks. All you need to do is add the code to the page.

**Installing via NPM:**

1. Install the SDK

   ```shell
   npm install --save @upscopeio/sdk
   ```

2. Import the Upscope Object

   ```javascript
   import Upscope from '@upscopeio/sdk';
   ```

3. Initialize

   ```javascript
   Upscope("init", {
     apiKey: "<public_api_key>"
   });
   ```

**Note:** You can use the Upscope object wherever required, and call the same functions that are available with the regular installation. Initialization (`init`) needs to be called first and must include your public API key.

###### Public API Key

You can find yours in the installation page of your UserView dashboard.

###### Pinning a Specific Version

By default, the package downloads the latest version of the UserView code, so you are always up to date without reinstalling. If you prefer to run the exact version you installed from npm, import from `@upscopeio/sdk/static` instead:

```javascript
import Upscope from '@upscopeio/sdk/static';
```

The static import works exactly like the default one, but no remote code is downloaded: only your account configuration is fetched, and the UserView code that runs is the one bundled with the installed package version. This also makes it suitable for environments that disallow remote code, such as Manifest V3 browser extensions.

**Get notified about new versions:**
When pinning a version, updates only reach your users when you update the package and redeploy. Add your email address on the installation page of your UserView dashboard to be notified when a new version is released.

**Installing via React:**

###### Installation

To incorporate UserView into your React project, first install the React-specific package using npm:

```shell
npm install --save @upscopeio/react
```

Import the `UpscopeProvider` component and wrap your main application component with it.

```javascript
import { UpscopeProvider } from '@upscopeio/react';
<UpscopeProvider apiKey="<public_api_key>" enabled={true/false}>
  {/* rest of your app */}
</UpscopeProvider>
```

**Entire page shared:**
UserView will share the entire page, regardless of where the `UpscopeProvider` is added in your component hierarchy. To only share a specific part of your content, see [Sharing Only Part of the Page](#sharing-only-part-of-the-page).

###### Pinning a Specific Version

By default, the package downloads the latest version of the UserView code, so you are always up to date without reinstalling. If you prefer to run the exact version you installed from npm, import from `@upscopeio/react/static` instead:

```javascript
import { UpscopeProvider } from '@upscopeio/react/static';
```

All the other exports (`useUpscope`, `Masked`, `NoRemoteControl`) are available from the same path. The static import works exactly like the default one, but no remote code is downloaded: only your account configuration is fetched, and the UserView code that runs is the one bundled with the installed package version. This also makes it suitable for environments that disallow remote code, such as Manifest V3 browser extensions.

**Get notified about new versions:**
When pinning a version, updates only reach your users when you update the package and redeploy. Add your email address on the installation page of your UserView dashboard to be notified when a new version is released.

###### Configuration

###### Public API Key

You can find yours in the installation page of your UserView dashboard.

The `UpscopeProvider` accepts props that you can use for additional configuration settings. These settings are similar to the ones you would specify using the `init` function in the standard SDK. For example, to specify a unique identifier for a user, you can do:

```javascript
<UpscopeProvider apiKey="<public_api_key>" enabled={true} uniqueId={user.email}>
  {/* Your application code here */}
</UpscopeProvider>
```

###### Using Functionality in Components

To use UserView features in your individual components, you can use the `useUpscope` hook:

```javascript
import { useUpscope } from '@upscopeio/react';
function YourComponent() {
  const {
    Upscope,       // SDK object
    shortId,       // Connected shortId or undefined
    getLookupCode, // Asynchronous function to get lookup code
    listen,        // Event listener function
    reset,         // Reset function
    isSharing      // Boolean indicating active session
  } = useUpscope();
  // Your component logic here
}
```

###### Additional Utilities: Masking and Disabling Remote Control

UserView offers utility components to mask sensitive data and disable remote control on specific UI elements.

To mask sensitive information:

```javascript
import { Masked, NoRemoteControl } from '@upscopeio/react';
function YourComponent() {
  return (
    <>
      <Masked>
        {/* Sensitive Info */}
      </Masked>
      <NoRemoteControl>
        {/* Control Elements */}
      </NoRemoteControl>
    </>
  );
}
```

To disable remote control on a particular element:

```javascript
import { NoRemoteControl } from '@upscopeio/react';
function YourComponent() {
  return (
    <>
      <NoRemoteControl>
        <label>
          Accept Terms of Service
          <input type="checkbox" />
        </label>
      </NoRemoteControl>
    </>
  );
}
```

By following these steps and guidelines, you can fully integrate UserView into your React application and leverage its features effectively.

##### Testing on a Local or Staging Environment

When you test on your own computer or in a staging environment that is not publicly accessible, you might notice some odd rendering issues.

This is because our proxy server is unable to reach your CSS and media files and therefore can't properly edit them to render on the Agent side.

We try to automatically detect if you are on a URL that looks like localhost (e.g. `http://127.0.0.1/*`, `http://localhost/*`, etc.), and send the content of CSS files directly from the Visitor's browser to the Agent's browser.

You can add more URLs for browser proxying in your dashboard settings.

##### Iframe Support

UserView will work with iframes without you needing to do anything when these are hosted on the same domain. This means that the part of the URL between `://` and the first `/` is exactly the same (i.e. `app.acme.com` and `dashboard.acme.com` are considered different domains).

In this case, you only need to add the script to the outermost frame (i.e. the parent page).

You don't need to do anything to make UserView work cross-domain if iframes aren't involved.

###### Different Domains

To make UserView work when you have iframes on different domains/subdomains, you'll need to add the code to all the iframes. This is the code you get from your dashboard's installation page.

The iframes will connect automatically.

**Using the SDK:**
The code will behave differently in the iframe, and you can't use SDK within it.
That means that if you want to identify the user you'll need to do so in the outermost frame.

###### Sharing Only Part of the Page

By default, UserView shares the entire page. If you only want to share a specific part of your content (for example, a document viewer or a preview area), place that content in a **same-origin iframe** and pass the iframe's `contentWindow` as the `sharingRoot` configuration option. Only the iframe's document will be shared — everything outside it stays private.

```html
<iframe id="shared-content" src="/shared-content"></iframe>
```

```javascript
const iframe = document.querySelector('#shared-content');
iframe.addEventListener('load', () => {
  Upscope('init', {
    sharingRoot: iframe.contentWindow
  });
});
```

Make sure the iframe has finished loading before initializing, as shown above, so that `contentWindow` points to the final document.

If you're using React, pass `sharingRoot` as a prop to the `UpscopeProvider`, enabling it once the iframe is available:

```javascript
function SharedContent() {
  const [contentWindow, setContentWindow] = useState(null);
  return (
    <UpscopeProvider
      apiKey="<public_api_key>"
      enabled={!!contentWindow}
      sharingRoot={contentWindow}
    >
      <iframe
        src="/shared-content"
        onLoad={(e) => setContentWindow(e.target.contentWindow)}
      />
    </UpscopeProvider>
  );
}
```

**Same origin required:**
The `sharingRoot` window must be on the same origin as the page running the SDK. Cross-origin iframes cannot be used as the sharing root; for those, follow the [Different Domains](#different-domains) instructions instead.

##### When You Have a Lot of Visitors

If your website has a lot of Visitors (i.e. over 5,000 connected at once), you might want to only connect Visitors who actually need help.

You can easily do this by passing `autoconnect: false` to the configuration, like this (or by turning this off in the dashboard):

```javascript
// Rest of the installation code...
Upscope('init', {
 autoconnect: false
})
```

The visitor will be connected automatically if they have recently been in a Session, and will also automatically connect if they are shown the **[lookup code](https://userview.com/docs/sdk/the-lookup-code.md)** through any means.

You can also manually connect the Visitor by calling `Upscope('connect');`

##### CSP Rules

If you use Content Security Policy rules to protect your website, you'll need to add the following URLs to allow UserView to work correctly.

```diff
script-src 'self' https://code.upscope.io https://js.upscope.io;
connect-src wss://*.upscope.io https://*.upscope.io;
media-src https://js.upscope.io;
img-src https://app.upscope.io https://app-cdn.upscope.io;
```

##### Prototype.js

To make UserView compatible with some older versions of Prototype, include the following code before the installation code.

```html
<script>
  if (window.Prototype) {
    delete Object.prototype.toJSON;
    delete Array.prototype.toJSON;
    delete Hash.prototype.toJSON;
    delete String.prototype.toJSON;
  }
</script>
```

#### Configuration Options

Source: https://userview.com/docs/sdk/web/configuration-options

UserView's installation code includes the `Upscope('init', {});` function, which accepts a dictionary of options as its second parameter. Most of these options can be configured through the UserView dashboard.

Some settings might not be available with your plan or may only be accessible if you have beta features enabled.

**Please use the dashboard:**
Setting these values through JavaScript is only recommended if you can't configure them through the dashboard and have a specific use case where each page needs to behave differently. Values set through JavaScript will override your dashboard settings. You can configure most of these settings in the dashboard.

##### Identifying the Visitor

You can use these settings to identify the visitor within UserView.

| Option           | Default Value | Description                                                                                                                                                                                                                            |
| ---------------- | ------------- | -------------------------------------------------------------------------------------------------------------------------------------------------------------------------------------------------------------------------------------- |
| `identities`     | `undefined`   | A list of strings to identify the visitor by (e.g. `['Joe Smith', 'joe@smith.com']`). If set to `null`, the identity info is cleared. If not set, nothing is changed. With some integrations, this is set automatically if left empty. |
| `tags`           | `undefined`   | A list of strings to tag the visitor with (e.g. `['#visitor', '#high-value']`). Tags can only be alphanumeric characters and cannot contain spaces. If set to `null`, the identity info is cleared. If not set, nothing is changed.    |
| `uniqueId`       | `undefined`   | A string to uniquely identify the visitor (e.g. `123`). If set to `null`, the ID is cleared. If not set, nothing is changed. With some integrations, this is set automatically if left empty.                                          |
| `integrationIds` | `undefined`   | A list of IDs that can be used to link the visitor to different records. Example: `["system_name:system_value"]`. New integration IDs are added to existing ones unless cleared like this: `["system_name:"]`.                         |
| `metadata`       | `undefined`   | A `Record<string, string>` object with metadata related to the visitor.                                                                                                                                                                |
| `secretKey`      | `undefined`   | An optional string required in all pageviews to match. If it doesn't match, a new visitor will be generated. There is no way to retrieve the `secretKey`, so no other actors would have access to it.                                  |

##### Agent Prompt

Use these settings to show extra information about the visitor to the agent. This can also be used to provide the agent with instructions on troubleshooting common problems with the specific page.

| Option        | Default Value | Description                                                                             |
| ------------- | ------------- | --------------------------------------------------------------------------------------- |
| `agentPrompt` | `undefined`   | A string of text containing information to be presented to the agent about the visitor. |

##### Additional Configuration

These settings control how the session behaves on this particular page.

| Option                           | Default Value                       | Description                                                                                                                                                                                                                                                                                                                                                       |
| -------------------------------- | ----------------------------------- | ----------------------------------------------------------------------------------------------------------------------------------------------------------------------------------------------------------------------------------------------------------------------------------------------------------------------------------------------------------------- |
| `allowAgentRedirect`             | (Set through the admin interface)   | Whether to allow agents to change the URL for the visitor.                                                                                                                                                                                                                                                                                                        |
| `allowFullScreen`                | (Set through the admin interface)   | Whether to allow full screen mode during sessions.                                                                                                                                                                                                                                                                                                                |
| `allowRequestFullTab`            | (Set through the admin interface)   | Whether to allow agents to request full tab sharing.                                                                                                                                                                                                                                                                                                              |
| `allowRemoteClick`               | (Set through the admin interface)   | Whether to allow agents to click for the visitor.                                                                                                                                                                                                                                                                                                                 |
| `agentRequestButtonPages`        | (Set through the admin interface)   | Pages on which to show the agent request button (e.g. `['https://site.com/help/*']`).                                                                                                                                                                                                                                                                             |
| `agentRequestButtonStyle`        | (Set through the admin interface)   | Position and style of the agent request button.                                                                                                                                                                                                                                                                                                                   |
| `allowRemoteConsole`             | (Set through the admin interface)   | Whether to allow agents (who have the right permissions) to execute remote console commands.                                                                                                                                                                                                                                                                      |
| `allowRemoteScroll`              | (Set through the admin interface)   | Whether to allow agents to scroll for the visitor.                                                                                                                                                                                                                                                                                                                |
| `allowRemoteType`                | (Set through the admin interface)   | Whether to allow agents to use the visitor's keyboard.                                                                                                                                                                                                                                                                                                            |
| `apiKey`                         | (Automatically set to your API key) | The API key of the account to connect to.                                                                                                                                                                                                                                                                                                                         |
| `autoconnect`                    | (Set through the admin interface)   | Whether to connect to the server automatically.                                                                                                                                                                                                                                                                                                                   |
| `automaticallyRequestFullTab`    | (Set through the admin interface)   | Whether to automatically request full tab sharing when a session starts.                                                                                                                                                                                                                                                                                          |
| `callRingtone`                   | (Default ringtone)                  | An mp3 of the ringtone for audio calls.                                                                                                                                                                                                                                                                                                                           |
| `collectHistory`                 | (Set through the admin interface)   | Whether to take screenshots and record pageviews to show in integrations.                                                                                                                                                                                                                                                                                         |
| `cursorColor`                    | `null`                              | The color to use for the enlarged cursor.                                                                                                                                                                                                                                                                                                                         |
| `disableFullScreenWhenMasked`    | `false`                             | Whether to disable full screen mode when masked elements are present on the page.                                                                                                                                                                                                                                                                                 |
| `disconnectAfterSeconds`         | `900`                               | Number of seconds of inactivity after which the SDK disconnects from the server. This only applies if a session is not active, and the connection is re-established when the tab regains focus, the cursor is moved, or the keyboard is used.                                                                                                                     |
| `domChangesDelay`                | `100`                               | Refresh rate of the page. Set to 100 so changes are shown right away, but can be higher on websites where a lot changes constantly to avoid the agent's browser slowing down.                                                                                                                                                                                     |
| `drawingsTtlMs`                  | `6000`                              | How long to keep agent drawings visible for.                                                                                                                                                                                                                                                                                                                      |
| `enableCanvases`                 | `true`                              | Whether to show canvases while screen sharing.                                                                                                                                                                                                                                                                                                                    |
| `enableLookupCodeOnKey`          | (Set through the admin interface)   | Whether to show the lookup code when the visitor presses the `lookupCodeKey` `lookupCodeKeyRepetitions` times.                                                                                                                                                                                                                                                    |
| `enableSessionRating`            | (Set through the admin interface)   | Whether to show a session rating prompt to the visitor after a session ends.                                                                                                                                                                                                                                                                                      |
| `endOfScreenshareMessage`        | (Set through the admin interface)   | Message shown at the end of the session.                                                                                                                                                                                                                                                                                                                          |
| `enlargeCursor`                  | `false`                             | Whether to enlarge the visitor's cursor so it looks like the agent's.                                                                                                                                                                                                                                                                                             |
| `compressImages`                 | `true`                              | Whether to compress and canvas content that is sent from the visitor's browser. Set to `false` if you have high definition canvases.                                                                                                                                                                                                                              |
| `grabIdentityFromLivechat`       | `true`                              | Whether to try to get the identity of the visitor from the live chat configuration.                                                                                                                                                                                                                                                                               |
| `injectLookupCodeButton`         | (Set through the admin interface)   | Whether to inject a button in the lower left of the page to show the 4-digit lookup code.                                                                                                                                                                                                                                                                         |
| `integrateWithLivechat`          | `true`                              | Whether to integrate automatically with live chat systems.                                                                                                                                                                                                                                                                                                        |
| `liveChatRewrite`                | `true`                              | Whether to change the live chat integration object to automatically include the watch link as a custom attribute.                                                                                                                                                                                                                                                 |
| `lookupCodeButtonPages`          | (Set through the admin interface)   | Pages on which to show the lookup code button (e.g. `['https://site.com/help/*']`).                                                                                                                                                                                                                                                                               |
| `lookupCodeButtonStyle`          | (Set through the admin interface)   | Position of the lookup code button.                                                                                                                                                                                                                                                                                                                               |
| `lookupCodeElement`              | (Set through the admin interface)   | CSS selector or HTML element object to replace text of with 4-digit lookup code.                                                                                                                                                                                                                                                                                  |
| `lookupCodeKey`                  | `17`                                | Which keyboard key to show the lookup code with (17 is the Ctrl key).                                                                                                                                                                                                                                                                                             |
| `lookupCodeKeyRepetitions`       | `5`                                 | Number of times the visitor needs to press `lookupCodeKey` to see the lookup code.                                                                                                                                                                                                                                                                                |
| `maskedElements`                 | (Set through the admin interface)   | List of CSS selectors (e.g. `['.credit-card']`) to mask when screen sharing in addition to elements with a `no-upscope` CSS class.                                                                                                                                                                                                                                |
| `noRemoteElements`               | (Set through the admin interface)   | List of CSS selectors for elements where the agent should not have the ability to click/type.                                                                                                                                                                                                                                                                     |
| `proxyAssets`                    | (Set through the admin interface)   | List of wildcard strings (e.g. `['://localhost:/*']`) to proxy from the browser when screen sharing. This is useful to allow screen sharing in development or staging environments.                                                                                                                                                                               |
| `region`                         | (Visitor's closest region)          | Which region to connect to.                                                                                                                                                                                                                                                                                                                                       |
| `requireAuthorizationForSession` | (Set through the admin interface)   | Whether to ask for visitor authorization before screen sharing.                                                                                                                                                                                                                                                                                                   |
| `requireControlRequest`          | (Set through the admin interface)   | Whether to ask the visitor separately for remote control capabilities.                                                                                                                                                                                                                                                                                            |
| `rewriteExternalLinks`           | (Set through the admin interface)   | Whether to automatically change links to third-party websites to make use of our proxy.                                                                                                                                                                                                                                                                           |
| `sfdcFieldId`                    | `"Screen_Share__c"`                 | For Salesforce integration, the ID of the field we send the watch link to.                                                                                                                                                                                                                                                                                        |
| `sfdcFieldLabel`                 | `"Screen_Share"`                    | For Salesforce integration, the label of the field we send the watch link to.                                                                                                                                                                                                                                                                                     |
| `sharingRoot`                    | `window`                            | A same-origin `Window` object whose document is shared instead of the current page. Useful to share only part of the page by loading that content in an iframe and passing the iframe's `contentWindow` — see [Sharing Only Part of the Page](https://userview.com/docs/sdk/web/installation.md). Can only be set through JavaScript.                                   |
| `showTerminateButton`            | (Set through the admin interface)   | Whether to show the visitor a "Stop session" button.                                                                                                                                                                                                                                                                                                              |
| `showAgentRequestButton`         | (Set through the admin interface)   | Whether to show the visitor the request agent button (one of `"always"`, `"when_available"`, or `"never"`).                                                                                                                                                                                                                                                       |
| `showUpscopeLink`                | `true`                              | Whether to show the UserView link to visitors. Setting this to `false` only works if whitelabeling is included in your plan.                                                                                                                                                                                                                                    |
| `skipSessionPreparation`         | `false`                             | Whether to skip the snapshot the SDK takes as soon as an agent opens the viewer, before the session starts. That snapshot exists to make the first frame appear faster. With `requireAuthorizationForSession` enabled, turning this on also holds off capture while the visitor is deciding, so nothing about the page leaves the browser until they agree to share it.                                                                    |
| `storageImplementation`          | `localStorage` + cookies            | An object that implements the [Storage](https://developer.mozilla.org/en-US/docs/Web/API/Storage) interface to use as storage for all visitor data.                                                                                                                                                                                                               |
| `storageKey`                     | `null`                              | An optional string to use to scope all visitor data stored on the browser.                                                                                                                                                                                                                                                                                        |
| `screenWakeLock`                 | `true`                              | Whether to attempt to place a screen lock during sessions.                                                                                                                                                                                                                                                                                                        |
| `trackConsole`                   | (Set through the admin interface)   | Whether to track console content to display to the viewer.                                                                                                                                                                                                                                                                                                        |
| `trustedFrameOrigins`            | `[]`                                | List of wildcard origins (e.g. `['https://*.example.com']`) allowed to exchange co-browsing messages with the SDK from a parent or child frame. An empty list accepts any origin. Set this if your pages frame, or are framed by, pages on other origins and you want to limit which of them can drive the SDK.                                                                                                                            |
| `unavailableAgentRequestRedirectTo`          | `null`                | URL to redirect the visitor to when no agents are available after requesting an agent.                                                                                                                                                                                                                                                                            |
| `unavailableAgentRequestRedirectImmediately` | `false`               | Whether to redirect immediately when no agents are available, instead of showing the unavailable message first.                                                                                                                                                                                                                                                   |
| `useFingerprinting`              | `true`                              | Whether to use a device fingerprint to recognize the device cross-domain.                                                                                                                                                                                                                                                                                         |
| `computedStyleSelectors`         | `[]`                                | A list of selectors that need to have the entire computed style sent from the browser (as the CSS won't be available to the agent). You can set to `"react"` if your whole app is built in React or `"angular"` if it's built in Angular, and we'll automatically send everything not added by React or Angular, such as elements injected by browser extensions. |

##### Messages

These settings are mostly translations. Each of them accepts either a string, or an object keyed by language code (e.g. `{ en: "Yes", it: "Si" }`) — the translation matching the visitor's browser language is shown, falling back to `en` if their language isn't included. See [Multi-Language Support](https://userview.com/docs/sdk/web/translations.md) for examples. All of these can also be configured per language through the dashboard.

| Option                                  | Default Value                     | Description                                                                                                                                                                                                                                |
| --------------------------------------- | --------------------------------- | ------------------------------------------------------------------------------------------------------------------------------------------------------------------------------------------------------------------------------------------ |
| `agentRequestAcceptedText`              | (Set through the admin interface) | Text shown when an agent request is accepted.                                                                                                                                                                                              |
| `agentRequestButtonRequestingSubtitle`  | (Set through the admin interface) | Subtitle shown on the agent request button while requesting.                                                                                                                                                                               |
| `agentRequestButtonRequestingTitle`     | (Set through the admin interface) | Title shown on the agent request button while requesting.                                                                                                                                                                                  |
| `agentRequestButtonSubtitle`            | (Set through the admin interface) | Subtitle shown on the agent request button.                                                                                                                                                                                                |
| `agentRequestButtonTitle`               | (Set through the admin interface) | Title shown on the agent request button.                                                                                                                                                                                                   |
| `agentRequestNotAvailableText`          | (Set through the admin interface) | Text shown when no agents are available.                                                                                                                                                                                                   |
| `agentRequestResultTitle`               | (Set through the admin interface) | Title shown in the agent request result popup.                                                                                                                                                                                             |
| `authorizationPromptMessage`            | (Set through the admin interface) | The text to display on the authorization prompt. `{%agentName%\|our agent}` is replaced with the name of the requesting agent (or the default `our agent` if there is no name). `{%currentDomain%}` is replaced with the current hostname. |
| `authorizationPromptTitle`              | (Set through the admin interface) | The title to display on the authorization prompt.                                                                                                                                                                                          |
| `callAudioAuthorizationFailedMessage`   | (Set through the admin interface) | Message shown when audio authorization fails during a call.                                                                                                                                                                                |
| `callAudioAuthorizationFailedTitle`     | (Set through the admin interface) | Title shown when audio authorization fails during a call.                                                                                                                                                                                  |
| `callPopupFailedMessage`                | (Set through the admin interface) | Message shown when the call popup fails.                                                                                                                                                                                                   |
| `callPopupFailedTitle`                  | (Set through the admin interface) | Title shown when the call popup fails.                                                                                                                                                                                                     |
| `callPopupNoInputMessage`               | (Set through the admin interface) | Message shown when no audio input device is found.                                                                                                                                                                                         |
| `callPopupNoInputTitle`                 | (Set through the admin interface) | Title shown when no audio input device is found.                                                                                                                                                                                           |
| `callPopupNoOutputMessage`              | (Set through the admin interface) | Message shown when no audio output device is found.                                                                                                                                                                                        |
| `callPopupNoOutputTitle`                | (Set through the admin interface) | Title shown when no audio output device is found.                                                                                                                                                                                          |
| `callPromptText`                        | (Set through the admin interface) | Message to show the visitor when an audio call is initiated.                                                                                                                                                                               |
| `controlRequestTitle`        | (Set through the admin interface) | The title to display on the control prompt.                                                                                                                                                                                                |
| `controlRequestMessage`      | (Set through the admin interface) | Message to display on the control prompt.                                                                                                                                                                                                  |
| `fullScreenRequestTitle`     | (Set through the admin interface) | The title to display on the full screen prompt.                                                                                                                                                                                            |
| `fullScreenRequestMessage`   | (Set through the admin interface) | Message to display on the full screen prompt.                                                                                                                                                                                              |                                                                                                                                                                   |
| `lookupCodeKeyMessage`       | (Set through the admin interface) | Message of prompt with the lookup code. `{%lookupCode%}` is replaced with the lookup code.                                                                                                                                                 |
| `lookupCodeKeyTitle`                    | (Set through the admin interface) | Title of prompt with the lookup code.                                                                                                                                                                                                      |
| `sessionRatingAgentLabel`               | (Set through the admin interface) | Label for the agent rating field in the session rating prompt.                                                                                                                                                                             |
| `sessionRatingFeedbackLabel`            | (Set through the admin interface) | Label for the feedback field in the session rating prompt.                                                                                                                                                                                 |
| `sessionRatingModalMessage`             | (Set through the admin interface) | Message shown in the session rating modal.                                                                                                                                                                                                 |
| `sessionRatingModalTitle`               | (Set through the admin interface) | Title of the session rating modal.                                                                                                                                                                                                         |
| `sessionRatingSessionLabel`             | (Set through the admin interface) | Label for the session rating field in the session rating prompt.                                                                                                                                                                           |
| `sessionRatingSubmitLabel`              | (Set through the admin interface) | Label for the submit button in the session rating prompt.                                                                                                                                                                                  |
| `translationsNo`                        | (Set through the admin interface) | Translation for _No_.                                                                                                                                                                                                                      |
| `translationsOk`             | (Set through the admin interface) | Translation for _Ok_.                                                                                                                                                                                                                      |
| `translationsStopSession`    | (Set through the admin interface) | Translation for _End Session_.                                                                                                                                                                                                             |
| `translationsYes`            | (Set through the admin interface) | Translation for _Yes_.                                                                                                                                                                                                                     |

##### Functions

You can pass the following functions to further customize how UserView behaves.

| Option                              | Arguments                                  | Return Value           | Description                                                                                                                                                                                    |
| ----------------------------------- | ------------------------------------------ | ---------------------- | ---------------------------------------------------------------------------------------------------------------------------------------------------------------------------------------------- |
| `allowRemoteMiddleware`             | `(element: HTMLElement)`                   | Boolean                | Set to change the behavior of the remote control functionality. Return `true` if the agent should have control over the element, `false` if they should **not** have control.                  |
| `customCallController`              | `(cb: function)`                           | Boolean (via callback) | Set to a function to change the look of the audio call ringing view. Return `true` to accept the call, `false` to reject it.                                                                   |
| `customControlRequestController`    | `(cb: function)`                           | Boolean (via callback) | Set to a function to change the look of the control request view. Return `true` to accept the control request, `false` to reject it.                                                           |
| `customFullScreenRequestController` | `(cb: function)`                           | Boolean (via callback) | Set to a function to change the look of the full screen request view. Return `true` to accept the full screen request, `false` to reject it.                                                   |
| `maskElementMiddleware`             | `(element: HTMLElement)`                   | Boolean                | Set to change the behavior of the masking functionality. Return `true` if the element should be masked, `false` if it should **not** be masked.                                                |
| `onSessionRequest`                  | `(cb: function, requestingAgent: string?)` | Boolean (via callback) | Set to change the behavior of the visitor authorization flow. Call the callback with `true` to authorize the session, with `false` to reject it.                                               |
| `shouldComputeStyleMiddleware`      | `(element: HTMLElement)`                   | Boolean                | Set to change the behavior of whether we get the computed style of a particular element before sending it to the agent.                                                                        |
| `styleSheetContentFromRules`        | `(element: HTMLElement)`                   | Boolean                | Set to change the behavior of whether we get the content of a stylesheet from its rules, or whether we can proxy its source from the server. Useful for libraries such as `styled-components`. |

#### SDK Functions

Source: https://userview.com/docs/sdk/web/sdk-functions

Here's a list of all the functions supported by UserView's SDK. These can be called with `Upscope('FUNCTION_NAME', ...args);`.

| Function Name        | Arguments                                                                                                                                                                                                                                                                                    | Description                                                                                                                                                                                                                                                                                                              |
| -------------------- | -------------------------------------------------------------------------------------------------------------------------------------------------------------------------------------------------------------------------------------------------------------------------------------------- | ------------------------------------------------------------------------------------------------------------------------------------------------------------------------------------------------------------------------------------------------------------------------------------------------------------------------ |
| `cancelRequestAgent` | —                                                                                                                                                                                                                                                                                            | Stops an Agent request.                                                                                                                                                                                                                                                                                                  |
| `connect`            | —                                                                                                                                                                                                                                                                                            | Starts the socket connection (The connection starts automatically if `autoconnect` is set to `true` in the [configuration](https://userview.com/docs/sdk/web/configuration-options.md).) to the servers.                                                                                                     |
| `customMessage`      | `(message: Record<string, unknown>)`                                                                                                                                                                                                                                                         | Sends a custom message to all observers. Observers can listen for these messages using the `customMessage` event.                                                                                                                                                                                                         |
| `expectDisconnect`   | `({ returnTimeSeconds?: number; message?: string; title?: string; })`                                                                                                                                                                                                                        | Call this before redirecting the Visitor to a page without the SDK installed (e.g. an external log in flow) to indicate to the Agent why the Visitor is offline and that they will return shortly. Optionally set `returnTimeSeconds` to revert to the default "Visitor is not connected anymore" message after a while. |
| `fullTabEnd`         | —                                                                                                                                                                                                                                                                                            | Ends full tab sharing.                                                                                                                                                                                                                                                                                                   |
| `fullTabStart`       | —                                                                                                                                                                                                                                                                                            | Starts full tab sharing, allowing the agent to see the entire browser tab including content outside of the page where the SDK is installed.                                                                                                                                                                              |
| `getLookupCode`      | `(callback: function(code: string))`                                                                                                                                                                                                                                                         | Returns the [lookup code](https://userview.com/docs/sdk/the-lookup-code.md) through the callback.                                                                                                                                                                                                                                    |
| `getShortId`         | `(callback: function(shortId: string))`                                                                                                                                                                                                                                                      | Returns the Visitor's shortId through the callback.                                                                                                                                                                                                                                                                      |
| `getWatchLink`       | `(callback: function(link: string))`                                                                                                                                                                                                                                                         | Returns the watch link through the callback.                                                                                                                                                                                                                                                                             |
| `init`               | `(configuration: Partial<SDKConfiguration>)` (Full list of configuration options found [here](https://userview.com/docs/sdk/web/configuration-options.md).)                                                                                                                              | Used to initiate the SDK. This must be the first function called.                                                                                                                                                                                                                                                        |
| `newPageview`        | —                                                                                                                                                                                                                                                                                            | Triggers a new pageview in a SPA environment.                                                                                                                                                                                                                                                                            |
| `on`                 | `(...events: string, callback: function)`                                                                                                                                                                                                                                                    | Adds a listener for the [events](https://userview.com/docs/sdk/web/listening-for-events.md) provided.                                                                                                                                                                                                                                    |
| `prefetchAssets`     | —                                                                                                                                                                                                                                                                                            | Call if you know a Session is about to happen to start prepping for it and make it go live faster.                                                                                                                                                                                                                       |
| `registerScreenStream` | `(stream: MediaStream)`                                                                                                                                                                                                                                                                    | Registers a pre-acquired screen capture stream to be used the next time full tab sharing starts, instead of prompting the Visitor for screen sharing permission. The stream is used once and must contain a live video track. The SDK never stops the stream's tracks: your app keeps ownership and is responsible for stopping them when done. |
| `registerVideoStream`  | `(stream: MediaStream)`                                                                                                                                                                                                                                                                    | Registers a pre-acquired camera stream to be used the next time the Visitor's camera is turned on during a video call, instead of prompting the Visitor for camera permission. The same rules as `registerScreenStream` apply: the stream is used once, must contain a live video track, and its tracks are never stopped by the SDK. |
| `requestAgent`       | —                                                                                                                                                                                                                                                                                            | Initiates an Agent request.                                                                                                                                                                                                                                                                                              |
| `reset`              | `(reopenConnection: boolean)`                                                                                                                                                                                                                                                                | Used to reset the connection and clear all identity from the Visitor. A new Visitor will be generated with a fresh ID. If `reopenConnection` is `false`, the connection will not be automatically re-opened, and the SDK will be in its initial idle state.                                                             |
| `saveHistory`        | —                                                                                                                                                                                                                                                                                            | Saves the current page to the visitor's history.                                                                                                                                                                                                                                                                         |
| `stopRemoteControl`  | —                                                                                                                                                                                                                                                                                            | Revokes the Agent's remote control of the page during an active Session. The Agent can request control again.                                                                                                                                                                                                           |
| `stopSession`        | —                                                                                                                                                                                                                                                                                            | Terminates an active Session.                                                                                                                                                                                                                                                                                            |
| `submitRating`       | `(ratings: { userSessionRating?: 1 \| 2 \| 3 \| 4 \| 5, userAgentRating?: 1 \| 2 \| 3 \| 4 \| 5, userAgentFeedback?: string })`                                                                                                                                                              | Submits a user rating after a Session has ended.                                                                                                                                                                                                                                                                         |
| `updateConnection`   | `(updates: {uniqueId?: string, identities?: string[], tags?: string[], integrationIds?: string[], callName?: string, agentPrompt?: string, allowRemoteConsole?: boolean, allowRemoteClick?: boolean, allowRemoteScroll?: boolean, allowRemoteType?: boolean, allowAgentRedirect?: boolean})` | Used to update the identity of the visitor or settings after pageload.                                                                                                                                                                                                                                                   |

#### Listening for Events

Source: https://userview.com/docs/sdk/web/listening-for-events

You can listen for events by running the following code:

```javascript
Upscope('on', ...eventNames, callbackFunction);
```

##### List of Events

| Event Name               | Additional Arguments                                                                                                         | Description                                                                                          |
|--------------------------|------------------------------------------------------------------------------------------------------------------------------|------------------------------------------------------------------------------------------------------|
| `agentsAvailable`        | —                                                                                                                            | Indicates that agents are available and waiting for requests on the UserView dashboard.              |
| `agentRequestUpdate`     | `status: "pending" \| "accepted" \| "unavailable" \| "canceled"`                                                           | Provides updates about the status of the current agent request.                                     |
| `callAccepted`           | —                                                                                                                            | An audio call has been accepted by the visitor.                                                     |
| `callEnd`                | —                                                                                                                            | An audio call has ended.                                                                             |
| `callStart`              | —                                                                                                                            | An audio call has started.                                                                           |
| `connection`             | —                                                                                                                            | The connection has been established with the servers.                                         |
| `connectionReset`        | —                                                                                                                            | The connection has been reset, and a new visitor will be created.                                   |
| `newObserver`            | `observerId: string, observerData: { id: string; name: string \| null; screenWidth: number; screenHeight: number; windowWidth: number; windowHeight: number; hasFocus: boolean;}` | Indicates a new agent is observing.                                                                 |
| `observerUpdate`         | `observerId: string, observerData: Partial<{ id: string; name: string \| null; screenWidth: number; screenHeight: number; windowWidth: number; windowHeight: number; hasFocus: boolean;}>` | An observer's data has changed.                                                                      |
| `observerGone`           | `observerId: string`                                                                                                        | `observerId` is no longer observing.                                                                 |
| `observerContentVisible`  | `observerId: string`                                                                                                        | `observerId` can now see the content (it is no longer loading).                                     |
| `observersCount`         | `count: number`                                                                                                             | Provides an accurate tally of the number of people currently observing.                              |
| `sessionEnd`             | —                                                                                                                            | A session has ended.                                                                                 |
| `sessionRequest`         | —                                                                                                                            | An agent is asking to start a session.  (If you want to change the authorization flow, you'll need to add a `onSessionRequest` function to the [configuration](https://userview.com/docs/sdk/web/configuration-options.md).) |
| `sessionContinue`        | —                                                                                                                            | A session is continuing from a previous pageview.                                                  |
| `sessionStart`           | —                                                                                                                            | A session has started.                                                                                |
| `customMessage`          | `sender: { observer: string } \| { visitor: string }, message: Record<string, unknown>`                                    | A custom message sent by an observer or visitor.                                                     |

##### Tracking Event Data Such as Clicks

All events originating from the agent will have a `isUpscopeBrowserInstruction` attribute set to `true`.

```javascript
button.addEventListener("click", evt => {
  console.log("Clicked by ", evt.isUpscopeBrowserInstruction ? "agent" : "user")
});
```

#### Multi-Language Support

Source: https://userview.com/docs/sdk/web/translations

UserView supports custom translations for all user-facing text. You can configure them per language through the dashboard, or set them during initialization.

##### Basic Translation Setup

Pass translation strings directly to the `init` function:

```javascript
Upscope("init", {
  authorizationPromptTitle: "Co-Browsing request",
  authorizationPromptMessage: "Would you like to let {%agentName%|our agent} co-browse with you?",
  translationsYes: "Yes",
  translationsNo: "No",
});
```

##### Multi-Language Setup

Instead of a string, every text option also accepts an object keyed by language code. UserView automatically shows the translation matching the visitor's browser language, falling back to `en` if their language isn't included:

```javascript
Upscope("init", {
  authorizationPromptTitle: {
    en: "Co-Browsing request",
    fr: "Demande de co-navigation",
    es: "Solicitud de co-navegación",
  },
  authorizationPromptMessage: {
    en: "Would you like to let {%agentName%|our agent} co-browse with you?",
    fr: "Souhaitez-vous permettre à {%agentName%|notre agent} de co-naviguer avec vous ?",
    es: "¿Le gustaría permitir que {%agentName%|nuestro agente} co-navegue con usted?",
  },
  translationsYes: { en: "Yes", fr: "Oui", es: "Sí" },
  translationsNo: { en: "No", fr: "Non", es: "No" },
});
```

You can also configure all of these translations per language through the dashboard, without any code changes.

##### Available Translation Keys

See the [Messages section of Configuration Options](https://userview.com/docs/sdk/web/configuration-options.md#messages) for a complete list of translatable strings.

### iOS SDK

Source: https://userview.com/docs/sdk/ios

**Beta:**
The mobile SDKs are currently in beta. If you encounter any issues, please [contact us](mailto:team@userview.com).

The UserView iOS SDK allows you to integrate screen sharing capabilities into your iOS app. It supports both SwiftUI and UIKit, with features for element redaction, visitor identification, and session management.

#### Requirements

- iOS 14.0+
- Swift 5.9+
- Xcode 15.0+

#### Features

- **Screen sharing**: Allow agents to view your app's screen in real-time
- **Element redaction**: Hide sensitive information during screen sharing
- **Visitor identification**: Identify users and link sessions to your CRM
- **Lookup codes**: Generate 4-digit codes for easy session joining
- **iPad support**: Automatic handling of split-screen scenarios

#### Installation

Source: https://userview.com/docs/sdk/ios/installation

**Beta:**
The mobile SDKs are currently in beta. If you encounter any issues, please [contact us](mailto:team@userview.com).

##### Requirements

- iOS 14.0+
- Swift 5.9+
- Xcode 15.0+

##### Installation

**Swift Package Manager:**

Add the package dependency to your `Package.swift`:

```swift
dependencies: [
    .package(url: "https://github.com/upscopeio/cobrowsing-ios.git", from: "2026.8.3")
]
```

Or add it through Xcode:
1. Go to **File** > **Add Package Dependencies**
2. Enter `https://github.com/upscopeio/cobrowsing-ios.git`
3. Select the version and add to your target

**CocoaPods:**

Add the following to your `Podfile`:

```ruby
pod 'UpscopeSDK', '~> 2026.8.3'
```

Then run:

```bash
pod install
```

##### Initialization

Initialize the SDK in your `AppDelegate` or `App` struct:

```swift
import UpscopeSDK

let config = UpscopeConfiguration(apiKey: "YOUR_API_KEY")
try Upscope.shared.initialize(with: config)
```

The SDK auto-connects by default. To disable this, set `autoconnect: false` in the configuration and call `Upscope.shared.connect()` manually when ready.

###### SwiftUI App Example

```swift
import SwiftUI
import UpscopeSDK

@main
struct MyApp: App {
    init() {
        let config = UpscopeConfiguration(apiKey: "YOUR_API_KEY")
        try? Upscope.shared.initialize(with: config)
    }

    var body: some Scene {
        WindowGroup {
            ContentView()
        }
    }
}
```

###### UIKit AppDelegate Example

```swift
import UIKit
import UpscopeSDK

@main
class AppDelegate: UIResponder, UIApplicationDelegate {
    func application(_ application: UIApplication, didFinishLaunchingWithOptions launchOptions: [UIApplication.LaunchOptionsKey: Any]?) -> Bool {
        let config = UpscopeConfiguration(apiKey: "YOUR_API_KEY")
        try? Upscope.shared.initialize(with: config)
        return true
    }
}
```

##### Public API Key

You can find your public API key in the installation page of your UserView dashboard.

##### iPad Split Screen Support

The SDK automatically handles iPad split screen scenarios. Each app instance captures only its own portion of the screen, and alerts appear on the correct window. No additional configuration is required.

##### Lookup Code on Shake

By default, shaking the device will display the lookup code in an alert. This can be disabled via configuration options.

#### Configuration Options

Source: https://userview.com/docs/sdk/ios/configuration-options

You can customize the behavior of the UserView iOS SDK through configuration options.

##### Setting Configuration

Pass options when creating the `UpscopeConfiguration`:

```swift
let config = UpscopeConfiguration(
    apiKey: "YOUR_API_KEY",
    requireAuthorizationForSession: true,
    authorizationPromptTitle: "Screen Sharing Request",
    authorizationPromptMessage: "Allow {%agentName%|Support} to view your screen?",
    endOfSessionMessage: "Thanks for using screen sharing!",
    translationsYes: "Allow",
    translationsNo: "Decline"
)

try Upscope.shared.initialize(with: config)
```

##### Configuration Options

Each option resolves in this order: a value you pass here overrides the matching dashboard setting, which overrides the SDK's built-in default (shown in the **Default** column).

###### Session Authorization

| Option | Type | Default | Description |
|--------|------|---------|-------------|
| `requireAuthorizationForSession` | `Bool?` | `true` | Require user permission before screen sharing starts. Resolved from the value set here, else the team's dashboard setting, else `true`. When it resolves `false`, sessions start silently and `onSessionRequest` is not called. |
| `authorizationPromptTitle` | `String?` | (Set through the admin interface) | Custom title for the authorization dialog. |
| `authorizationPromptMessage` | `String?` | (Set through the admin interface) | Custom message for the authorization dialog. Supports placeholders. |

###### Message Placeholders

The `authorizationPromptMessage` supports these placeholders:
- `{%agentName%|fallback}` - Agent's name with a fallback if unavailable
- `{%currentDomain%}` - App name on iOS

Example:
```swift
authorizationPromptMessage: "{%agentName%|Our support team} would like to view your screen"
```

###### UI Display

| Option | Type | Default | Description |
|--------|------|---------|-------------|
| `showTerminateButton` | `Bool?` | (Set through the admin interface) | Show a button to end the screen sharing session. |
| `showUpscopeLink` | `Bool?` | `true` | Show the UserView link to the user. Setting this to `false` only works if whitelabeling is included in your plan. |
| `endOfSessionMessage` | `String?` | (Set through the admin interface) | Message displayed when the session ends. |
| `stopSessionText` | `String?` | (Set through the admin interface) | Custom text for the stop session button. |

###### Remote Control

| Option | Type | Default | Description |
|--------|------|---------|-------------|
| `allowRemoteClick` | `Bool?` | (Set through the admin interface) | Allow agents to remotely tap on the screen. |
| `allowRemoteScroll` | `Bool?` | (Set through the admin interface) | Allow agents to remotely scroll the screen. |
| `requireControlRequest` | `Bool?` | `false` | Require user approval before agents can use remote input. Resolved from the value set here, else the team's dashboard setting, else `false`. When it resolves `false`, remote input is granted without a separate control request. |
| `controlRequestTitle` | `String?` | (Set through the admin interface) | Custom title for the control request prompt. |
| `controlRequestMessage` | `String?` | (Set through the admin interface) | Custom message for the control request prompt. |
| `onControlRequest` | `((SessionRequestResponse, String?) -> Cancellable?)?` | (Custom UI) | Called when an agent requests remote control. Only invoked when `requireControlRequest` is enabled (which defaults to `false`). The closure receives the response and the requesting agent's name (may be `nil`). Show your own UI, then call `response.accept()` or `response.reject()`. When unset, the SDK shows its default control request prompt. See [Custom Authorization UI](#custom-authorization-ui). |

###### Lookup Code

| Option | Type | Default | Description |
|--------|------|---------|-------------|
| `enableLookupCodeOnShake` | `Bool?` | (Set through the admin interface) | Show lookup code popup when device is shaken. |
| `lookupCodeKeyTitle` | `String?` | (Set through the admin interface) | Custom title for the shake detection alert. |
| `lookupCodeKeyMessage` | `String?` | (Set through the admin interface) | Custom message for shake alert. Supports `{%lookupCode%}` placeholder. |

###### Localization Strings

| Option | Type | Description |
|--------|------|-------------|
| `translationsYes` | `String?` | Custom text for "Allow" button in authorization prompt. |
| `translationsNo` | `String?` | Custom text for "Deny" button in authorization prompt. |
| `translationsOk` | `String?` | Custom text for "OK" button. |

###### Multi-Language Translations

Every text option (titles, messages, and the strings above) also accepts a dictionary keyed by language code instead of a single string. The translation matching the device language is shown, falling back to `en` if the device language isn't included:

```swift
translationsYes: ["en": "Yes", "it": "Si"],
translationsNo: ["en": "No", "it": "No"]
```

All of these can also be configured per language through the dashboard.

###### Full Device Screen Sharing

| Option | Type | Description |
|--------|------|-------------|
| `allowFullScreen` | `Bool?` | Allow agents to request full device screen sharing during sessions. Also requires the setup described in [Full Device Screen Sharing](https://userview.com/docs/sdk/ios/full-device-screen-sharing.md). Default: (Set through the admin interface). |
| `disableFullScreenWhenMasked` | `Bool?` | When `true`, full device screen sharing is automatically declined if any masked views are present. Default: (Set through the admin interface). |
| `onFullDeviceRequest` | `((SessionRequestResponse, String?) -> Cancellable?)?` | Called when an agent requests full-device sharing, before the system broadcast picker appears. The closure receives the response and the requesting agent's name (may be `nil`). Show your own UI, then call `response.accept()` to continue to the picker or `response.reject()` to decline. When unset, the SDK proceeds to the picker directly. |

See [Full Device Screen Sharing](https://userview.com/docs/sdk/ios/full-device-screen-sharing.md) for the full setup guide.

###### System Options

| Option | Type | Description |
|--------|------|-------------|
| `autoconnect` | `Bool?` | Automatically connect on initialization. Default: `true` (set through the admin interface). |
| `region` | `String?` | Server region for connections. |
| `onPremiseBaseEndpoint` | `String?` | The base endpoint of your [on-premise deployment](https://userview.com/docs/setup/on-premise.md) (your instance's `BASE_ENDPOINT`), e.g. `"https://cobrowsing.acmetech.com"`. When set, the SDK connects to your instance instead of the cloud servers, and `region` is ignored. |
| `webviewMaskedElements` | `[String]?` | List of CSS selectors (e.g. `[".credit-card"]`) to redact inside WebViews enrolled with `redactWebView`. Merged with the dashboard **Masked elements** setting and with selectors passed to `redactWebView`; a local list never disables dashboard masking. |

##### Custom Authorization UI

`onSessionRequest` is only invoked when `requireAuthorizationForSession` resolves `true` — when authorization is disabled (locally or via the team's dashboard setting), sessions start without any prompt and the handler is never called.

You can replace the default authorization dialog with your own UI by setting the `onSessionRequest` property after creating the configuration:

```swift
var config = UpscopeConfiguration(
    apiKey: "YOUR_API_KEY",
    requireAuthorizationForSession: true
)

config.onSessionRequest = { response, agentName in
    // Show your custom UI here
    // Call response.accept() or response.reject()
    myCustomAlert.show(agentName: agentName) { accepted in
        if accepted {
            response.accept()
        } else {
            response.reject()
        }
    }
    // Return a Cancellable for cleanup if the request is dismissed externally
    return Cancellable {
        myCustomAlert.dismiss()
    }
}

try Upscope.shared.initialize(with: config)
```

Similarly, use `onControlRequest` to customize the remote control authorization prompt:

```swift
var config = UpscopeConfiguration(
    apiKey: "YOUR_API_KEY",
    requireControlRequest: true
)

config.onControlRequest = { response, agentName in
    // Show your custom UI, e.g. "{agentName} wants to control your screen"
    myControlAlert.show(agentName: agentName) { accepted in
        if accepted {
            response.accept()
        } else {
            response.reject()
        }
    }
    return nil // or return a Cancellable
}
```

Use `onFullDeviceRequest` to intercept full-device sharing requests before the system broadcast picker appears:

```swift
var config = UpscopeConfiguration(
    apiKey: "YOUR_API_KEY"
)

config.onFullDeviceRequest = { response, agentName in
    // Show your custom UI before the system broadcast picker
    myCustomAlert.show(agentName: agentName) { accepted in
        if accepted {
            response.accept() // proceeds to the system broadcast picker
        } else {
            response.reject() // declines without showing the picker
        }
    }
    // Return a Cancellable called if the request is dismissed externally
    return Cancellable {
        myCustomAlert.dismiss()
    }
}

try Upscope.shared.initialize(with: config)
```

##### Full Example

```swift
let config = UpscopeConfiguration(
    apiKey: "YOUR_API_KEY",
    requireAuthorizationForSession: true,
    authorizationPromptTitle: "Screen Share",
    authorizationPromptMessage: "{%agentName%|Support} wants to help you",
    showTerminateButton: true,
    endOfSessionMessage: "Session ended. Thank you!",
    stopSessionText: "End Session",
    allowRemoteClick: true,
    allowRemoteScroll: true,
    enableLookupCodeOnShake: true,
    lookupCodeKeyTitle: "Your Code",
    lookupCodeKeyMessage: "Share this code: {%lookupCode%}",
    translationsYes: "Yes, share",
    translationsNo: "No thanks",
    translationsOk: "Got it",
    region: "us-east"
)

try Upscope.shared.initialize(with: config)
```

#### SDK Functions

Source: https://userview.com/docs/sdk/ios/sdk-functions

Here's a list of all the functions and properties supported by the UserView iOS SDK.

All methods and properties are accessed through the `Upscope.shared` singleton.

##### Connection Management

| Function | Description |
|----------|-------------|
| `connect()` | Establishes a WebSocket connection to the servers. |
| `disconnect()` | Closes the connection and ends any active session. |
| `reset(reconnect: Bool = true)` | Resets the connection, clearing all stored identities and visitor data. Pass `false` to stay disconnected after reset. |

##### Session Control

| Function | Description |
|----------|-------------|
| `stopSession()` | Ends the current screen sharing session. |
| `requestAgent()` | Signals that the visitor wants assistance from an agent. |
| `cancelAgentRequest()` | Cancels a pending agent request. |
| `getLookupCode()` | Requests a 4-digit lookup code from the server. Access the code via the `lookupCode` property or `lookupCodePublisher`. |
| `sendCustomMessage(_ message: String)` | Sends a custom text or JSON message to the agent (max 5000 characters). |
| `stopRemoteControl()` | Revokes the agent's remote control of the device. The session continues; only the agent's ability to interact stops. Safe no-op if no agent has control. |
| `stopFullDeviceSharing()` | Stops full-device screen sharing and reverts to in-app screen sharing. Safe no-op if not active. |

##### State Properties

| Property | Type | Description |
|----------|------|-------------|
| `isConnected` | `Bool` | Whether the SDK is currently connected to the server. |
| `isInSession` | `Bool` | Whether a screen sharing session is currently active. |
| `connectionState` | `ConnectionState` | Current connection state (`.inactive`, `.connecting`, `.connected`, `.reconnecting`, `.error`). |
| `sessionState` | `SessionState` | Current session state (`.inactive`, `.pendingRequest`, `.active`, `.paused`, `.ended`). |
| `shortId` | `String?` | The visitor's unique short ID assigned by the server. |
| `lookupCode` | `String?` | The current 4-digit lookup code, if one has been generated. |
| `watchLink` | `URL?` | The full URL where agents can view the session (`https://upscope.com/w/{shortId}`). |
| `remoteControlState` | `RemoteControlState` | Current remote control state (`.inactive`, `.pendingRequest`, `.active`). |
| `fullDeviceSharingState` | `FullDeviceSharingState` | Current full-device sharing state (`.inactive`, `.pendingRequest`, `.active`). |

##### Visitor Identification

You can set visitor identity either through direct property assignment or as a batch update.

###### Direct Properties

```swift
Upscope.shared.uniqueId = "user-123"
Upscope.shared.callName = "John Smith"
Upscope.shared.tags = ["#VIP"]
Upscope.shared.identities = ["John Smith", "john@example.com"]
Upscope.shared.metadata = ["plan": "enterprise", "region": "US"]
```

###### Batch Update

Use `updateConnection()` to update multiple fields at once:

```swift
Upscope.shared.updateConnection(
    uniqueId: "user-123",
    callName: "John Smith",
    tags: ["#VIP"],
    identities: ["John Smith", "john@example.com"],
    metadata: ["plan": "enterprise", "region": "US"]
)
```

Pass `nil` to keep an existing value unchanged. Only non-nil parameters are updated.

##### Reactive State (Combine)

Subscribe to state changes using Combine publishers:

```swift
import Combine

var cancellables = Set<AnyCancellable>()

// Connection state changes
Upscope.shared.connectionStatePublisher
    .sink { state in
        print("Connection: \(state)")
    }
    .store(in: &cancellables)

// Session state changes
Upscope.shared.sessionStatePublisher
    .sink { state in
        print("Session: \(state)")
    }
    .store(in: &cancellables)

// Short ID changes
Upscope.shared.shortIdPublisher
    .sink { shortId in
        print("Short ID: \(shortId ?? "none")")
    }
    .store(in: &cancellables)

// Lookup code changes
Upscope.shared.lookupCodePublisher
    .sink { code in
        print("Lookup code: \(code ?? "none")")
    }
    .store(in: &cancellables)

// Session mode changes
Upscope.shared.sessionModePublisher
    .sink { mode in
        print("Session mode: \(String(describing: mode))")
    }
    .store(in: &cancellables)

// Remote control state changes
Upscope.shared.remoteControlStatePublisher
    .sink { state in
        print("Remote control: \(state)")
    }
    .store(in: &cancellables)

// Full device sharing state changes
Upscope.shared.fullDeviceSharingStatePublisher
    .sink { state in
        print("Full device sharing: \(state)")
    }
    .store(in: &cancellables)
```

##### Masking

Hide sensitive content from agents during screen sharing.

| Property/Function | Description |
|-------------------|-------------|
| `maskSecureTextFields` | `Bool` — Automatically mask secure text fields. Default: `true`. |
| `addMaskedView(_ view: UIView)` | Register a UIKit view to be masked (hidden from agent). |
| `removeMaskedView(_ view: UIView)` | Unregister a masked view. |
| `allMaskedViews` | `[UIView]` — All currently masked views. |

###### Example

```swift
// Mask a specific UIKit view
Upscope.shared.addMaskedView(creditCardField)

// Later, remove the mask
Upscope.shared.removeMaskedView(creditCardField)

// Disable automatic secure field masking
Upscope.shared.maskSecureTextFields = false
```

#### Listening for Events

Source: https://userview.com/docs/sdk/ios/listening-for-events

You can listen for SDK events by implementing the `UpscopeDelegate` protocol and assigning it to the shared instance:

```swift
Upscope.shared.delegate = self
```

##### UpscopeDelegate Protocol

All delegate methods are optional.

```swift
extension YourClass: UpscopeDelegate {
    func upscope(_ upscope: Upscope, didChangeConnectionState state: ConnectionState) {
        // Connection state changed
        switch state {
        case .inactive:
            print("Inactive")
        case .connecting:
            print("Connecting...")
        case .connected:
            print("Connected")
        case .reconnecting:
            print("Reconnecting...")
        case .error(let error):
            print("Error: \(error.message)")
        }
    }

    func upscopeSessionDidStart(_ upscope: Upscope, agentName: String?) {
        print("Session started with \(agentName ?? "an agent")")
    }

    func upscopeSessionDidEnd(_ upscope: Upscope, reason: SessionEndReason) {
        switch reason {
        case .userStopped:
            print("User ended session")
        case .agentStopped:
            print("Agent ended session")
        case .timeout:
            print("Session timed out")
        case .error(let error):
            print("Session error: \(error.message)")
        }
    }

    func upscope(_ upscope: Upscope, didReceiveCustomMessage message: String, from viewerId: String) {
        print("Message from \(viewerId): \(message)")
    }

    func upscope(_ upscope: Upscope, didEncounterError error: UpscopeError) {
        print("Error: \(error.code) - \(error.message)")
    }

    func upscope(_ upscope: Upscope, viewerDidJoin viewer: Viewer) {
        print("Viewer joined: \(viewer.name ?? viewer.id)")
    }

    func upscope(_ upscope: Upscope, viewerDidLeave viewerId: String) {
        print("Viewer left: \(viewerId)")
    }

    func upscope(_ upscope: Upscope, viewerCountDidChange count: Int) {
        print("Viewers: \(count)")
    }

    func upscope(_ upscope: Upscope, didChangeRemoteControlState state: RemoteControlState) {
        // Whether an agent currently has remote control changed
        print("Remote control state: \(state)")
    }

    func upscope(_ upscope: Upscope, didChangeFullDeviceSharingState state: FullDeviceSharingState) {
        // Whether full-device screen sharing is active changed
        print("Full device sharing state: \(state)")
    }
}
```

##### Event Reference

| Method | Description |
|--------|-------------|
| `upscope(_:didChangeConnectionState:)` | Called when the connection state changes. |
| `upscopeSessionDidStart(_:agentName:)` | A screen sharing session has started. `agentName` is the agent's display name if available. |
| `upscopeSessionDidEnd(_:reason:)` | A session has ended. `reason` indicates why (user stopped, agent stopped, timeout, or error). |
| `upscope(_:didReceiveCustomMessage:from:)` | A custom message was received from a viewer. |
| `upscope(_:didEncounterError:)` | An SDK error occurred. |
| `upscope(_:viewerDidJoin:)` | An agent started viewing the session. The `Viewer` includes `id`, `name`, screen dimensions, and focus state. |
| `upscope(_:viewerDidLeave:)` | An agent stopped viewing the session. |
| `upscope(_:viewerCountDidChange:)` | The total number of active viewers changed. |
| `upscope(_:didChangeRemoteControlState:)` | Whether an agent currently has remote control of the device (ability to tap and scroll) changed. Independent of the session being active. |
| `upscope(_:didChangeFullDeviceSharingState:)` | Whether full-device (entire screen) sharing is currently running changed, as opposed to default in-app screen sharing. |

#### Full Device Screen Sharing

Source: https://userview.com/docs/sdk/ios/full-device-screen-sharing

By default, the UserView iOS SDK shares only your app's screen. With full device screen sharing, agents can see the entire device screen, including other apps, the home screen, and system UI. This uses Apple's Broadcast Upload Extension (ReplayKit).

**Physical devices only:**
Full device screen sharing only works on physical devices. It is not supported on the iOS Simulator.

##### How It Works

Full device screen sharing uses a **Broadcast Upload Extension** — a separate target in your Xcode project that captures the entire screen via ReplayKit. The extension sends frames to your main app through an App Group, and the SDK transmits them to the agent over the existing connection.

When an agent requests full device mode, the SDK shows the system broadcast picker. The user taps "Start Broadcast" to begin sharing, and can stop at any time from Control Center.

##### Setup

Full device screen sharing must also be **enabled in the UserView dashboard** (admin interface) in addition to the steps below. If it is disabled there, agents will not see the full device option during sessions.

###### 1. Add the Broadcast Extension dependency

The extension links a separate, lightweight module so your app binary never pulls in the ReplayKit capture code. Add it to your Broadcast Extension target (created in step 2) — separately from the main `UpscopeSDK` dependency on your app target.

**Swift Package Manager:**

Add the `UpscopeBroadcastExtension` product (from the same `UpscopeSDK` package you already added) to your Broadcast Extension target.

**CocoaPods:**

Add the `BroadcastExtension` subspec to your extension target in the `Podfile`:

```ruby
target 'YourAppBroadcast' do
  pod 'UpscopeSDK/BroadcastExtension', '~> 2026.8.3'
end
```

###### 2. Create the Broadcast Upload Extension target

1. In Xcode, go to **File > New > Target**
2. Select **Broadcast Upload Extension**
3. Uncheck "Include UI Extension"
4. Name it (e.g., `YourAppBroadcast`)
5. Note the bundle identifier — it must be prefixed with your main app's bundle identifier (e.g., `com.yourcompany.yourapp.broadcast`)

###### 3. Configure App Groups

Both your main app and the Broadcast Extension need to share data through an App Group:

1. Select your **main app target** > Signing & Capabilities > **+ Capability** > **App Groups**
2. Add a group identifier (e.g., `group.com.yourcompany.yourapp`)
3. Select your **extension target** > Signing & Capabilities > **+ Capability** > **App Groups**
4. Add the **same** group identifier

###### 4. Configure the Extension's Info.plist

Add the App Group identifier to the extension's `Info.plist`:

```xml
<key>UpscopeAppGroupId</key>
<string>group.com.yourcompany.yourapp</string>
```

###### 5. Implement the Extension

Replace the contents of your extension's `SampleHandler.swift` with:

```swift
import UpscopeBroadcastExtension

class SampleHandler: UpscopeSampleHandler {}
```

That's it — all the frame capture and forwarding logic is handled by `UpscopeSampleHandler`.

###### 6. Configure your app's Info.plist

Add the App Group and extension bundle identifiers to your **app's** `Info.plist` (`UpscopeAppGroupId` is the same key you added to the extension's `Info.plist` in step 4):

```xml
<key>UpscopeAppGroupId</key>
<string>group.com.yourcompany.yourapp</string>
<key>UpscopeBroadcastExtensionBundleId</key>
<string>com.yourcompany.yourapp.broadcast</string>
```

No code changes are needed — the SDK picks these up automatically.

##### How agents trigger full device mode

Once configured, agents can switch to full device mode from the UserView dashboard during an active session. When they do:

1. The system broadcast picker appears in your app
2. The user taps **Start Broadcast**
3. The agent sees the full device screen
4. The user can stop sharing at any time from **Control Center**

If the user stops the broadcast, the SDK notifies the server automatically. The agent can also switch back to app-only mode at any time.

##### Custom request UI

By default, the system broadcast picker appears immediately when an agent requests full-device mode. To show your own confirmation UI first, set `onFullDeviceRequest` on the configuration:

```swift
config.onFullDeviceRequest = { response, agentName in
    myAlert.show(agentName: agentName) { accepted in
        if accepted {
            response.accept() // continues to the system broadcast picker
        } else {
            response.reject() // declines without showing the picker
        }
    }
    return Cancellable { myAlert.dismiss() }
}
```

See [Configuration Options](https://userview.com/docs/sdk/ios/configuration-options.md) for full details.

##### Limitations

- Only works on **physical devices** (not the Simulator)
- **Element masking** is not available in full device mode (the SDK cannot inspect views outside your app)
- **Remote control** (tap/scroll) only works within your app, not on the home screen or other apps
- **Drawing annotations** are not displayed in full device mode
- The user must explicitly start the broadcast via the system picker — it cannot be started programmatically

##### Without full device support

If the `UpscopeAppGroupId` key is missing from your app's `Info.plist`, the SDK will not advertise full device support. If an agent attempts full device mode, the user will see an "unsupported" message and the mode will revert automatically.

### Android SDK

Source: https://userview.com/docs/sdk/android

**Beta:**
The mobile SDKs are currently in beta. If you encounter any issues, please [contact us](mailto:team@userview.com).

The UserView Android SDK allows you to integrate screen sharing capabilities into your Android app. It supports both Jetpack Compose and traditional View-based layouts, with features for element redaction, visitor identification, and session management.

#### Requirements

- Minimum Android API: 26 (Android 8.0)
- Target Android API: 36 or higher
- Kotlin: 1.9+
- Gradle: 8.2+
- JDK: 17+

#### Features

- **Screen sharing**: Allow agents to view your app's screen in real-time
- **Element redaction**: Hide sensitive information during screen sharing
- **Visitor identification**: Identify users and link sessions to your CRM
- **Lookup codes**: Generate 4-digit codes for easy session joining
- **Full device screen sharing**: Optionally capture the entire device screen via MediaProjection
- **No runtime permissions for in-app capture**: In-app screen sharing works without any user prompts

#### Installation

Source: https://userview.com/docs/sdk/android/installation

**Beta:**
The mobile SDKs are currently in beta. If you encounter any issues, please [contact us](mailto:team@userview.com).

##### Requirements

- Android API 26+ (Android 8.0 Oreo)
- Kotlin **2.1.0+** (projects on Kotlin 2.0.x or older will encounter metadata build failures at compile time)
- Gradle 8.2+
- JDK 17+

##### Installation

Add the dependency to your app's `build.gradle`:

**Kotlin DSL:**

```kotlin
dependencies {
    implementation("io.github.upscopeio:upscope-android-sdk:2026.8.3")
}
```

**Groovy:**

```groovy
dependencies {
    implementation 'io.github.upscopeio:upscope-android-sdk:2026.8.3'
}
```

##### Initialization

Initialize the SDK in your `Application` class:

```kotlin
import io.upscope.sdk.Upscope
import io.upscope.sdk.UpscopeConfiguration

class MyApplication : Application() {
    override fun onCreate() {
        super.onCreate()

        val config = UpscopeConfiguration.Builder("YOUR_API_KEY")
            .build()

        Upscope.initialize(this, config)
    }
}
```

The SDK auto-connects by default. To disable this, call `.autoConnect(false)` on the builder and call `Upscope.connect()` manually when ready.

The SDK automatically binds to the current activity via lifecycle callbacks. No manual activity binding is needed.

###### Jetpack Compose Example

```kotlin
import io.upscope.sdk.Upscope
import io.upscope.sdk.UpscopeConfiguration

class MyApplication : Application() {
    override fun onCreate() {
        super.onCreate()

        val config = UpscopeConfiguration.Builder("YOUR_API_KEY")
            .build()

        Upscope.initialize(this, config)
    }
}

class MainActivity : ComponentActivity() {
    override fun onCreate(savedInstanceState: Bundle?) {
        super.onCreate(savedInstanceState)
        setContent {
            MyApp()
        }
    }
}
```

##### Public API Key

You can find your public API key in the installation page of your UserView dashboard.

##### Required Permissions

The SDK declares these permissions (automatically merged into your manifest):
- `INTERNET` — WebSocket connection to servers
- `ACCESS_NETWORK_STATE` — Network connectivity checks

No special permissions are required for in-app screen capture.

[Full device screen sharing](https://userview.com/docs/sdk/android/full-device-screen-sharing.md) must be enabled in the UserView dashboard and also requires adding two extra permissions to your `AndroidManifest.xml`. Without them, the SDK automatically disables full device screen sharing. See the [full device screen sharing guide](https://userview.com/docs/sdk/android/full-device-screen-sharing.md) for details.

##### Lookup Code on Shake

By default, shaking the device will display the lookup code in a dialog. This can be disabled via configuration options.

#### Configuration Options

Source: https://userview.com/docs/sdk/android/configuration-options

You can customize the behavior of the UserView Android SDK through configuration options.

##### Setting Configuration

Use the `UpscopeConfiguration.Builder` when initializing the SDK:

```kotlin
val config = UpscopeConfiguration.Builder("YOUR_API_KEY")
    .requireAuthorizationForSession(true)
    .authorizationPromptTitle("Screen Sharing Request")
    .authorizationPromptMessage("Allow {%agentName%|Support} to view your screen?")
    .endOfSessionMessage("Thanks for using screen sharing!")
    .translationsYes("Allow")
    .translationsNo("Decline")
    .build()

Upscope.initialize(applicationContext, config)
```

##### Configuration Options

Each option resolves in this order: a value you pass here overrides the matching dashboard setting, which overrides the SDK's built-in default (shown in the **Default** column).

###### Session Authorization

| Option | Type | Default | Description |
|--------|------|---------|-------------|
| `requireAuthorizationForSession` | `Boolean` | `true` | Require user permission before screen sharing starts. Resolved from the value set here, else the team's dashboard setting, else `true`. When it resolves `false`, sessions start silently and `onSessionRequest` is not called. |
| `authorizationPromptTitle` | `String` | (Set through the admin interface) | Custom title for the authorization dialog. |
| `authorizationPromptMessage` | `String` | (Set through the admin interface) | Custom message for the authorization dialog. Supports placeholders. |

###### Message Placeholders

The `authorizationPromptMessage` supports these placeholders:
- `{%agentName%|fallback}` - Agent's name with a fallback if unavailable
- `{%currentDomain%}` - App name on Android

Example:
```kotlin
.authorizationPromptMessage("{%agentName%|Our support team} would like to view your screen")
```

###### UI Display

| Option | Type | Default | Description |
|--------|------|---------|-------------|
| `showTerminateButton` | `Boolean` | (Set through the admin interface) | Show a button to end the screen sharing session. |
| `showUpscopeLink` | `Boolean` | `true` | Show the UserView link to the user. Setting this to `false` only works if whitelabeling is included in your plan. |
| `endOfSessionMessage` | `String` | (Set through the admin interface) | Message displayed when the session ends. |
| `stopSessionText` | `String` | (Set through the admin interface) | Custom text for the stop session button. |

###### Remote Control

| Option | Type | Default | Description |
|--------|------|---------|-------------|
| `allowRemoteClick` | `Boolean` | (Set through the admin interface) | Allow agents to remotely tap on the screen. |
| `allowRemoteScroll` | `Boolean` | (Set through the admin interface) | Allow agents to remotely scroll the screen. |
| `requireControlRequest` | `Boolean` | `false` | Require user approval before agents can use remote input. Resolved from the value set here, else the team's dashboard setting, else `false`. When it resolves `false`, remote input is granted without a separate control request. |
| `controlRequestTitle` | `String` | (Set through the admin interface) | Custom title for the control request prompt. |
| `controlRequestMessage` | `String` | (Set through the admin interface) | Custom message for the control request prompt. |

###### Lookup Code

| Option | Type | Default | Description |
|--------|------|---------|-------------|
| `enableLookupCodeOnShake` | `Boolean` | (Set through the admin interface) | Show lookup code dialog when device is shaken. |
| `lookupCodeKeyTitle` | `String` | (Set through the admin interface) | Custom title for the shake detection dialog. |
| `lookupCodeKeyMessage` | `String` | (Set through the admin interface) | Custom message for shake dialog. Supports `{%lookupCode%}` placeholder. |

###### Localization Strings

| Option | Type | Description |
|--------|------|-------------|
| `translationsYes` | `String` | Custom text for "Allow" button in authorization prompt. |
| `translationsNo` | `String` | Custom text for "Deny" button in authorization prompt. |
| `translationsOk` | `String` | Custom text for "OK" button. |

###### Multi-Language Translations

Every text option (titles, messages, and the strings above) also accepts a map keyed by language code instead of a single string. The translation matching the device language is shown, falling back to `en` if the device language isn't included:

```kotlin
.translationsYes(mapOf("en" to "Yes", "it" to "Si"))
.translationsNo(mapOf("en" to "No", "it" to "No"))
```

All of these can also be configured per language through the dashboard.

###### System Options

| Option | Type | Description |
|--------|------|-------------|
| `autoConnect` | `Boolean` | Automatically connect on initialization. Default: `true` (set through the admin interface). |
| `region` | `String` | Server region for connections. |
| `onPremiseBaseEndpoint` | `String` | The base endpoint of your [on-premise deployment](https://userview.com/docs/setup/on-premise.md) (your instance's `BASE_ENDPOINT`), e.g. `"https://cobrowsing.acmetech.com"`. When set, the SDK connects to your instance instead of the cloud servers, and `region` is ignored. |
| `allowFullScreen` | `Boolean` | Allow agents to request full device screen sharing during sessions. Also requires the setup described in [Full Device Screen Sharing](https://userview.com/docs/sdk/android/full-device-screen-sharing.md). (Set through the admin interface) |
| `disableFullScreenWhenMasked` | `Boolean` | When `true`, full device screen sharing is automatically declined if any masked views are present. (Set through the admin interface) |
| `webviewMaskedElements` | `List<String>` | List of CSS selectors (e.g. `listOf(".credit-card")`) to redact inside WebViews enrolled with `redactWebView`. Merged with the dashboard **Masked elements** setting and with selectors passed to `redactWebView`; a local list never disables dashboard masking. |

##### Custom Authorization UI

`onSessionRequest` is only invoked when `requireAuthorizationForSession` resolves `true` — when authorization is disabled (locally or via the team's dashboard setting), sessions start without any prompt and the handler is never called.

You can replace the default authorization dialog with your own UI by providing an `onSessionRequest` listener:

```kotlin
val config = UpscopeConfiguration.Builder("YOUR_API_KEY")
    .requireAuthorizationForSession(true)
    .onSessionRequest(OnSessionRequestListener { response, agentName ->
        // Show your custom UI here
        // Call response.accept() or response.reject()
        myCustomDialog.show(agentName) { accepted ->
            if (accepted) response.accept() else response.reject()
        }
        // Return a Cancellable for cleanup if the request is dismissed externally
        Cancellable { myCustomDialog.dismiss() }
    })
    .build()
```

Similarly, use `onControlRequest` to customize the remote control authorization prompt. It is only invoked when `requireControlRequest` is enabled (which defaults to `false`):

```kotlin
val config = UpscopeConfiguration.Builder("YOUR_API_KEY")
    .requireControlRequest(true)
    .onControlRequest(OnControlRequestListener { response, agentName ->
        // Show your custom UI here
        myCustomDialog.show(agentName) { accepted ->
            if (accepted) response.accept() else response.reject()
        }
        // Return a Cancellable for cleanup if the request is withdrawn externally
        Cancellable { myCustomDialog.dismiss() }
    })
    .build()
```

Use `onFullDeviceRequest` to intercept an agent's request for full-device screen sharing before the system MediaProjection permission dialog appears. Show your own UI, then call `response.accept()` to proceed to the system prompt or `response.reject()` to decline and stay in in-app mode. When this listener is not set, the SDK shows the system permission dialog directly.

```kotlin
val config = UpscopeConfiguration.Builder("YOUR_API_KEY")
    .onFullDeviceRequest(OnFullDeviceRequestListener { response, agentName ->
        // Show your custom UI here
        myDialog.show(
            agentName = agentName,
            onAccept = { response.accept() },
            onDecline = { response.reject() }
        )
        // Return a Cancellable invoked if the request is withdrawn before the user responds
        Cancellable { myDialog.dismiss() }
    })
    .build()
```

The listener interface is:

```kotlin
fun interface OnFullDeviceRequestListener {
    fun onFullDeviceRequest(response: SessionRequestResponse, agentName: String?): Cancellable?
}
```

`SessionRequestResponse` exposes `accept()` and `reject()`. The returned `Cancellable` (or `null`) is called for cleanup if the request is withdrawn by the agent before the user responds.

##### Full Example

```kotlin
val config = UpscopeConfiguration.Builder("YOUR_API_KEY")
    .requireAuthorizationForSession(true)
    .authorizationPromptTitle("Screen Share")
    .authorizationPromptMessage("{%agentName%|Support} wants to help you")
    .showTerminateButton(true)
    .endOfSessionMessage("Session ended. Thank you!")
    .stopSessionText("End Session")
    .allowRemoteClick(true)
    .allowRemoteScroll(true)
    .enableLookupCodeOnShake(true)
    .lookupCodeKeyTitle("Your Code")
    .lookupCodeKeyMessage("Share this code: {%lookupCode%}")
    .translationsYes("Yes, share")
    .translationsNo("No thanks")
    .translationsOk("Got it")
    .region("us-east")
    .build()

Upscope.initialize(applicationContext, config)
```

#### SDK Functions

Source: https://userview.com/docs/sdk/android/sdk-functions

Here's a list of all the functions and properties supported by the UserView Android SDK.

All methods and properties are accessed through the `Upscope` singleton object.

##### Connection Management

| Function | Description |
|----------|-------------|
| `connect()` | Establishes a WebSocket connection to the servers. |
| `disconnect()` | Closes the connection and ends any active session. |
| `reset(reconnect: Boolean = true)` | Resets the connection, clearing all stored identities and visitor data. Pass `false` to stay disconnected after reset. |

##### Session Control

| Function | Description |
|----------|-------------|
| `stopSession()` | Ends the current screen sharing session. |
| `requestAgent()` | Signals that the visitor wants assistance from an agent. |
| `cancelAgentRequest()` | Cancels a pending agent request. |
| `getLookupCode()` | Requests a 4-digit lookup code from the server. Access the code via the `lookupCode` property or `lookupCodeFlow`. |
| `sendCustomMessage(message: String)` | Sends a custom text or JSON message to the agent (max 5000 characters). |
| `stopRemoteControl()` | Revokes the agent's remote control of the device. The session continues; only the agent's ability to interact stops. Safe no-op if no agent has control. |
| `stopFullDeviceSharing()` | Stops full-device screen sharing and reverts to in-app screen sharing. Safe no-op if not active. |

##### State Properties

| Property | Type | Description |
|----------|------|-------------|
| `isConnected` | `Boolean` | Whether the SDK is currently connected to the server. |
| `isInSession` | `Boolean` | Whether a screen sharing session is currently active. |
| `connectionState` | `ConnectionState` | Current connection state (`Inactive`, `Connecting`, `Connected`, `Reconnecting`, `Error`). |
| `sessionState` | `SessionState` | Current session state (`INACTIVE`, `PENDING_REQUEST`, `ACTIVE`, `PAUSED`, `ENDED`). |
| `shortId` | `String?` | The visitor's unique short ID assigned by the server. |
| `lookupCode` | `String?` | The current 4-digit lookup code, if one has been generated. |
| `watchLink` | `String?` | The full URL where agents can view the session (`https://upscope.com/w/{shortId}`). |
| `remoteControlState` | `RemoteControlState` | Current remote control state (`INACTIVE`, `PENDING_REQUEST`, `ACTIVE`). |
| `fullDeviceSharingState` | `FullDeviceSharingState` | Current full-device sharing state (`INACTIVE`, `PENDING_REQUEST`, `ACTIVE`). |

##### Visitor Identification

You can set visitor identity either through direct property assignment or as a batch update.

###### Direct Properties

```kotlin
Upscope.uniqueId = "user-123"
Upscope.callName = "John Smith"
Upscope.tags = listOf("#VIP")
Upscope.identities = listOf("John Smith", "john@example.com")
Upscope.metadata = mapOf("plan" to "enterprise", "region" to "US")
```

###### Batch Update

Use `updateConnection()` to update multiple fields at once:

```kotlin
Upscope.updateConnection(
    uniqueId = "user-123",
    callName = "John Smith",
    tags = listOf("#VIP"),
    identities = listOf("John Smith", "john@example.com"),
    metadata = mapOf("plan" to "enterprise", "region" to "US")
)
```

Pass `null` to keep an existing value unchanged. Only non-null parameters are updated.

##### Reactive State (StateFlow)

Subscribe to state changes using Kotlin StateFlow:

```kotlin
import kotlinx.coroutines.flow.collect
import kotlinx.coroutines.launch

// In a coroutine scope (e.g., viewModelScope, lifecycleScope)

// Connection state changes
launch {
    Upscope.connectionStateFlow.collect { state ->
        println("Connection: $state")
    }
}

// Session state changes
launch {
    Upscope.sessionStateFlow.collect { state ->
        println("Session: $state")
    }
}

// Short ID changes
launch {
    Upscope.shortIdFlow.collect { shortId ->
        println("Short ID: $shortId")
    }
}

// Lookup code changes
launch {
    Upscope.lookupCodeFlow.collect { code ->
        println("Lookup code: $code")
    }
}

// Session mode changes
launch {
    Upscope.sessionModeFlow.collect { mode ->
        println("Session mode: $mode")
    }
}

// Remote control state changes
launch {
    Upscope.remoteControlStateFlow.collect { state ->
        println("Remote control: $state")
    }
}

// Full device sharing state changes
launch {
    Upscope.fullDeviceSharingStateFlow.collect { state ->
        println("Full device sharing: $state")
    }
}
```

##### Masking

Hide sensitive content from agents during screen sharing.

| Property/Function | Description |
|-------------------|-------------|
| `maskSecureInputs` | `Boolean` — Automatically mask secure input fields. Default: `true`. |
| `addMaskedView(view: View)` | Register a view to be masked (hidden from agent). |
| `removeMaskedView(view: View)` | Unregister a masked view. |
| `allMaskedViews` | `List<View>` — All currently masked views. |

###### Example

```kotlin
// Mask a specific view
Upscope.addMaskedView(creditCardField)

// Later, remove the mask
Upscope.removeMaskedView(creditCardField)

// Disable automatic secure input masking
Upscope.maskSecureInputs = false
```

#### Listening for Events

Source: https://userview.com/docs/sdk/android/listening-for-events

You can listen for SDK events by implementing the `UpscopeListener` interface and assigning it to the `Upscope` object:

```kotlin
Upscope.listener = object : UpscopeListener {
    // Override methods you need
}
```

##### UpscopeListener Interface

All listener methods have default empty implementations, so you only need to override the ones you care about.

```kotlin
Upscope.listener = object : UpscopeListener {
    override fun onConnectionStateChanged(state: ConnectionState) {
        // Connection state changed
        when (state) {
            is ConnectionState.Inactive -> println("Inactive")
            is ConnectionState.Connecting -> println("Connecting...")
            is ConnectionState.Connected -> println("Connected")
            is ConnectionState.Reconnecting -> println("Reconnecting...")
            is ConnectionState.Error -> println("Error: ${state.error.message}")
        }
    }

    override fun onSessionStarted(agentName: String?) {
        println("Session started with ${agentName ?: "an agent"}")
    }

    override fun onSessionEnded(reason: SessionEndReason) {
        when (reason) {
            is SessionEndReason.UserStopped -> println("User ended session")
            is SessionEndReason.AgentStopped -> println("Agent ended session")
            is SessionEndReason.Timeout -> println("Session timed out")
            is SessionEndReason.Error -> println("Session error: ${reason.error.message}")
        }
    }

    override fun onCustomMessageReceived(message: String, viewerId: String) {
        println("Message from $viewerId: $message")
    }

    override fun onError(error: UpscopeError) {
        println("Error: ${error.code} - ${error.message}")
    }

    override fun onViewerJoined(viewer: Viewer) {
        println("Viewer joined: ${viewer.name ?: viewer.id}")
    }

    override fun onViewerLeft(viewerId: String) {
        println("Viewer left: $viewerId")
    }

    override fun onViewerCountChanged(count: Int) {
        println("Viewers: $count")
    }

    override fun onRemoteControlStateChanged(state: RemoteControlState) {
        when (state) {
            RemoteControlState.INACTIVE -> println("Remote control inactive")
            RemoteControlState.PENDING_REQUEST -> println("Agent requested control, awaiting the user's response")
            RemoteControlState.ACTIVE -> println("Remote control active")
        }
    }

    override fun onFullDeviceSharingStateChanged(state: FullDeviceSharingState) {
        when (state) {
            FullDeviceSharingState.INACTIVE -> println("Full device sharing inactive")
            FullDeviceSharingState.PENDING_REQUEST -> println("Agent requested full device sharing, awaiting the user's response")
            FullDeviceSharingState.ACTIVE -> println("Full device sharing active")
        }
    }
}
```

##### Event Reference

| Method | Description |
|--------|-------------|
| `onConnectionStateChanged(state)` | Called when the connection state changes. |
| `onSessionStarted(agentName)` | A screen sharing session has started. `agentName` is the agent's display name if available. |
| `onSessionEnded(reason)` | A session has ended. `reason` indicates why (user stopped, agent stopped, timeout, or error). |
| `onCustomMessageReceived(message, viewerId)` | A custom message was received from a viewer. |
| `onError(error)` | An SDK error occurred. |
| `onViewerJoined(viewer)` | An agent started viewing the session. The `Viewer` includes `id`, `name`, screen dimensions, and focus state. |
| `onViewerLeft(viewerId)` | An agent stopped viewing the session. |
| `onViewerCountChanged(count)` | The total number of active viewers changed. |
| `onRemoteControlStateChanged(state)` | Whether an agent currently has remote control of the device (ability to tap and scroll) changed. Independent of the session being active. `RemoteControlState`: `INACTIVE`, `PENDING_REQUEST`, `ACTIVE`. |
| `onFullDeviceSharingStateChanged(state)` | Whether full-device (entire screen) sharing is currently running changed, as opposed to default in-app screen sharing. `FullDeviceSharingState`: `INACTIVE`, `PENDING_REQUEST`, `ACTIVE`. |

#### Full Device Screen Sharing

Source: https://userview.com/docs/sdk/android/full-device-screen-sharing

By default, the UserView Android SDK shares only your app's screen. With full device screen sharing, agents can see the entire device screen, including other apps, the home screen, and system UI. This uses Android's MediaProjection API.

##### How It Works

Full device screen sharing uses the **MediaProjection API** to capture the entire screen. When an agent requests full device mode, the SDK shows the system screen capture permission dialog. The user taps "Start now" to begin sharing, and a persistent notification indicates that screen capture is active.

A **foreground service** keeps the capture alive even when your app is in the background, so agents continue to see the screen.

##### Setup

Full device screen sharing requires both:

1. **Enabling it in the UserView dashboard** (admin interface) — if disabled there, agents will not see the full device option during sessions
2. **Adding the required permissions** to your app's `AndroidManifest.xml`:

```xml
<uses-permission android:name="android.permission.FOREGROUND_SERVICE" />
<uses-permission android:name="android.permission.FOREGROUND_SERVICE_MEDIA_PROJECTION" />
```

The SDK already declares the necessary service and activity components. It detects these permissions at runtime — if they are missing, full device screen sharing is disabled regardless of the dashboard setting, and any agent requests for it are automatically declined.

##### How agents trigger full device mode

Once connected, agents can switch to full device mode from the UserView dashboard during an active session. When they do:

1. The system screen capture permission dialog appears
2. The user taps **Start now**
3. A notification appears indicating screen sharing is active
4. The agent sees the full device screen
5. The user can stop sharing at any time by dismissing the notification

If the user denies the permission or stops the capture, the SDK notifies the server automatically. The agent can also switch back to app-only mode at any time.

##### Custom Request UI

By default the system MediaProjection permission dialog appears immediately when an agent requests full-device mode. You can intercept this request to show your own UI first — for example, an explanation screen — by setting `onFullDeviceRequest` on the `UpscopeConfiguration.Builder`. Call `response.accept()` to proceed to the system dialog, or `response.reject()` to decline and remain in in-app screen sharing mode. See [Configuration Options](https://userview.com/docs/sdk/android/configuration-options.md) for the full usage example.

##### Limitations

- **Element masking** is not available in full device mode (the SDK cannot inspect views outside your app). If `disableFullScreenWhenMasked` is enabled and masked views are present, the SDK will automatically decline full device mode.
- **Remote control** (tap/scroll) only works within your app, not on the home screen or other apps
- **Drawing annotations** are not displayed in full device mode
- The user must explicitly grant the system screen capture permission — it cannot be started programmatically

### Flutter SDK

Source: https://userview.com/docs/sdk/flutter

**Beta:**
The mobile SDKs are currently in beta. If you encounter any issues, please [contact us](mailto:team@userview.com).

The UserView Flutter SDK allows you to integrate screen sharing capabilities into your Flutter app. It works on both iOS and Android from a single codebase, with features for element redaction, visitor identification, and session management.

#### Requirements

- Flutter 3.19.0+
- Dart SDK 3.3.0+
- iOS 14.0+
- Android API 26+ (Android 8.0)

#### Features

- **Screen sharing**: Allow agents to view your app's screen in real-time
- **Element redaction**: Hide sensitive widgets during screen sharing with the `UpscopeMasked` widget
- **Visitor identification**: Identify users and link sessions to your CRM
- **Lookup codes**: Generate 4-digit codes for easy session joining
- **Reactive streams**: All state exposed as Dart `Stream`s for reactive UI binding

#### Installation

Source: https://userview.com/docs/sdk/flutter/installation

**Beta:**
The mobile SDKs are currently in beta. If you encounter any issues, please [contact us](mailto:team@userview.com).

##### Requirements

- Flutter 3.19.0+
- Dart SDK 3.3.0+
- iOS 14.0+
- Android API 26+ (Android 8.0)

##### Installation

```bash
flutter pub add upscopeio_flutter_sdk
```

Or add it manually to your `pubspec.yaml`:

```yaml
dependencies:
  upscopeio_flutter_sdk: ^2026.8.3
```

Then run:

```bash
flutter pub get
```

##### Initialization

Register the method channel and initialize the SDK early in your app:

```dart
import 'package:upscopeio_flutter_sdk/upscopeio_flutter_sdk.dart';

void main() {
  UpscopeMethodChannel.register();
  runApp(const MyApp());
}
```

Then initialize in your root widget:

```dart
import 'package:upscopeio_flutter_sdk/upscopeio_flutter_sdk.dart';

class MyApp extends StatefulWidget {
  const MyApp({super.key});

  @override
  State<MyApp> createState() => _MyAppState();
}

class _MyAppState extends State<MyApp> {
  @override
  void initState() {
    super.initState();
    _initUpscope();
  }

  Future<void> _initUpscope() async {
    await Upscope.instance.initialize(
      UpscopeConfiguration(apiKey: 'YOUR_API_KEY'),
    );
  }

  @override
  Widget build(BuildContext context) {
    return MaterialApp(
      home: HomeScreen(),
    );
  }
}
```

The SDK auto-connects by default. To disable this, set `autoConnect: false` in the configuration and call `Upscope.instance.connect()` manually when ready.

##### Public API Key

You can find your public API key in the installation page of your UserView dashboard.

##### ConnectionState Name Collision

Flutter's `material.dart` exports its own `ConnectionState`. To avoid conflicts, hide it when importing the SDK:

```dart
import 'package:flutter/material.dart' hide ConnectionState;
import 'package:upscopeio_flutter_sdk/upscopeio_flutter_sdk.dart';
```

##### Full Device Screen Sharing

The Flutter SDK supports full device screen sharing, but it requires platform-specific setup:

- **iOS**: Requires a Broadcast Upload Extension. See the [iOS full device screen sharing guide](https://userview.com/docs/sdk/ios/full-device-screen-sharing.md).
- **Android**: Requires adding two permissions to your `AndroidManifest.xml`. See the [Android full device screen sharing guide](https://userview.com/docs/sdk/android/full-device-screen-sharing.md).

##### Lookup Code on Shake

By default, shaking the device will display the lookup code in a dialog. This can be disabled via configuration options.

#### Configuration Options

Source: https://userview.com/docs/sdk/flutter/configuration-options

You can customize the behavior of the **PRODUCT** Flutter SDK through configuration options.

##### Setting Configuration

Pass options when creating the `UpscopeConfiguration`:

```dart
final config = UpscopeConfiguration(
  apiKey: 'YOUR_API_KEY',
  requireAuthorizationForSession: true,
  authorizationPromptTitle: 'Screen Sharing Request',
  authorizationPromptMessage: 'Allow {%agentName%|Support} to view your screen?',
  endOfSessionMessage: 'Thanks for using screen sharing!',
  translationsYes: 'Allow',
  translationsNo: 'Decline',
);

await Upscope.instance.initialize(config);
```

##### Configuration Options

Each option resolves in this order: a value you pass here overrides the matching dashboard setting, which overrides the SDK's built-in default (shown in the **Default** column).

###### Session Authorization

| Option                           | Type      | Default                           | Description                                                         |
| -------------------------------- | --------- | --------------------------------- | ------------------------------------------------------------------- |
| `requireAuthorizationForSession` | `bool`    | `true`                            | Require user permission before screen sharing starts. The Flutter SDK always sends this value (default `true`), so the team's dashboard setting is not consulted for it. When set to `false`, sessions start silently: no prompt is shown and nothing is emitted on `onSessionRequest`, even with `customSessionRequestUI` enabled. |
| `authorizationPromptTitle`       | `String?` | (Set through the admin interface) | Custom title for the authorization dialog.                          |
| `authorizationPromptMessage`     | `String?` | (Set through the admin interface) | Custom message for the authorization dialog. Supports placeholders. |
| `customSessionRequestUI`         | `bool?`   | `false`                           | Replace the native authorization dialog with your own UI. When `true`, the SDK emits on the `onSessionRequest` stream instead of showing the native dialog; you must listen and call `respondToSessionRequest`, otherwise session requests stall. This only changes how the authorization prompt is presented, not whether it happens: if `requireAuthorizationForSession` is set to `false`, sessions start with no prompt and no event (its default is `true`). See [Listening for Events](https://userview.com/docs/sdk/flutter/listening-for-events.md). |

###### Message Placeholders

The `authorizationPromptMessage` supports these placeholders:

- `{%agentName%|fallback}` - Agent's name with a fallback if unavailable
- `{%currentDomain%}` - App name

Example:

```dart
authorizationPromptMessage: '{%agentName%|Our support team} would like to view your screen',
```

###### UI Display

| Option                | Type      | Default                           | Description                                                    |
| --------------------- | --------- | --------------------------------- | -------------------------------------------------------------- |
| `showTerminateButton` | `bool`    | `true`                            | Show a button in the banner to end the screen sharing session. |
| `showUpscopeLink`     | `bool?`   | `true`                            | Show the UserView link to the user. Setting this to `false` only works if whitelabeling is included in your plan. |
| `endOfSessionMessage` | `String?` | (Set through the admin interface) | Message displayed when the session ends.                       |
| `stopSessionText`     | `String?` | (Set through the admin interface) | Custom text for the stop session button.                       |

###### Remote Control

| Option                  | Type      | Default                           | Description                                               |
| ----------------------- | --------- | --------------------------------- | --------------------------------------------------------- |
| `allowRemoteClick`      | `bool?`   | (Set through the admin interface) | Allow agents to remotely tap on the screen.               |
| `allowRemoteScroll`     | `bool?`   | (Set through the admin interface) | Allow agents to remotely scroll the screen.               |
| `requireControlRequest` | `bool?`   | `false` | Require user approval before agents can use remote input. Resolved from the value set here, else the team's dashboard setting, else `false`. When it resolves `false`, remote input is granted without a separate control request — no prompt and nothing on `onControlRequest`, even with `customControlRequestUI` enabled. |
| `controlRequestTitle`   | `String?` | (Set through the admin interface) | Custom title for the control request prompt.              |
| `controlRequestMessage` | `String?` | (Set through the admin interface) | Custom message for the control request prompt.            |
| `customControlRequestUI` | `bool?`  | `false`                           | Replace the native control request prompt with your own UI. When `true`, the SDK emits on the `onControlRequest` stream instead of showing the native prompt; you must listen and call `respondToControlRequest`, otherwise control requests stall. This only changes how the control prompt is presented, not whether it happens: the stream only emits when `requireControlRequest` resolves `true`. See [Listening for Events](https://userview.com/docs/sdk/flutter/listening-for-events.md). |

###### Lookup Code

| Option                    | Type      | Default                           | Description                                                            |
| ------------------------- | --------- | --------------------------------- | ---------------------------------------------------------------------- |
| `enableLookupCodeOnShake` | `bool?`   | (Set through the admin interface) | Show lookup code popup when device is shaken.                          |
| `lookupCodeKeyTitle`      | `String?` | (Set through the admin interface) | Custom title for the shake detection alert.                            |
| `lookupCodeKeyMessage`    | `String?` | (Set through the admin interface) | Custom message for shake alert. Supports `{%lookupCode%}` placeholder. |

###### Localization Strings

| Option            | Type      | Description                                             |
| ----------------- | --------- | ------------------------------------------------------- |
| `translationsYes` | `String?` | Custom text for "Allow" button in authorization prompt. |
| `translationsNo`  | `String?` | Custom text for "Deny" button in authorization prompt.  |
| `translationsOk`  | `String?` | Custom text for "OK" button.                            |

###### Multi-Language Translations

Every text option (titles, messages, and the strings above) also accepts a map keyed by language code instead of a single string. The translation matching the device language is shown, falling back to `en` if the device language isn't included:

```dart
translationsYes: {'en': 'Yes', 'it': 'Si'},
translationsNo: {'en': 'No', 'it': 'No'},
```

All of these can also be configured per language through the dashboard.

###### Full Device Sharing

These options configure full-device screen sharing behavior. For the iOS Broadcast Upload Extension setup (App Group and extension bundle id via Info.plist), see [Full Device Screen Sharing](https://userview.com/docs/sdk/flutter/full-device-screen-sharing.md).

| Option                       | Type      | Description                                                                                                                             |
| ---------------------------- | --------- | --------------------------------------------------------------------------------------------------------------------------------------- |
| `allowFullScreen`            | `bool?`   | iOS and Android — allow agents to request full device screen sharing during sessions. Also requires the setup described in [Full Device Screen Sharing](https://userview.com/docs/sdk/flutter/full-device-screen-sharing.md). Default: set through the admin interface. |
| `disableFullScreenWhenMasked` | `bool?`   | When `true`, full-device sharing is declined while masked content is on screen. Set `false` to allow it even with masked content present. Default: set through the admin interface. |
| `customFullDeviceRequestUI`  | `bool?`   | iOS and Android — gate full-device requests behind your own UI. When `true`, the SDK emits on the `onFullDeviceRequest` stream instead of proceeding directly to the system permission prompt; you must listen and call `respondToFullDeviceRequest`, otherwise requests stall. Default `false` = straight to the system prompt. See [Listening for Events](https://userview.com/docs/sdk/flutter/listening-for-events.md). |

###### System Options

| Option        | Type      | Description                                                                                 |
| ------------- | --------- | ------------------------------------------------------------------------------------------- |
| `autoConnect` | `bool`    | Automatically connect on initialization. Default: `true` (set through the admin interface). |
| `region`      | `String?` | Server region for connections.                                                              |
| `onPremiseBaseEndpoint` | `String?` | The base endpoint of your [on-premise deployment](https://userview.com/docs/setup/on-premise.md) (your instance's `BASE_ENDPOINT`), e.g. `'https://cobrowsing.acmetech.com'`. When set, the SDK connects to your instance instead of the cloud servers, and `region` is ignored. |

##### Full Example

```dart
final config = UpscopeConfiguration(
  apiKey: 'YOUR_API_KEY',
  requireAuthorizationForSession: true,
  autoConnect: true,
  authorizationPromptTitle: 'Screen Share',
  authorizationPromptMessage: '{%agentName%|Support} wants to help you',
  showTerminateButton: true,
  endOfSessionMessage: 'Session ended. Thank you!',
  stopSessionText: 'End Session',
  allowRemoteClick: true,
  allowRemoteScroll: true,
  enableLookupCodeOnShake: true,
  lookupCodeKeyTitle: 'Your Code',
  lookupCodeKeyMessage: 'Share this code: {%lookupCode%}',
  translationsYes: 'Yes, share',
  translationsNo: 'No thanks',
  translationsOk: 'Got it',
  region: 'us-east',
);

await Upscope.instance.initialize(config);
```

#### SDK Functions

Source: https://userview.com/docs/sdk/flutter/sdk-functions

Here's a list of all the functions and properties supported by the UserView Flutter SDK.

All methods are accessed through the `Upscope.instance` singleton.

##### Connection Management

| Function | Description |
|----------|-------------|
| `connect()` | Establishes a WebSocket connection to the servers. Returns `Future<void>`. |
| `disconnect()` | Closes the connection and ends any active session. Returns `Future<void>`. |
| `reset({bool reconnect = true})` | Resets the connection, clearing all stored identities and visitor data. Pass `reconnect: false` to stay disconnected after reset. Returns `Future<void>`. |

##### Session Control

| Function | Description |
|----------|-------------|
| `stopSession()` | Ends the current screen sharing session. Returns `Future<void>`. |
| `requestAgent()` | Signals that the visitor wants assistance from an agent. Returns `Future<void>`. |
| `cancelAgentRequest()` | Cancels a pending agent request. Returns `Future<void>`. |
| `getLookupCode()` | Requests a 4-digit lookup code from the server. Access the code via the `lookupCode` stream. Returns `Future<void>`. |
| `sendCustomMessage(String message)` | Sends a custom text or JSON message to the agent (max 5000 characters). Returns `Future<void>`. |
| `stopRemoteControl()` | Revokes the agent's remote control of the device. The session continues; only the agent's ability to interact stops. Safe no-op if no agent has control. Returns `Future<void>`. |
| `stopFullDeviceSharing()` | Stops full-device screen sharing and reverts to in-app screen sharing. Safe no-op if not active. Returns `Future<void>`. |
| `respondToFullDeviceRequest(String requestId, {required bool accept})` | Responds to an `onFullDeviceRequest` event. `accept: true` allows full-device sharing (proceeds to the system permission prompt); `accept: false` declines. Returns `Future<void>`. |
| `respondToControlRequest(String requestId, {required bool accept})` | Responds to an `onControlRequest` event. `accept: true` grants the agent remote control; `accept: false` declines. Returns `Future<void>`. |
| `respondToSessionRequest(String requestId, {required bool accept})` | Responds to an `onSessionRequest` event. `accept: true` starts the cobrowsing session; `accept: false` declines. Returns `Future<void>`. |

##### State

| Method | Return Type | Description |
|--------|-------------|-------------|
| `getShortId()` | `Future<String?>` | The visitor's unique short ID assigned by the server. |
| `getWatchLink()` | `Future<String?>` | The full URL where agents can view the session (`https://upscope.com/w/{shortId}`). |

##### Visitor Identification

Use `updateConnection()` to set or update visitor identity:

```dart
await Upscope.instance.updateConnection(
  uniqueId: 'user-123',
  callName: 'John Smith',
  tags: ['#VIP'],
  identities: ['John Smith', 'john@example.com'],
  metadata: {'plan': 'enterprise', 'region': 'US'},
);
```

Pass `null` to keep an existing value unchanged. Only non-null parameters are updated.

##### Reactive Streams

Subscribe to state changes using Dart `Stream`s. These work with `StreamBuilder` for reactive UI updates.

```dart
// Connection state changes
StreamBuilder<ConnectionState>(
  stream: Upscope.instance.connectionState,
  builder: (context, snapshot) {
    final state = snapshot.data;
    return Text('Connection: ${state?.name ?? "unknown"}');
  },
);

// Session state changes
StreamBuilder<SessionState>(
  stream: Upscope.instance.sessionState,
  builder: (context, snapshot) {
    final state = snapshot.data;
    return Text('Session: ${state?.name ?? "unknown"}');
  },
);

// Short ID changes
Upscope.instance.shortId.listen((shortId) {
  print('Short ID: $shortId');
});

// Lookup code changes
Upscope.instance.lookupCode.listen((code) {
  print('Lookup code: $code');
});
```

###### Available Streams

| Stream | Type | Description |
|--------|------|-------------|
| `connectionState` | `Stream<ConnectionState>` | Connection state changes (`inactive`, `connecting`, `connected`, `reconnecting`, `error`). |
| `sessionState` | `Stream<SessionState>` | Session state changes (`inactive`, `pendingRequest`, `active`, `paused`, `ended`). |
| `shortId` | `Stream<String?>` | The visitor's short ID. |
| `lookupCode` | `Stream<String?>` | The current lookup code. |
| `onSessionStarted` | `Stream<String?>` | Emits when a session begins. The value is the agent's name, if available. |
| `onSessionEnded` | `Stream<SessionEndReason>` | Emits the reason when a session ends. |
| `onViewerJoined` | `Stream<Viewer>` | Emits when an agent starts viewing. |
| `onViewerLeft` | `Stream<String>` | Emits the viewer ID when an agent stops viewing. |
| `onViewerCountChanged` | `Stream<int>` | Emits the current count of active viewers. |
| `onCustomMessageReceived` | `Stream<CustomMessage>` | Emits custom messages received from agents. |
| `onError` | `Stream<UpscopeError>` | Emits SDK-level errors. |
| `remoteControlState` | `Stream<RemoteControlState>` | Emits when remote control state changes (`inactive`, `pendingRequest`, `active`). See [Listening for Events](https://userview.com/docs/sdk/flutter/listening-for-events.md) for details. |
| `fullDeviceSharingState` | `Stream<FullDeviceSharingState>` | Emits when full-device sharing state changes (`inactive`, `pendingRequest`, `active`). See [Listening for Events](https://userview.com/docs/sdk/flutter/listening-for-events.md) for details. |
| `onFullDeviceRequest` | `Stream<FullDeviceRequest>` | Fires when an agent requests full-device sharing and the configuration sets `customFullDeviceRequestUI: true`. Emits a `FullDeviceRequest` with `requestId` and `agentName`; respond with `respondToFullDeviceRequest`. See [Listening for Events](https://userview.com/docs/sdk/flutter/listening-for-events.md) for details. |
| `onControlRequest` | `Stream<ControlRequest>` | Fires when an agent requests remote control and the configuration sets `customControlRequestUI: true`. Emits a `ControlRequest` with `requestId` and `agentName`; respond with `respondToControlRequest`. See [Listening for Events](https://userview.com/docs/sdk/flutter/listening-for-events.md) for details. |
| `onSessionRequest` | `Stream<SessionRequest>` | Fires when an agent requests to start a session, the configuration sets `customSessionRequestUI: true`, and `requireAuthorizationForSession` is enabled. Emits a `SessionRequest` with `requestId` and `agentName`; respond with `respondToSessionRequest`. See [Listening for Events](https://userview.com/docs/sdk/flutter/listening-for-events.md) for details. |

##### Masking

Hide sensitive content from agents during screen sharing using the `UpscopeMasked` widget.

```dart
UpscopeMasked(
  child: TextField(
    decoration: InputDecoration(labelText: 'Credit Card Number'),
    obscureText: true,
  ),
)
```

The `UpscopeMasked` widget automatically tracks its child's position and replaces the region with a black rectangle in the agent's view. The user sees the real content as normal.

#### Listening for Events

Source: https://userview.com/docs/sdk/flutter/listening-for-events

The UserView Flutter SDK exposes all events as Dart `Stream`s. Subscribe to them for reactive event handling.

##### Listening for Events

```dart
import 'dart:async';
import 'package:upscopeio_flutter_sdk/upscopeio_flutter_sdk.dart';

class MyWidget extends StatefulWidget {
  const MyWidget({super.key});

  @override
  State<MyWidget> createState() => _MyWidgetState();
}

class _MyWidgetState extends State<MyWidget> {
  final List<StreamSubscription> _subscriptions = [];

  @override
  void initState() {
    super.initState();

    _subscriptions.add(
      Upscope.instance.connectionState.listen((state) {
        switch (state) {
          case ConnectionState.inactive:
            print('Inactive');
          case ConnectionState.connecting:
            print('Connecting...');
          case ConnectionState.connected:
            print('Connected');
          case ConnectionState.reconnecting:
            print('Reconnecting...');
          case ConnectionState.error:
            print('Error');
        }
      }),
    );

    _subscriptions.add(
      Upscope.instance.onSessionStarted.listen((_) {
        print('Session started');
      }),
    );

    _subscriptions.add(
      Upscope.instance.onSessionEnded.listen((reason) {
        switch (reason) {
          case SessionEndReason.userStopped:
            print('User ended session');
          case SessionEndReason.agentStopped:
            print('Agent ended session');
          case SessionEndReason.timeout:
            print('Session timed out');
          case SessionEndReason.error:
            print('Session error');
        }
      }),
    );

    _subscriptions.add(
      Upscope.instance.onCustomMessageReceived.listen((msg) {
        print('Message from ${msg.viewerId}: ${msg.message}');
      }),
    );

    _subscriptions.add(
      Upscope.instance.onError.listen((error) {
        print('Error: ${error.code} - ${error.message}');
      }),
    );

    _subscriptions.add(
      Upscope.instance.onViewerJoined.listen((viewer) {
        print('Viewer joined: ${viewer.name ?? viewer.id}');
      }),
    );

    _subscriptions.add(
      Upscope.instance.onViewerLeft.listen((viewerId) {
        print('Viewer left: $viewerId');
      }),
    );

    _subscriptions.add(
      Upscope.instance.onViewerCountChanged.listen((count) {
        print('Viewers: $count');
      }),
    );

    _subscriptions.add(
      Upscope.instance.remoteControlState.listen((state) {
        print('Remote control: ${state.name}');
      }),
    );

    _subscriptions.add(
      Upscope.instance.fullDeviceSharingState.listen((state) {
        print('Full device sharing: ${state.name}');
      }),
    );

    _subscriptions.add(
      Upscope.instance.onFullDeviceRequest.listen((request) {
        print('Full device request from ${request.agentName ?? "agent"}');
        // Only fires when the configuration sets customFullDeviceRequestUI:
        // true (otherwise the SDK proceeds directly to the system prompt).
        // accept: true proceeds to the system permission prompt; false declines
        Upscope.instance
            .respondToFullDeviceRequest(request.requestId, accept: true);
      }),
    );

    _subscriptions.add(
      Upscope.instance.onControlRequest.listen((request) {
        print('Control request from ${request.agentName ?? "agent"}');
        // Only fires when the configuration sets customControlRequestUI: true
        // (replacing the native control request prompt) and
        // requireControlRequest is enabled.
        // accept: true grants remote control; false declines
        Upscope.instance
            .respondToControlRequest(request.requestId, accept: true);
      }),
    );

    _subscriptions.add(
      Upscope.instance.onSessionRequest.listen((request) {
        print('Session request from ${request.agentName ?? "agent"}');
        // Only fires when the configuration sets customSessionRequestUI: true
        // (replacing the native authorization dialog) and authorization is
        // required.
        // accept: true starts the session; false declines
        Upscope.instance
            .respondToSessionRequest(request.requestId, accept: true);
      }),
    );
  }

  @override
  void dispose() {
    for (final sub in _subscriptions) {
      sub.cancel();
    }
    super.dispose();
  }

  @override
  Widget build(BuildContext context) {
    return const SizedBox.shrink();
  }
}
```

##### Event Reference

| Stream | Type | Description |
|--------|------|-------------|
| `connectionState` | `ConnectionState` | Connection state changed. |
| `onSessionStarted` | `String?` | A screen sharing session has started. Emits the agent's name, if available. |
| `onSessionEnded` | `SessionEndReason` | A session has ended. Reason indicates why (`userStopped`, `agentStopped`, `timeout`, or `error`). |
| `onCustomMessageReceived` | `CustomMessage` | A custom message was received from a viewer. Includes `message` and `viewerId`. |
| `onError` | `UpscopeError` | An SDK error occurred. Includes `code` and `message`. |
| `onViewerJoined` | `Viewer` | An agent started viewing the session. The `Viewer` includes `id`, `name`, and screen metrics. |
| `onViewerLeft` | `String` | An agent stopped viewing the session. Emits the viewer ID. |
| `onViewerCountChanged` | `int` | The total number of active viewers changed. |
| `remoteControlState` | `RemoteControlState` | Emits when whether an agent has remote control of the device changes (ability to tap and scroll). Enum values: `inactive`, `pendingRequest`, `active`. Independent of the session being active. |
| `fullDeviceSharingState` | `FullDeviceSharingState` | Emits when whether full-device (entire screen) sharing is running changes, as opposed to default in-app screen sharing. Enum values: `inactive`, `pendingRequest`, `active`. |
| `onFullDeviceRequest` | `FullDeviceRequest` | Fires when an agent requests full-device sharing, before the system permission prompt. Only fires when `customFullDeviceRequestUI: true` is set in the configuration — without the flag, the SDK proceeds directly to the system prompt. Emits a `FullDeviceRequest` with `requestId` and `agentName`. Respond with `Upscope.instance.respondToFullDeviceRequest(request.requestId, accept: ...)` — `true` allows (proceeds to the system prompt), `false` declines (stays in in-app mode). Without a listener that responds, full-device requests stall. |
| `onControlRequest` | `ControlRequest` | Fires when an agent requests remote control of the device. Only fires when `customControlRequestUI: true` is set in the configuration and `requireControlRequest` is enabled (note: `requireControlRequest` defaults to `false`, so control is otherwise granted without a request); the native control request prompt is not shown. Emits a `ControlRequest` with `requestId` and `agentName`. Respond with `Upscope.instance.respondToControlRequest(request.requestId, accept: ...)` — `true` grants control, `false` declines. Without a listener that responds, control requests stall. |
| `onSessionRequest` | `SessionRequest` | Fires when an agent requests to start a cobrowsing session. Only fires when `customSessionRequestUI: true` is set in the configuration and `requireAuthorizationForSession` is enabled; the native authorization dialog is not shown. Emits a `SessionRequest` with `requestId` and `agentName`. Respond with `Upscope.instance.respondToSessionRequest(request.requestId, accept: ...)` — `true` starts the session, `false` declines. Without a listener that responds, session requests stall and the session never starts. |

##### Using StreamBuilder

For reactive UI updates, use `StreamBuilder` instead of manual subscriptions:

```dart
StreamBuilder<ConnectionState>(
  stream: Upscope.instance.connectionState,
  builder: (context, snapshot) {
    if (!snapshot.hasData) return const SizedBox.shrink();
    return Text('Status: ${snapshot.data!.name}');
  },
)
```

#### Full Device Screen Sharing

Source: https://userview.com/docs/sdk/flutter/full-device-screen-sharing

By default, the UserView Flutter SDK shares only your app's screen. With full device screen sharing, agents can see the entire device screen, including other apps, the home screen, and system UI.

On **iOS** this uses Apple's Broadcast Upload Extension (ReplayKit); on **Android** it uses the MediaProjection API. Both need a little native setup, described below.

**Physical devices only:**
Full device screen sharing only works on physical devices. It is not supported on the iOS Simulator or Android emulators.

Full device screen sharing must also be **enabled in the UserView dashboard** (admin interface) in addition to the steps below. If it is disabled there, agents will not see the full device option during sessions.

##### iOS setup

Full device capture on iOS runs in a **Broadcast Upload Extension** — a separate native target in your app's Xcode project (under `ios/`). It sends frames to your app through an App Group, and the SDK relays them to the agent.

###### 1. Create the Broadcast Upload Extension target

Create the extension target **first** — the `Podfile` step below references it by name, so it must already exist in the Xcode project before you run `pod install`.

1. Open `ios/Runner.xcworkspace` in Xcode
2. Go to **File > New > Target**
3. Select **Broadcast Upload Extension**
4. **Uncheck "Include UI Extension"** — a UI extension adds a setup screen whose default handler never completes, so the broadcast would never start
5. Name it (e.g., `YourAppBroadcast`) — you'll reference this exact name in the `Podfile` next
6. Note the extension's **bundle identifier** (Xcode prefixes it with your app's, e.g. `com.yourcompany.yourapp.YourAppBroadcast`) — you'll need it in step 6

###### 2. Add the extension dependency

In your app's `ios/Podfile`, add the broadcast subspec to the **extension** target. Declare it as a **top-level target** (a sibling of `Runner`, not nested inside it). `use_frameworks!` is required so the extension's linkage matches the `Runner` target, which Flutter links as frameworks. Do not pin a version — it follows the `UpscopeSDK` version that `upscopeio_flutter_sdk` already requires:

```ruby
target 'YourAppBroadcast' do
  use_frameworks!
  pod 'UpscopeSDK/BroadcastExtension'
end
```

Then run `pod install` from the `ios/` directory.

###### 3. Configure App Groups

Both your main app (the `Runner` target) and the extension need to share data through an App Group:

1. Select the **Runner target** > Signing & Capabilities > **+ Capability** > **App Groups**
2. Add a group identifier (e.g., `group.com.yourcompany.yourapp`)
3. Select your **extension target** > Signing & Capabilities > **+ Capability** > **App Groups**
4. Add the **same** group identifier

###### 4. Configure the extension's Info.plist

Add the App Group identifier to the extension's `Info.plist`:

```xml
<key>UpscopeAppGroupId</key>
<string>group.com.yourcompany.yourapp</string>
```

###### 5. Implement the extension

Replace the contents of the extension's `SampleHandler.swift` with:

```swift
import UpscopeBroadcastExtension

class SampleHandler: UpscopeSampleHandler {}
```

All frame capture and forwarding is handled by `UpscopeSampleHandler`.

###### 6. Configure your iOS app's Info.plist

Add the App Group and extension bundle identifiers to your iOS **app's** `Info.plist` (`UpscopeAppGroupId` is the same key you added to the extension's `Info.plist` in step 4):

```xml
<key>UpscopeAppGroupId</key>
<string>group.com.yourcompany.yourapp</string>
<key>UpscopeBroadcastExtensionBundleId</key>
<string>com.yourcompany.yourapp.broadcast</string>
```

No code changes are needed — the native SDK picks these up automatically.

If the `UpscopeAppGroupId` key is missing from your app's `Info.plist`, the SDK will not advertise full device support on iOS, and agent requests for it are declined automatically.

By default, an agent's full device request goes straight to the system permission prompt. To show your own confirmation UI first, set `customFullDeviceRequestUI: true` in the configuration and **handle incoming requests** — see [Responding to full device requests](#responding-to-full-device-requests) below. With the flag set, requests stall silently unless a listener calls `respondToFullDeviceRequest`.

##### Android setup

Add the screen-capture permissions to `android/app/src/main/AndroidManifest.xml`:

```xml
<uses-permission android:name="android.permission.FOREGROUND_SERVICE" />
<uses-permission android:name="android.permission.FOREGROUND_SERVICE_MEDIA_PROJECTION" />
```

The SDK already declares the capture service and activity. It detects these permissions at runtime — if they are missing, full device screen sharing is disabled regardless of the dashboard setting. No further configuration is required; Android shows the system screen-capture permission dialog when sharing starts.

##### Responding to full device requests

By default the SDK proceeds directly to the system permission prompt when an agent requests full device sharing. To gate the request behind your own UI, set `customFullDeviceRequestUI: true` in the configuration — the SDK then routes requests to your Dart code instead. You must listen on `onFullDeviceRequest` and respond, or requests will never proceed:

```dart
final requestSub = Upscope.instance.onFullDeviceRequest.listen((request) {
  // request.agentName is the requesting agent's name, if available.
  // Optionally show your own confirmation UI here, then respond:
  Upscope.instance
      .respondToFullDeviceRequest(request.requestId, accept: true); // accept: false to decline
});

final stateSub = Upscope.instance.fullDeviceSharingState.listen((state) {
  // FullDeviceSharingState.pendingRequest / .active / .inactive
  debugPrint('Full device sharing: $state');
});

// Cancel both subscriptions in dispose().
```

After you accept, iOS shows the system broadcast picker (the user taps **Start Broadcast**) and Android shows the screen-capture dialog (the user taps **Start now**). End sharing programmatically at any time:

```dart
Upscope.instance.stopFullDeviceSharing();
```

The user can also stop sharing from iOS **Control Center** or the Android capture notification; the SDK reports this via `fullDeviceSharingState`.

##### Responding to control requests

Remote control requests follow the same pattern, but are opt-in: set `customControlRequestUI: true` in the configuration to replace the native control request prompt. The SDK then routes requests to your Dart code — listen on `onControlRequest` and respond with `respondToControlRequest`:

```dart
final controlRequestSub = Upscope.instance.onControlRequest.listen((request) {
  // request.agentName is the requesting agent's name, if available.
  // Optionally show your own confirmation UI here, then respond:
  Upscope.instance
      .respondToControlRequest(request.requestId, accept: true); // accept: false to decline
});

final controlStateSub = Upscope.instance.remoteControlState.listen((state) {
  // RemoteControlState.pendingRequest / .active / .inactive
  debugPrint('Remote control: $state');
});

// Cancel both subscriptions in dispose().
```

Revoke control at any time with `Upscope.instance.stopRemoteControl()`.

##### Limitations

- Works on **physical devices** only (not the iOS Simulator or Android emulators)
- **Element masking** is not available in full device mode (the SDK cannot inspect views outside your app)
- **Remote control** only works within your app, not on the home screen or other apps
- **Drawing annotations** are not displayed in full device mode
- The user must explicitly start the broadcast/capture via the system prompt — it cannot be started programmatically

### React Native SDK

Source: https://userview.com/docs/sdk/react-native

**Beta:**
The mobile SDKs are currently in beta. If you encounter any issues, please [contact us](mailto:team@userview.com).

The UserView React Native SDK allows you to integrate screen sharing capabilities into your React Native app. It works on both iOS and Android from a single codebase, with features for element redaction, visitor identification, and session management.

#### Requirements

- React Native 0.76.0+ (New Architecture required)
- React 18.2.0+
- iOS 14.0+
- Android API 26+ (Android 8.0)

#### Features

- **Screen sharing**: Allow agents to view your app's screen in real-time
- **Element redaction**: Hide sensitive content during screen sharing with the `UpscopeMasked` component
- **Visitor identification**: Identify users and link sessions to your CRM
- **Lookup codes**: Generate 4-digit codes for easy session joining
- **React hooks**: Reactive hooks for connection state, session state, and more

#### Installation

Source: https://userview.com/docs/sdk/react-native/installation

**Beta:**
The mobile SDKs are currently in beta. If you encounter any issues, please [contact us](mailto:team@userview.com).

##### Requirements

- React Native 0.76.0+ (New Architecture required)
- React 18.2.0+
- iOS 14.0+
- Android API 26+ (Android 8.0)

##### Installation

```bash
npm install @upscopeio/react-native-sdk
```

###### iOS Setup

The React Native SDK depends on the native `UpscopeSDK` iOS framework, which must be added via Swift Package Manager:

1. Open your iOS project in Xcode (`ios/YourApp.xcworkspace`)
2. Go to **File** > **Add Package Dependencies**
3. Enter `https://github.com/upscopeio/cobrowsing-ios.git`
4. Select the version and add to your app target

Then install the CocoaPods bridge:

```bash
cd ios && pod install
```

###### Android Setup

No additional steps required. The native Android SDK is linked automatically via Gradle.

##### Initialization

Initialize the SDK early in your app, before any components that use Upscope hooks mount:

```typescript
import Upscope from '@upscopeio/react-native-sdk';

Upscope.initialize({
  apiKey: 'YOUR_API_KEY',
  autoConnect: true,
});
```

###### Full Example

```typescript
import React, { useEffect } from 'react';
import { SafeAreaView } from 'react-native';
import Upscope from '@upscopeio/react-native-sdk';

export default function App() {
  useEffect(() => {
    Upscope.initialize({
      apiKey: 'YOUR_API_KEY',
      autoConnect: true,
    });

    Upscope.updateConnection({
      uniqueId: 'user-123',
      callName: 'John Smith',
    });
  }, []);

  return (
    <SafeAreaView>
      {/* Your app content */}
    </SafeAreaView>
  );
}
```

The SDK auto-connects by default. To disable this, set `autoConnect: false` and call `Upscope.connect()` manually when ready.

##### Public API Key

You can find your public API key in the installation page of your UserView dashboard.

##### Full Device Screen Sharing

The React Native SDK supports full device screen sharing, but it requires platform-specific setup:

- **iOS**: Requires a Broadcast Upload Extension. See the [iOS full device screen sharing guide](https://userview.com/docs/sdk/ios/full-device-screen-sharing.md).
- **Android**: Requires adding two permissions to your `AndroidManifest.xml`. See the [Android full device screen sharing guide](https://userview.com/docs/sdk/android/full-device-screen-sharing.md).

##### Lookup Code on Shake

By default, shaking the device will display the lookup code in a dialog. This can be disabled via configuration options.

#### Configuration Options

Source: https://userview.com/docs/sdk/react-native/configuration-options

You can customize the behavior of the **PRODUCT** React Native SDK through configuration options.

##### Setting Configuration

Pass options when calling `initialize()`:

```typescript
import Upscope from "@upscopeio/react-native-sdk";

Upscope.initialize({
  apiKey: "YOUR_API_KEY",
  requireAuthorizationForSession: true,
  authorizationPromptTitle: "Screen Sharing Request",
  authorizationPromptMessage:
    "Allow {%agentName%|Support} to view your screen?",
  endOfSessionMessage: "Thanks for using screen sharing!",
  translationsYes: "Allow",
  translationsNo: "Decline",
});
```

##### Configuration Options

Each option resolves in this order: a value you pass here overrides the matching dashboard setting, which overrides the SDK's built-in default (shown in the **Default** column).

###### Session Authorization

| Option                           | Type      | Default                           | Description                                                         |
| -------------------------------- | --------- | --------------------------------- | ------------------------------------------------------------------- |
| `requireAuthorizationForSession` | `boolean` | `true`                            | Require user permission before screen sharing starts. Resolved from the value set here, else the team's dashboard setting, else `true`. When it resolves `false`, sessions start silently: no prompt is shown and no `sessionRequest` event fires, even with `customSessionRequestUI` enabled. |
| `authorizationPromptTitle`       | `string`  | (Set through the admin interface) | Custom title for the authorization dialog.                          |
| `authorizationPromptMessage`     | `string`  | (Set through the admin interface) | Custom message for the authorization dialog. Supports placeholders. |
| `customSessionRequestUI`         | `boolean` | `false`                           | Replace the native authorization dialog with your own UI. When `true`, the SDK emits a `sessionRequest` event instead of showing the native dialog; you must subscribe and call `respondToSessionRequest`, otherwise session requests stall. This only changes how the authorization prompt is presented, not whether it happens: if `requireAuthorizationForSession` resolves `false`, sessions start with no prompt and no event. Apps that need the event to always fire should also set `requireAuthorizationForSession: true`. See [Listening for Events](https://userview.com/docs/sdk/react-native/listening-for-events.md). |

###### Message Placeholders

The `authorizationPromptMessage` supports these placeholders:

- `{%agentName%|fallback}` - Agent's name with a fallback if unavailable
- `{%currentDomain%}` - App name

Example:

```typescript
authorizationPromptMessage: '{%agentName%|Our support team} would like to view your screen',
```

###### UI Display

| Option                | Type      | Default                           | Description                                                    |
| --------------------- | --------- | --------------------------------- | -------------------------------------------------------------- |
| `showTerminateButton` | `boolean` | (Set through the admin interface) | Show a button in the banner to end the screen sharing session. |
| `showUpscopeLink`     | `boolean` | `true`                            | Show the UserView link to the user. Setting this to `false` only works if whitelabeling is included in your plan. |
| `endOfSessionMessage` | `string`  | (Set through the admin interface) | Message displayed when the session ends.                       |
| `stopSessionText`     | `string`  | (Set through the admin interface) | Custom text for the stop session button.                       |

###### Remote Control

| Option                  | Type      | Default                           | Description                                               |
| ----------------------- | --------- | --------------------------------- | --------------------------------------------------------- |
| `allowRemoteClick`      | `boolean` | `true`                            | Allow agents to remotely tap on the screen.               |
| `allowRemoteScroll`     | `boolean` | `true`                            | Allow agents to remotely scroll the screen.               |
| `requireControlRequest` | `boolean` | `false` | Require user approval before agents can use remote input. Resolved from the value set here, else the team's dashboard setting, else `false`. When it resolves `false`, remote input is granted without a separate control request — no prompt and no `controlRequest` event, even with `customControlRequestUI` enabled. |
| `controlRequestTitle`   | `string`  | (Set through the admin interface) | Custom title for the control request prompt.              |
| `controlRequestMessage` | `string`  | (Set through the admin interface) | Custom message for the control request prompt.            |
| `customControlRequestUI` | `boolean` | `false`                          | Replace the native control request prompt with your own UI. When `true`, the SDK emits a `controlRequest` event instead of showing the native prompt; you must subscribe and call `respondToControlRequest`, otherwise control requests stall. This only changes how the control prompt is presented, not whether it happens: the event fires only when `requireControlRequest` resolves `true`. See [Listening for Events](https://userview.com/docs/sdk/react-native/listening-for-events.md). |

###### Lookup Code

| Option                    | Type      | Default                           | Description                                                            |
| ------------------------- | --------- | --------------------------------- | ---------------------------------------------------------------------- |
| `enableLookupCodeOnShake` | `boolean` | (Set through the admin interface) | Show lookup code popup when device is shaken.                          |
| `lookupCodeKeyTitle`      | `string`  | (Set through the admin interface) | Custom title for the shake detection alert.                            |
| `lookupCodeKeyMessage`    | `string`  | (Set through the admin interface) | Custom message for shake alert. Supports `{%lookupCode%}` placeholder. |

###### Localization Strings

| Option            | Type     | Description                                             |
| ----------------- | -------- | ------------------------------------------------------- |
| `translationsYes` | `string` | Custom text for "Allow" button in authorization prompt. |
| `translationsNo`  | `string` | Custom text for "Deny" button in authorization prompt.  |
| `translationsOk`  | `string` | Custom text for "OK" button.                            |

###### Multi-Language Translations

Every text option (titles, messages, and the strings above) also accepts an object keyed by language code instead of a single string. The translation matching the device language is shown, falling back to `en` if the device language isn't included:

```typescript
translationsYes: { en: "Yes", it: "Si" },
translationsNo: { en: "No", it: "No" },
```

All of these can also be configured per language through the dashboard.

###### Full-Device Screen Sharing (iOS)

| Option                          | Type     | Description                                                                                              |
| ------------------------------- | -------- | -------------------------------------------------------------------------------------------------------- |
| `allowFullScreen`               | `boolean` | iOS and Android — allow agents to request full device screen sharing during sessions. Also requires the setup described in [Full Device Screen Sharing](https://userview.com/docs/sdk/react-native/full-device-screen-sharing.md). Default: set through the admin interface. |
| `disableFullScreenWhenMasked`   | `boolean` | When `true`, full-device sharing is declined while masked content is on screen. Set `false` to allow it even with masked content present. Default: set through the admin interface. |
| `customFullDeviceRequestUI`     | `boolean` | iOS and Android — gate full-device requests behind your own UI. When `true`, the SDK emits a `fullDeviceRequest` event instead of proceeding directly to the system permission prompt; you must subscribe and call `respondToFullDeviceRequest`, otherwise requests stall. Default `false` = straight to the system prompt. See [Listening for Events](https://userview.com/docs/sdk/react-native/listening-for-events.md). |

###### System Options

| Option        | Type      | Description                                                                                 |
| ------------- | --------- | ------------------------------------------------------------------------------------------- |
| `autoConnect` | `boolean` | Automatically connect on initialization. Default: `true` (set through the admin interface). |
| `region`      | `string`  | Server region for connections.                                                              |
| `onPremiseBaseEndpoint` | `string` | The base endpoint of your [on-premise deployment](https://userview.com/docs/setup/on-premise.md) (your instance's `BASE_ENDPOINT`), e.g. `"https://cobrowsing.acmetech.com"`. When set, the SDK connects to your instance instead of the cloud servers, and `region` is ignored. |

##### Full Example

```typescript
Upscope.initialize({
  apiKey: "YOUR_API_KEY",
  autoConnect: true,
  requireAuthorizationForSession: true,
  authorizationPromptTitle: "Screen Share",
  authorizationPromptMessage: "{%agentName%|Support} wants to help you",
  showTerminateButton: true,
  endOfSessionMessage: "Session ended. Thank you!",
  stopSessionText: "End Session",
  allowRemoteClick: true,
  allowRemoteScroll: true,
  enableLookupCodeOnShake: true,
  lookupCodeKeyTitle: "Your Code",
  lookupCodeKeyMessage: "Share this code: {%lookupCode%}",
  translationsYes: "Yes, share",
  translationsNo: "No thanks",
  translationsOk: "Got it",
  region: "us-east",
});
```

#### SDK Functions

Source: https://userview.com/docs/sdk/react-native/sdk-functions

Here's a list of all the functions and hooks supported by the UserView React Native SDK.

##### Imperative API

All methods are accessed through the default `Upscope` import or the `useUpscope()` hook.

```typescript
import Upscope from '@upscopeio/react-native-sdk';
```

###### Connection Management

| Function | Description |
|----------|-------------|
| `connect()` | Establishes a WebSocket connection to the servers. |
| `disconnect()` | Closes the connection and ends any active session. |
| `reset(reconnect?: boolean)` | Resets the connection, clearing all stored identities and visitor data. Pass `false` to stay disconnected after reset. Defaults to `true`. |

###### Session Control

| Function | Description |
|----------|-------------|
| `stopSession()` | Ends the current screen sharing session. |
| `requestAgent()` | Signals that the visitor wants assistance from an agent. |
| `cancelAgentRequest()` | Cancels a pending agent request. |
| `getLookupCode()` | Requests a 4-digit lookup code from the server. Access the code via the `useLookupCode()` hook or `lookupCodeChanged` event. |
| `sendCustomMessage(message: string)` | Sends a custom text or JSON message to the agent (max 5000 characters). |
| `stopRemoteControl()` | Revokes the agent's remote control of the device. The session continues; only the agent's ability to interact stops. Safe no-op if no agent has control. |
| `stopFullDeviceSharing()` | Stops full-device screen sharing and reverts to in-app screen sharing. Safe no-op if not active. |
| `respondToSessionRequest(requestId: string, accept: boolean)` | Responds to a `sessionRequest` event. Pass `true` to start the cobrowsing session or `false` to decline. |
| `respondToControlRequest(requestId: string, accept: boolean)` | Responds to a `controlRequest` event. Pass `true` to grant the agent remote control of the device or `false` to decline. |
| `respondToFullDeviceRequest(requestId: string, accept: boolean)` | Responds to a `fullDeviceRequest` event. Pass `true` to allow full-device sharing (proceeds to the system permission prompt) or `false` to decline. |

###### State

| Function | Return Type | Description |
|----------|-------------|-------------|
| `getShortId()` | `Promise<string \| null>` | The visitor's unique short ID assigned by the server. |
| `getWatchLink()` | `Promise<string \| null>` | The full URL where agents can view the session (`https://upscope.com/w/{shortId}`). |

###### Visitor Identification

Use `updateConnection()` to set or update visitor identity:

```typescript
Upscope.updateConnection({
  uniqueId: 'user-123',
  callName: 'John Smith',
  tags: ['#VIP'],
  identities: ['John Smith', 'john@example.com'],
  metadata: { plan: 'enterprise', region: 'US' },
});
```

Only provided fields are updated. Omit a field to keep its existing value.

##### React Hooks

All hooks are reactive — components re-render automatically when the underlying state changes.

```typescript
import {
  useConnectionState,
  useSessionState,
  useShortId,
  useLookupCode,
  useRemoteControlState,
  useFullDeviceSharingState,
  useUpscope,
} from '@upscopeio/react-native-sdk';
```

###### `useConnectionState()`

Returns the current connection state.

```typescript
const connectionState = useConnectionState();
// "inactive" | "connecting" | "connected" | "reconnecting" | "error"
```

###### `useSessionState()`

Returns the current session state.

```typescript
const sessionState = useSessionState();
// "inactive" | "pendingRequest" | "active" | "paused" | "ended"
```

###### `useShortId()`

Returns the visitor's short ID, or `null` if not yet assigned.

```typescript
const shortId = useShortId();
```

###### `useLookupCode()`

Returns the current lookup code, or `null` if not yet generated.

```typescript
const lookupCode = useLookupCode();
```

###### `useRemoteControlState()`

Returns whether an agent currently has remote control of the device.

```typescript
const remoteControlState = useRemoteControlState();
// "inactive" | "pendingRequest" | "active"
```

###### `useFullDeviceSharingState()`

Returns whether full-device screen sharing is currently running.

```typescript
const fullDeviceSharingState = useFullDeviceSharingState();
// "inactive" | "pendingRequest" | "active"
```

###### `useUpscope()`

Returns a stable object of imperative action methods. Safe to use as a dependency in `useCallback` / `useEffect`.

```typescript
const {
  connect,
  disconnect,
  stopSession,
  requestAgent,
  cancelAgentRequest,
  sendCustomMessage,
  getLookupCode,
  reset,
  stopRemoteControl,
  stopFullDeviceSharing,
  respondToSessionRequest,
  respondToControlRequest,
  respondToFullDeviceRequest,
} = useUpscope();
```

##### Masking

Hide sensitive content from agents during screen sharing using the `UpscopeMasked` component.

```tsx
import { UpscopeMasked } from '@upscopeio/react-native-sdk';

<UpscopeMasked>
  <TextInput secureTextEntry placeholder="Credit Card Number" />
</UpscopeMasked>
```

`UpscopeMasked` accepts all standard `View` props and replaces the wrapped region with a black rectangle in the agent's view. The user sees the real content as normal.

#### Listening for Events

Source: https://userview.com/docs/sdk/react-native/listening-for-events

You can listen for SDK events using `Upscope.addListener()`. Always remove subscriptions on cleanup to avoid memory leaks.

```typescript
import Upscope from '@upscopeio/react-native-sdk';
```

##### Listening for Events

```typescript
import React, { useEffect } from 'react';
import Upscope from '@upscopeio/react-native-sdk';

function MyComponent() {
  useEffect(() => {
    const subs = [
      Upscope.addListener('connectionStateChanged', ({ state, error }) => {
        switch (state) {
          case 'inactive':
            console.log('Inactive');
            break;
          case 'connecting':
            console.log('Connecting...');
            break;
          case 'connected':
            console.log('Connected');
            break;
          case 'reconnecting':
            console.log('Reconnecting...');
            break;
          case 'error':
            console.log('Error:', error?.message);
            break;
        }
      }),

      Upscope.addListener('sessionStarted', ({ agentName }) => {
        console.log(`Session started with ${agentName ?? 'an agent'}`);
      }),

      Upscope.addListener('sessionEnded', ({ reason, error }) => {
        switch (reason) {
          case 'userStopped':
            console.log('User ended session');
            break;
          case 'agentStopped':
            console.log('Agent ended session');
            break;
          case 'timeout':
            console.log('Session timed out');
            break;
          case 'error':
            console.log('Session error:', error?.message);
            break;
        }
      }),

      Upscope.addListener('customMessageReceived', ({ message, viewerId }) => {
        console.log(`Message from ${viewerId}: ${message}`);
      }),

      Upscope.addListener('error', ({ code, message }) => {
        console.log(`Error: ${code} - ${message}`);
      }),

      Upscope.addListener('viewerJoined', (viewer) => {
        console.log(`Viewer joined: ${viewer.name ?? viewer.id}`);
      }),

      Upscope.addListener('viewerLeft', ({ viewerId }) => {
        console.log(`Viewer left: ${viewerId}`);
      }),

      Upscope.addListener('viewerCountChanged', ({ count }) => {
        console.log(`Viewers: ${count}`);
      }),

      Upscope.addListener('remoteControlStateChanged', ({ state }) => {
        console.log(`Remote control: ${state}`);
      }),

      Upscope.addListener('fullDeviceSharingStateChanged', ({ state }) => {
        console.log(`Full-device sharing: ${state}`);
      }),

      Upscope.addListener('sessionRequest', ({ requestId, agentName }) => {
        // An agent is requesting to start a cobrowsing session. Only fires
        // when the config sets customSessionRequestUI: true (replacing the
        // native authorization dialog) and authorization is required.
        // Pass true to start the session, false to decline.
        const userAllowsSession = true;
        console.log(`${agentName ?? 'An agent'} requested a session`);
        Upscope.respondToSessionRequest(requestId, userAllowsSession);
      }),

      Upscope.addListener('controlRequest', ({ requestId, agentName }) => {
        // An agent is requesting remote control of the device. Only fires
        // when the config sets customControlRequestUI: true (replacing the
        // native control request prompt) and requireControlRequest is
        // enabled.
        // Pass true to grant control, false to decline.
        const userGrantsControl = true;
        console.log(`${agentName ?? 'An agent'} requested remote control`);
        Upscope.respondToControlRequest(requestId, userGrantsControl);
      }),

      Upscope.addListener('fullDeviceRequest', ({ requestId, agentName }) => {
        // Only fires when the config sets customFullDeviceRequestUI: true
        // (otherwise the SDK proceeds directly to the system prompt).
        // Pass true to proceed to the prompt, false to stay in in-app mode.
        const userWantsFullDevice = true;
        console.log(`${agentName ?? 'An agent'} requested full-device sharing`);
        Upscope.respondToFullDeviceRequest(requestId, userWantsFullDevice);
      }),
    ];

    return () => subs.forEach((sub) => sub.remove());
  }, []);

  return null;
}
```

##### Event Reference

| Event | Payload | Description |
|-------|---------|-------------|
| `connectionStateChanged` | `{ state, error? }` | Called when the connection state changes. `error` is present when `state` is `"error"`. |
| `sessionStarted` | `{ agentName }` | A screen sharing session has started. `agentName` is the agent's display name if available. |
| `sessionEnded` | `{ reason, error? }` | A session has ended. `reason` indicates why (`userStopped`, `agentStopped`, `timeout`, or `error`). |
| `customMessageReceived` | `{ message, viewerId }` | A custom message was received from a viewer. |
| `error` | `{ code, message }` | An SDK error occurred. |
| `viewerJoined` | `Viewer` | A viewer/agent joined the session. The `Viewer` includes `id`, `name`, screen dimensions, and focus state. |
| `viewerLeft` | `{ viewerId }` | A viewer/agent left the session. |
| `viewerCountChanged` | `{ count }` | The total number of active viewers changed. |
| `remoteControlStateChanged` | `{ state }` | Whether an agent currently has remote control of the device (ability to tap and scroll) changed. `state` is `'inactive' \| 'pendingRequest' \| 'active'`. Independent of the session being active. |
| `fullDeviceSharingStateChanged` | `{ state }` | Whether full-device (entire screen) sharing is currently running changed, as opposed to default in-app screen sharing. `state` is `'inactive' \| 'pendingRequest' \| 'active'`. |
| `sessionRequest` | `{ requestId, agentName }` | An agent requested to start a cobrowsing session. Only fires when `customSessionRequestUI: true` is set in the config and `requireAuthorizationForSession` is enabled; the native authorization dialog is not shown. `agentName` is the agent's display name if available, otherwise `null`. Respond with `Upscope.respondToSessionRequest(requestId, accept)` to start or decline the session — without a listener that responds, session requests stall and the session never starts. |
| `controlRequest` | `{ requestId, agentName }` | An agent requested remote control of the device. Only fires when `customControlRequestUI: true` is set in the config and `requireControlRequest` is enabled (note: `requireControlRequest` defaults to `false`, so control is otherwise granted without a request); the native control request prompt is not shown. `agentName` is the agent's display name if available, otherwise `null`. Respond with `Upscope.respondToControlRequest(requestId, accept)` to grant or decline control — without a listener that responds, control requests stall. |
| `fullDeviceRequest` | `{ requestId, agentName }` | An agent requested full-device screen sharing, before the system permission prompt appears. Only fires when `customFullDeviceRequestUI: true` is set in the config — without the flag, the SDK proceeds directly to the system prompt. `agentName` is the agent's display name if available, otherwise `null`. Respond with `Upscope.respondToFullDeviceRequest(requestId, accept)` to allow (continues to the system prompt) or decline (stays in in-app mode) — without a listener that responds, full-device requests stall. |
| `shortIdChanged` | `{ shortId }` | The visitor's short ID was assigned or changed. |
| `lookupCodeChanged` | `{ lookupCode }` | The lookup code was issued or changed. |

##### Using Hooks Instead

For most use cases, the reactive hooks are simpler than manual event subscriptions. See [SDK Functions](https://userview.com/docs/sdk/react-native/sdk-functions.md) for details on `useConnectionState()`, `useSessionState()`, and other hooks.

#### Full Device Screen Sharing

Source: https://userview.com/docs/sdk/react-native/full-device-screen-sharing

By default, the UserView React Native SDK shares only your app's screen. With full device screen sharing, agents can see the entire device screen, including other apps, the home screen, and system UI.

On **iOS** this uses Apple's Broadcast Upload Extension (ReplayKit); on **Android** it uses the MediaProjection API. Both need a little native setup, described below.

**Physical devices only:**
Full device screen sharing only works on physical devices. It is not supported on the iOS Simulator or Android emulators.

Full device screen sharing must also be **enabled in the UserView dashboard** (admin interface) in addition to the steps below. If it is disabled there, agents will not see the full device option during sessions.

##### iOS setup

Full device capture on iOS runs in a **Broadcast Upload Extension** — a separate native target in your app's Xcode project (under `ios/`). It sends frames to your app through an App Group, and the SDK relays them to the agent.

###### 1. Create the Broadcast Upload Extension target

Create the extension target **first** — the `Podfile` step below references it by name, so it must already exist in the Xcode project before you run `pod install`.

1. Open `ios/YourApp.xcworkspace` in Xcode
2. Go to **File > New > Target**
3. Select **Broadcast Upload Extension**
4. **Uncheck "Include UI Extension"** — a UI extension adds a setup screen whose default handler never completes, so the broadcast would never start
5. Name it (e.g., `YourAppBroadcast`) — you'll reference this exact name in the `Podfile` next
6. Note the extension's **bundle identifier** (Xcode prefixes it with your app's, e.g. `com.yourcompany.yourapp.YourAppBroadcast`) — you'll need it in step 6

###### 2. Add the extension dependency

In your app's `ios/Podfile`, add the broadcast subspec to the **extension** target, declared as a **top-level target** (not nested inside your app target). Do not pin a version — it follows the `UpscopeSDK` version that `@upscopeio/react-native-sdk` already requires:

```ruby
target 'YourAppBroadcast' do
  pod 'UpscopeSDK/BroadcastExtension'
end
```

If your app's targets are configured with `use_frameworks!`, add it to this target too so the extension's linkage matches its host. Then run `pod install` from the `ios/` directory.

###### 3. Configure App Groups

Both your main app and the extension need to share data through an App Group:

1. Select your **main app target** > Signing & Capabilities > **+ Capability** > **App Groups**
2. Add a group identifier (e.g., `group.com.yourcompany.yourapp`)
3. Select your **extension target** > Signing & Capabilities > **+ Capability** > **App Groups**
4. Add the **same** group identifier

###### 4. Configure the extension's Info.plist

Add the App Group identifier to the extension's `Info.plist`:

```xml
<key>UpscopeAppGroupId</key>
<string>group.com.yourcompany.yourapp</string>
```

###### 5. Implement the extension

Replace the contents of the extension's `SampleHandler.swift` with:

```swift
import UpscopeBroadcastExtension

class SampleHandler: UpscopeSampleHandler {}
```

All frame capture and forwarding is handled by `UpscopeSampleHandler`.

###### 6. Configure your iOS app's Info.plist

Add the App Group and extension bundle identifiers to your iOS **app's** `Info.plist` (`UpscopeAppGroupId` is the same key you added to the extension's `Info.plist` in step 4):

```xml
<key>UpscopeAppGroupId</key>
<string>group.com.yourcompany.yourapp</string>
<key>UpscopeBroadcastExtensionBundleId</key>
<string>com.yourcompany.yourapp.broadcast</string>
```

No code changes are needed — the native SDK picks these up automatically.

If the `UpscopeAppGroupId` key is missing from your app's `Info.plist`, the SDK will not advertise full device support on iOS, and agent requests for it are declined automatically.

By default, an agent's full device request goes straight to the system permission prompt. To show your own confirmation UI first, set `customFullDeviceRequestUI: true` in the config and **handle incoming requests** — see [Responding to full device requests](#responding-to-full-device-requests) below. With the flag set, requests stall silently unless a listener calls `respondToFullDeviceRequest`.

##### Android setup

Add the screen-capture permissions to `android/app/src/main/AndroidManifest.xml`:

```xml
<uses-permission android:name="android.permission.FOREGROUND_SERVICE" />
<uses-permission android:name="android.permission.FOREGROUND_SERVICE_MEDIA_PROJECTION" />
```

The SDK already declares the capture service and activity. It detects these permissions at runtime — if they are missing, full device screen sharing is disabled regardless of the dashboard setting. No further configuration is required; Android shows the system screen-capture permission dialog when sharing starts.

##### Responding to full device requests

By default the SDK proceeds directly to the system permission prompt when an agent requests full device sharing. To gate the request behind your own UI, set `customFullDeviceRequestUI: true` in the config — the SDK then routes requests to your JavaScript code instead. You must listen for `fullDeviceRequest` and respond, or requests will never proceed:

```typescript
import { useEffect } from 'react';
import Upscope from '@upscopeio/react-native-sdk';

useEffect(() => {
  const subs = [
    Upscope.addListener('fullDeviceRequest', ({ requestId, agentName }) => {
      // Optionally show your own confirmation UI here (agentName is the
      // requesting agent's display name, or null), then respond:
      Upscope.respondToFullDeviceRequest(requestId, true); // false to decline
    }),

    Upscope.addListener('fullDeviceSharingStateChanged', ({ state }) => {
      console.log('Full device sharing:', state); // 'active' | 'pendingRequest' | 'inactive'
    }),
  ];

  return () => subs.forEach((s) => s.remove());
}, []);
```

After you accept, iOS shows the system broadcast picker (the user taps **Start Broadcast**) and Android shows the screen-capture dialog (the user taps **Start now**). End sharing programmatically at any time:

```typescript
Upscope.stopFullDeviceSharing();
```

The user can also stop sharing from iOS **Control Center** or the Android capture notification; the SDK reports this via `fullDeviceSharingStateChanged`.

##### Responding to control requests

Remote control requests follow the same pattern, but are opt-in: set `customControlRequestUI: true` in the config to replace the native control request prompt. The SDK then emits `controlRequest` instead of showing the prompt; respond with `respondToControlRequest` to grant or decline:

```typescript
import { useEffect } from 'react';
import Upscope from '@upscopeio/react-native-sdk';

useEffect(() => {
  const subs = [
    Upscope.addListener('controlRequest', ({ requestId, agentName }) => {
      // Optionally show your own confirmation UI here (agentName is the
      // requesting agent's display name, or null), then respond:
      Upscope.respondToControlRequest(requestId, true); // false to decline
    }),

    Upscope.addListener('remoteControlStateChanged', ({ state }) => {
      console.log('Remote control:', state); // 'active' | 'pendingRequest' | 'inactive'
    }),
  ];

  return () => subs.forEach((s) => s.remove());
}, []);
```

Revoke control programmatically at any time with `Upscope.stopRemoteControl()`; the session continues and only the agent's ability to interact stops.

##### Limitations

- Works on **physical devices** only (not the iOS Simulator or Android emulators)
- **Element masking** is not available in full device mode (the SDK cannot inspect views outside your app)
- **Remote control** only works within your app, not on the home screen or other apps
- **Drawing annotations** are not displayed in full device mode
- The user must explicitly start the broadcast/capture via the system prompt — it cannot be started programmatically

### Element Masking

Source: https://userview.com/docs/sdk/element-masking

UserView allows you to mask certain elements from the Agent. When you do this, not only will the content of the masked elements be hidden from the Agent, but it will also not go through our servers.

**Javascript:**

The easiest way to mask an element is to add its CSS selector to the dashboard `Settings` » `Co-browsing`.

For example, if you want to hide an element with the id `secret-code`, you'd add `#secret-code` to the settings.

You can also mask elements by adding the `no-upscope` CSS class to them.

**Javascript (React):**

You can use the `Masked` and `NoRemoteControl` components from our React SDK to mask parts of the page.

```javascript
import { Masked } from "@upscopeio/react";

function YourComponent() {
  return (
    <div>
      <label>Your SSN</label>
      <Masked>
        <input type="text" />
      </Masked>
    </div>
  )
}
```

**iOS:**

##### UIKit

Call `addMaskedView(_:)` on the `Upscope` singleton to hide a view during screen sharing:

```swift
import UpscopeIO

class SensitiveViewController: UIViewController {
    @IBOutlet weak var ssnField: UITextField!
    @IBOutlet weak var creditCardField: UITextField!

    override func viewDidLoad() {
        super.viewDidLoad()

        Upscope.shared.addMaskedView(ssnField)
        Upscope.shared.addMaskedView(creditCardField)
    }
}
```

To remove masking:

```swift
Upscope.shared.removeMaskedView(ssnField)
```

##### Automatic Secure Field Masking

The SDK automatically masks secure text fields (like password fields) by default. To disable this:

```swift
Upscope.shared.maskSecureTextFields = false
```

##### WebView Selective Redaction

Elements inside a `WKWebView` are redacted by CSS selector, without masking the entire WebView. This works the same way as on the web: add the selectors to the dashboard **Masked elements** setting (or the `webviewMaskedElements` initialization option) and matching elements are masked in every WebView automatically — no per-WebView code.

To redact selectors specific to one screen, in addition to the configured ones:

```swift
Upscope.shared.redactWebView(webView, selectors: ["#ssn", ".credit-card"])
```

Elements matching the selectors, plus any element with the `no-upscope` class, are masked during capture. While the page is loading, navigating, or being scrolled (any moment the SDK cannot trust the element positions), the entire WebView is masked instead (fail-closed).

Requirements: JavaScript must be enabled on the WebView (`defaultWebpagePreferences.allowsContentJavaScript`). If it is disabled, the whole WebView stays masked and a warning is logged (invalid selectors log an error). Unlike Android, there is no minimum WebView version to consider — `WKWebView` always supports document-start scripts.

Selectors are matched in the WebView's top frame only. Elements inside an iframe are never redacted, same-origin or not, so use `addMaskedView` on the WebView if an iframe can show sensitive content.

Enrolling a WebView whose page is already loaded starts selective redaction immediately, because the message-handler bridge is available to the page as soon as it is added. (On Android, enrollment takes effect on the next page load.)

Selectors configured in the team dashboard (the same Masked elements setting the web SDK uses) and the `webviewMaskedElements` initialization option are merged with the selectors passed to `redactWebView`; a locally configured list never disables dashboard masking. An invalid selector in the dashboard masks every WebView entirely (fail closed) and logs an error, so validate selectors after editing them.

To keep the SDK out of a particular WebView — one showing third-party content, for example — opt it out:

```swift
Upscope.shared.stopRedactingWebView(webView)
```

An opted-out WebView is not redacted and is not picked up again by the configured selectors, so **its content is visible to the agent**. To hide it entirely instead, mask the view itself with `Upscope.shared.addMaskedView(webView)`. Call `redactWebView` to opt it back into selective redaction.

Note: on web, masking happens at the DOM level, so masked content never leaves the device. On mobile, the SDK masks pixels after capture, before transmission.

**Android:**

##### View-Based (XML Layouts)

Call `addMaskedView()` on the `Upscope` object to hide a view during screen sharing:

```kotlin
import io.upscope.sdk.Upscope

class SensitiveActivity : AppCompatActivity() {
    override fun onCreate(savedInstanceState: Bundle?) {
        super.onCreate(savedInstanceState)
        setContentView(R.layout.activity_sensitive)

        val ssnField = findViewById<EditText>(R.id.ssn_field)
        val creditCardField = findViewById<EditText>(R.id.credit_card_field)

        Upscope.addMaskedView(ssnField)
        Upscope.addMaskedView(creditCardField)
    }
}
```

To remove masking:

```kotlin
Upscope.removeMaskedView(ssnField)
```

##### Automatic Secure Input Masking

The SDK automatically masks secure input fields (like password fields) by default. To disable this:

```kotlin
Upscope.maskSecureInputs = false
```

##### WebView Selective Redaction

Redact specific elements inside a `WebView` by CSS selector, without masking the entire WebView:

```kotlin
Upscope.redactWebView(webView, listOf("#ssn", ".card-number"))
```

Elements matching the selectors, plus any element with the `no-upscope` class, are masked during capture. While the page is loading, navigating, or being scrolled (any moment the SDK cannot trust the element positions), the entire WebView is masked instead (fail-closed).

Requirements: JavaScript must be enabled on the WebView, and the device's WebView must support document-start scripts (WebView 89+). If either is missing, the whole WebView stays masked and a warning is logged (invalid selectors log an error).

Selectors are matched in the WebView's top frame only. Elements inside an iframe are never redacted, same-origin or not, so use `addMaskedView` on the WebView if an iframe can show sensitive content.

Enrolling a WebView that has already loaded a page masks the whole WebView until its next navigation, when selective redaction begins. Call `redactWebView` before `loadUrl` to have it apply from the first page.

Selectors configured in the team dashboard (the same Masked elements setting the web SDK uses) and the `webviewMaskedElements` initialization option are merged with the selectors passed to `redactWebView`; a locally configured list never disables dashboard masking. Calling `Upscope.redactWebView(webView)` with no selectors enrolls the WebView with those configured selectors alone. An invalid selector in the dashboard masks every enrolled WebView entirely (fail closed) and logs an error, so validate selectors after editing them.

To stop redacting:

```kotlin
Upscope.stopRedactingWebView(webView)
```

Call this before destroying the `WebView`, so the SDK can release its reference to it.

Note: on web, masking happens at the DOM level, so masked content never leaves the device. On mobile, the SDK masks pixels after capture, before transmission.

#### Default Masking (Web Only)

On web, UserView will automatically mask password fields and fields that contain what looks like credit card numbers. On iOS and Android, you need to explicitly mark sensitive fields for redaction.

#### Masking Inputs or Elements

On web, you can mask either form inputs or whole HTML elements. When you mask an input, the Agent will see the value of it transformed into asterisks. This way, they can see if the Visitor is typing, but not what they are typing.

When you mask any other element, nothing contained in it will show up on the Agent side. The element will be turned into a gray box.

On mobile (iOS/Android), masked views are replaced with black rectangles that hide the content completely. Secure text fields (password fields) are masked automatically by default.

**Inline Elements (Web):**
On web, you can only mask elements that have the `display` CSS property set to `block`. This is because inline elements don't have a fixed size and could span multiple lines.

#### Agent Control

The Agent will be unable to control anything that is masked. This means they can't type for a Visitor on a masked field or click on a masked button.

You can further restrict which fields are not masked but the Agent should not be able to control in your `Settings` » `Teams` » `Co-browsing`.

### Identifying the Visitor

Source: https://userview.com/docs/sdk/identifying-the-visitor

You'll need to identify users in order to search for them on the UserView application.

Here you can see you're able to search using Jack's email address, this is because the identity has been passed through UserView's code.

![UserView Screenshot](https://cms-cdn.userview.com/www/docs/assets/screenshot-2025-02-11-at-17.36.29.png)

If you'd like to see customer data (email address, name, unique id, etc.) on [UserView](https://userview.com/), there may be some additional steps. If you use Intercom and Zendesk, we try to use their API to automatically display it for you, but if you don't, you'll only be able to see IP addresses.

#### Identifying Visitors on UserView

There are several ways to identify the visitor on UserView.

#### Providing Identity Information

**Javascript:**

You can provide identity information when initializing the SDK or update it later.

##### At Initialization

Provide the details with the `Upscope('init');` function if you have them from your backend:

```javascript
// Rest of the installation code...
Upscope('init', {
  identities: ['John Smith', 'acme.com'],
  uniqueId: '00032'
});
```

##### After Initialization (SPA)

Call `Upscope('init');` first, then provide the identity information with `Upscope('updateConnection');`:

```javascript
// Rest of the installation code...
Upscope('init');

// getVisitorInfo is a made up function you might have in your code
getVisitorInfo().then(visitor => {
  Upscope('updateConnection', {
    identities: [visitor.name],
    uniqueId: visitor.id
  });
});
```

**Javascript (React):**

##### With UpscopeProvider Props

Pass identity information directly to the `UpscopeProvider`:

```javascript
import { UpscopeProvider } from '@upscopeio/react';

<UpscopeProvider
  apiKey="<public_api_key>"
  enabled={true}
  uniqueId={user.id}
  identities={[user.name, user.email]}
>
  {/* Your application code here */}
</UpscopeProvider>
```

##### With the useUpscope Hook

Update identity information dynamically using the hook:

```javascript
import { useUpscope } from '@upscopeio/react';

function UserProfile() {
  const { Upscope } = useUpscope();

  useEffect(() => {
    if (user) {
      Upscope('updateConnection', {
        identities: [user.name],
        uniqueId: user.id
      });
    }
  }, [user]);

  return <div>{/* ... */}</div>;
}
```

**iOS:**

##### At Initialization

Provide identity information when initializing the SDK:

```swift
let config = UpscopeConfiguration(apiKey: "YOUR_API_KEY")
try Upscope.shared.initialize(with: config)

Upscope.shared.uniqueId = "user-123"
Upscope.shared.identities = ["John Smith", "john@example.com"]
```

##### After Initialization

Update identity information using `updateConnection()`:

```swift
// After user logs in
Upscope.shared.updateConnection(
    uniqueId: "user-123",
    identities: ["John Smith", "john@example.com"],
    metadata: ["plan": "enterprise"]
)
```

##### Clearing Identity

To clear identity on logout:

```swift
Upscope.shared.reset()
```

**Android:**

##### At Initialization

Provide identity information when initializing the SDK:

```kotlin
val config = UpscopeConfiguration.Builder("YOUR_API_KEY").build()
Upscope.initialize(this, config)

Upscope.uniqueId = "user-123"
Upscope.identities = listOf("John Smith", "john@example.com")
```

##### After Initialization

Update identity information using `updateConnection()`:

```kotlin
// After user logs in
Upscope.updateConnection(
    uniqueId = "user-123",
    identities = listOf("John Smith", "john@example.com"),
    metadata = mapOf("plan" to "enterprise")
)
```

##### Clearing Identity

To clear identity on logout:

```kotlin
Upscope.reset()
```

#### Visitor Information Details

You can provide the following bits of visitor information:

| Key              | Type                                         | Description                                                                                                                                              |
|------------------|----------------------------------------------|----------------------------------------------------------------------------------------------------------------------------------------------------------|
| `identities`     | String[]                                    | An array of strings with whatever identifying information you want to send us.                                                                          |
| `uniqueId`       | String                                      | A string with a unique id of the visitor from your database. This could be the visitor's email address.                                                |
| `tags`           | String[], each matching `/^#[A-Z-]+$/`     | An array of hashtags to filter visitors by.                                                                                                            |
| `integrationIds` | String[], each matching `/^[a-z]{3,}:.+$/` | An array of strings representing an integration name and an integration id. For example, if your app is called acmechat, and the acmechat ID for the visitor is `123`, you could pass `["acmechat:123"]`. |
| `metadata`       | Object/Dictionary                           | Custom key-value pairs for additional visitor data. |

#### Removing Identification

Any piece of identification set to `undefined` (web) or `nil`/`null` (mobile) will be ignored. If you identify visitors on the login page and they navigate to another area that doesn't have identification, we will keep the data we already have.

To explicitly remove any piece of data, set it to `null` (web) or pass `nil`/`null` (mobile). To clear all identification and start fresh, call `reset()`.

#### Logging the Visitor Out

You can log the visitor out by calling the reset function:

**Javascript:**

```javascript
Upscope('reset');
```

**Javascript (React):**

```javascript
const { reset } = useUpscope();
reset();
```

**iOS:**

```swift
Upscope.shared.reset()
```

**Android:**

```kotlin
Upscope.reset()
```

This will reset the connection and create a new visitor with a new ID.

#### Using the Watch Link

The most reliable way to identify a visitor is to use the watch link. This is a unique link to the particular browser or app session the visitor is using, generated for each visitor.

##### Browser or Visitor?

Although we use the concept of "visitor" throughout the docs, we really mean the visitor's session. If the same person logs in on two different browsers or devices, and you initiate UserView each time with the same `uniqueId`, you'll end up with two separate visitors in UserView.

Each watch link looks like this: `https://upscope.io/w/SHORT_ID`.

We automatically add the watch link to most of our built-in integrations, but if you are building your own, you can retrieve the link:

**Javascript:**

```javascript
Upscope('getWatchLink', link => {
  console.log(link);
});
```

**Javascript (React):**

```javascript
const { Upscope } = useUpscope();
Upscope('getWatchLink', link => {
  console.log(link);
});
```

**iOS:**

```swift
if let watchLink = Upscope.shared.watchLink {
    print(watchLink)
}
```

**Android:**

```kotlin
val watchLink = Upscope.watchLink
println(watchLink)
```

##### Authentication

The watch link is not meant to be secret. You can freely share it around, as it will still require the agent to authenticate on UserView's dashboard to be used. If you want to use the link without authentication (or without the agent having a UserView account), you'll need to exchange it with a secure one through the REST API.

##### Getting the Short ID

If you only need the Short ID for an integration:

**Javascript:**

```javascript
Upscope('getShortId', shortId => {
  console.log(shortId);
});
```

**Javascript (React):**

```javascript
const { shortId } = useUpscope();
console.log(shortId);
```

**iOS:**

```swift
let shortId = Upscope.shared.shortId
print(shortId ?? "none")
```

**Android:**

```kotlin
val shortId = Upscope.shortId
println(shortId)
```

#### Using the Lookup Code

Learn more about the lookup code on the [dedicated page](https://userview.com/docs/sdk/the-lookup-code.md).

### The Lookup Code

Source: https://userview.com/docs/sdk/the-lookup-code

The lookup code is the easiest way to quickly find a Visitor that is not logged in. You can show the Visitor a short code that they can read over the phone (or send through chat) to the Agent. The Agent would enter the code in the UserView dashboard and connect to the Visitor right away.

**Forcing the use of the lookup code:**
If you want to force the Agent to use the lookup code to start a session, you can enable this in the `Settings` » `Visitor Search`. This way, they won't see the full list of visitors, but only see the one that has the lookup code they entered. We throttle the search to make sure they can't enter all the codes.

#### How to Show the Code

**Javascript:**

There are different ways to show the code, which can all be enabled in the `Settings` » `Visitor Search`.

##### Control Key

You can make a popup with the code appear by asking the Visitor to press `Ctrl` 5 times anywhere on the page. This works great as it doesn't disrupt your layout and doesn't require any setup.

##### Widget

You can show a small widget on the side of the screen which the Visitor can click to see the lookup code.

##### HTML Element

You can have UserView replace the content of an HTML element with the lookup code. For example, you could configure the element to be `#upscope-lookup-code`, and have the following on the page:

```html
<p id="support">
  If you need any help, please read the support agent this code: <span id="upscope-lookup-code"></span>
</p>
```

**Too many visitors?:**
Make sure you aren't showing the lookup code to everyone if you have a lot of Visitors online. Because the code is short, only so many Visitors can have a unique one at a time. You can still use the HTML Element option, but only make the element appear after the Visitor does something, like clicking a support link. We only add the code once the element appears on the page.

##### Link

You can show a popup with the lookup code by creating a link to `#upscope-lookup-code`.

```html
<p id="support">
  If the support agent asks you for a code, click <a href="#upscope-lookup-code">here</a>.
</p>
```

**Javascript (React):**

Use the `useUpscope` hook to get the lookup code:

```javascript
import { useUpscope } from "@upscopeio/react";

function SupportSection() {
  const { getLookupCode } = useUpscope();
  const [code, setCode] = useState(null);

  const handleShowCode = async () => {
    const lookupCode = await getLookupCode();
    setCode(lookupCode);
  };

  return (
    <div>
      {code ? (
        <p>Your support code is: <strong>{code}</strong></p>
      ) : (
        <button onClick={handleShowCode}>Get Support Code</button>
      )}
    </div>
  );
}
```

You can also use the dashboard settings (`Settings` » `Visitor Search`) to enable automatic methods like the Control Key or Widget, which work the same as the vanilla Javascript implementation.

**iOS:**

##### Shake Gesture

By default, the SDK shows a lookup code dialog when the user shakes their device. You can customize or disable this in the configuration:

```swift
let config = UpscopeConfiguration(
    apiKey: "YOUR_API_KEY",
    enableLookupCodeOnShake: true,
    lookupCodeKeyTitle: "Support Code",
    lookupCodeKeyMessage: "Please share this code with support: {%lookupCode%}"
)
```

##### Programmatic Access

Request a lookup code and display it in your own UI:

```swift
// Request a code from the server
Upscope.shared.getLookupCode()

// Read the current code
let code = Upscope.shared.lookupCode ?? ""
```

##### Subscribe to Changes

Listen for lookup code changes using Combine:

```swift
Upscope.shared.lookupCodePublisher
    .sink { lookupCode in
        print("Lookup code: \(lookupCode ?? "none")")
    }
    .store(in: &cancellables)
```

**Android:**

##### Shake Gesture

By default, the SDK shows a lookup code dialog when the user shakes their device. You can customize or disable this in the configuration:

```kotlin
val config = UpscopeConfiguration.Builder("YOUR_API_KEY")
    .enableLookupCodeOnShake(true)
    .lookupCodeKeyTitle("Support Code")
    .lookupCodeKeyMessage("Please share this code with support: {%lookupCode%}")
    .build()
```

##### Programmatic Access

Request a lookup code and display it in your own UI:

```kotlin
// Request a code from the server
Upscope.getLookupCode()

// Read the current code
val code = Upscope.lookupCode
```

##### Subscribe to Changes

Listen for lookup code changes using StateFlow:

```kotlin
launch {
    Upscope.lookupCodeFlow.collect { lookupCode ->
        println("Lookup code: $lookupCode")
    }
}
```

#### Requiring the Lookup Code
You can restrict your team so they must enter a lookup code to find visitors, rather than browsing the full list. Enable this at [Settings » Visitor Search](https://app.upscope.io/settings/teams/_/search) by selecting "Yes" under "Require a code in visitor list".

**Default view:** agents can see and select any visitor.

![Default view showing all visitors](https://cms-cdn.userview.com/www/docs/assets/screenshot-2025-02-14-at-11.32.56.png)

**Limited search:** agents must enter a lookup code to find visitors.

![Limited search requiring lookup code](https://cms-cdn.userview.com/www/docs/assets/screenshot-2025-02-14-at-11.32.41.png)

## Setup

Source: https://userview.com/docs/setup

### How to Connect Your SAML Provider

Source: https://userview.com/docs/setup/connect-saml

#### Connecting Your SAML Provider to UserView

UserView provides a generic auth provider for SAML2-based authentication, allowing you to connect any SAML2-enabled IdP system.

##### Supported SAML Features

UserView supports the following SAML features:

- Identity Provider (IdP) initiated SSO
- Service Provider (SP) initiated SSO
- Identity Provider initiated SLO (Single Logout)
- Automatic user provisioning via SAML attributes
- Permission synchronization via SAML attributes

##### Technical Specifications

| **Specification** | **Value** |
| --- | --- |
| **NameID Format** | `urn:oasis:names:tc:SAML:1.1:nameid-format:emailAddress` |
| **ACS Binding** | HTTP POST |
| **SLO Binding** | HTTP Redirect |

#### Connect Your IdP to UserView

To connect your IdP to UserView, navigate to the SAML section of the membership settings in your dashboard. You'll find these under `General Settings` » `Team settings & SSO` » `SAML`.

1. Change the `Enable SAML SSO` setting to `Yes`.
2. Scroll to the bottom of the page to find the Configuration information, which includes:

   | **Configuration** | **Description** |
   | --- | --- |
   | **SAML Consumer URL** | Used to log you into UserView. This could also be called *Assertion Consumer Service (ACS)*. Uses HTTP POST binding. |
   | **SAML Single Logout URL** | Used to log you out of UserView when you log out in your IdP. Uses HTTP Redirect binding. |
   | **SAML Entity ID** | This could also be called *Metadata,* and it identifies your UserView team. |

3. Create a custom application in your IdP using the information above. Your IdP will then provide you with either a **XML file** or a **Metadata URL**.

   - If you are given a **Metadata URL**, enter it under the **IdP Metadata URL** setting on the UserView website. The metadata will be fetched automatically and kept up to date.
   - If you are given a **XML file**, copy its content to your clipboard and paste it into the **IdP Metadata XML** setting on the same page.

4. Save the settings, and SAML will be fully set up.

#### Options

In the SAML section, you'll find the following options:

| **Option** | **Description** |
| --- | --- |
| **Automatically provision new SAML users?** | Set up UserView to automatically create an account for users logging in with SAML, without needing manual invitations. They will receive your default permission set (or what you configure through SAML attributes). If set to no, an admin must invite new agents on the members page before they can log in. |
| **Exclude root user from SAML SSO requirement?** | If set to yes, the root user (Account Owner) will not be required to log in through SAML and can use a password or a magic link. This is useful if you have an email address not part of your IdP for cloud operations. |
| **Update user data at login?** | When enabled (default), user profile information (name, phone number, language) will be synchronized from SAML attributes each time the user logs in. |
| **Update permissions at login?** | When enabled, user permissions will be synchronized from SAML attributes each time the user logs in. This allows you to manage UserView permissions directly from your IdP. Disabled by default. |

#### SAML Attributes

UserView can read user information from SAML attributes in your IdP's response. Attribute names are matched flexibly, ignoring underscores and case (e.g., `email_address`, `EmailAddress`, and `emailaddress` are all equivalent).

##### User Profile Attributes

| **Attribute** | **Description** |
| --- | --- |
| `email` or `email_address` | The user's email address. If not provided as an attribute, the NameID will be used (must be in email format). |
| `display_name`, `full_name`, or `first_name` + `last_name` | The user's display name. If `display_name` or `full_name` aren't set, `first_name` and `last_name` will be combined. |
| `phone_number` | The user's phone number. |
| `language` | The user's preferred language code. |
| `visitor_list_regions` | Comma-separated list of regions the user can view in the visitor list (these need to match the `userRegion` attribute passed at initiation). |

##### Permission Attributes

When **Update permissions at login** is enabled, you can control user permissions via SAML attributes. Set each attribute to `true` or `false`.

- `permission_can_use`: User can start UserView sessions. Defaults to `true` if not specified.
- `permission_can_manage_content`: User can remove visitor's data.
- `permission_can_view_reporting`: User can view reporting and usage analytics.
- `permission_can_manage_users`: User can manage the team's users.
- `permission_can_manage_billing`: User can pay for the team and manage the billing settings.
- `permission_can_access_settings`: User can access general settings and make changes.

This allows you to centrally manage UserView permissions from your identity provider, ensuring permissions stay in sync with your organization's access control policies.

### Embedding UserView Agent view on Another Page Using an Iframe

Source: https://userview.com/docs/setup/crm-embed

#### Embed UserView into your CRM

To embed UserView into your CRM, follow these steps:

1. Create a new `iframe` within your system.
2. Point the `iframe` to `https://userview.com/embed/`.
3. This will display the UserView dashboard within the `iframe`, allowing you to search for and assist individual users.
4. When you initiate co-browsing with a user, it will occur within the `iframe` rather than opening a new tab.

```html
<iframe src="https://userview.com/embed" title="UserView Dashboard"></iframe>
```

### Integrate your Live Chat Platform

Source: https://userview.com/docs/setup/integrate-live-chat

UserView co-browsing is available for a number of live chat systems, and the installation is a simple copy and paste in most cases. There are multiple ways of starting a session, so determine how your company has implemented the solution.

#### Step 1: Get Your Installation Code

1. Sign up for the free UserView trial on the home page ([https://userview.com/signup](https://userview.com/signup)).
2. Get your installation code from your settings by navigating to `Settings` » `Installation Code` ([https://app.upscope.io/install](https://app.upscope.io/install)).

#### Step 2: Install the Code

Paste the UserView installation code on the same page as the live chat code. This will need to be done by someone on your development team or whoever has access to your website code. For more details, visit the [UserView Installation](https://userview.com/docs/sdk/web/installation.md) page.

#### Step 3: Connect the Integration

1. Look either in your live chat marketplace or within your UserView settings to connect the integration.
2. Follow the steps to complete the integration setup.

#### Additional Steps

Due to the way some APIs work, you might have to perform additional steps to get the integration going. Browse our [Integrations](https://userview.com/docs/integrations.md) page to find out if this applies to your case.

**Integration Apps:**
In some cases, UserView offers a more complete integration in the form of a custom-built app, which you can typically add to the live chat system via their marketplace. Currently, UserView has custom apps for Intercom, Zendesk, LiveChat, and Frontapp. You can search their marketplaces for the "UserView Co-Browsing" integration and add it. Each live chat system contains details on how to install the custom app if available.

Visit the [Integrations](https://userview.com/docs/integrations.md) page for more complete instructions on how to integrate UserView with the live chat tool you are using.

### On-premise

Source: https://userview.com/docs/setup/on-premise

#### Running UserView On-Premise

To run UserView on your infrastructure, you'll need to either run a Docker image that contains everything or host the components separately yourself.

If you have fewer than 5,000 Visitors online at any given time and no more than 100 concurrent Sessions, a single server will likely be enough. If you have more, you'll likely need to add more servers and scale UserView horizontally by having a separate Redis cluster.

**Docker Image:**

Pull [our image](https://hub.docker.com/r/upscope/onpremise) from Docker Hub and run it with the environment variables listed below.

```shell
docker run -d \
  -e BASE_ENDPOINT=https://cobrowsing.acmetech.com/ \
  -e LICENSE_KEY=https://api.upscope.io/v1.3/.... \
  -e SECRET_KEY=myrandomsecretkey... \
  -p 5002:5002 \
  upscope/onpremise
```

See the [Configuration](#configuration) section for all available environment variables.

**Host MongoDB Connection Issues:**
MongoDB cannot be listening only to localhost, because the container never uses the loopback network for connection. Set the `net.bindIp` to listen on `0.0.0.0` in `/etc/mongod.conf`, or—if it's a security issue—on the Docker network. This is similar for Redis, which should listen to `*:6379`.

**Docker Script:**

We've created a simple startup script to easily start and configure UserView to use with Docker.

1. Download the [startup script (.sh file)](https://raw.githubusercontent.com/upscopeio/onprem-scripts/master/start-on-premise.sh).
2. Edit its variables according to the data from your UserView dashboard `Settings` » `On Premise`.
3. Make it executable: `chmod +x start-on-premise.sh`.
4. Run it: `./start-on-premise.sh`.

**Host MongoDB Connection Issues:**
MongoDB cannot be listening only to localhost, because the container never uses the loopback network for connection. Set the `net.bindIp` to listen on `0.0.0.0` in `/etc/mongod.conf`, or—if it's a security issue—on the Docker network. This is similar for Redis, which should listen to `*:6379`.

**Binaries:**

If you don't want to use Docker, you'll find UserView binaries on the link provided in your UserView dashboard `Settings` » `On Premise`.

This link never changes, so you can `curl` the binaries as part of your build process and automatically keep UserView up to date. Any breaking change will have a new link, so you don't need to worry about that.

You can start the server by running:

```shell
BASE_ENDPOINT=http://localhost:5002 PORT=5002 \
LICENSE_KEY=https://api.upscope.io/v1.3/.... \
SECRET_KEY=myrandomsecretkey... ./upscope-data-linux
```

#### Installing UserView on Your Website

After you run UserView, the output will give you instructions for your [JavaScript SDK](https://userview.com/docs/sdk/web/installation.md) installation code. It looks like this (notice `{BASE_ENDPOINT}`):

```html
<script>
  (function(w, u, d){if(typeof u!=="function"){var i=function(){i.c(arguments)};i.q=[];i.c=function(args){i.q.push(args)};
  w.Upscope=i;var l = function(){var s=d.createElement('script');s.type='text/javascript';s.async=true;
  s.src='{BASE_ENDPOINT}/upscope.js';var x=d.getElementsByTagName('script')[0];x.parentNode.insertBefore(s,x);};l();}}
  )(window, window.Upscope, document);
  Upscope('init');
  Upscope('getWatchLink', console.log);
</script>
```

You can add that code to pages like you would with our cloud solution.

#### Installing UserView in Your Mobile Apps

The [iOS](https://userview.com/docs/sdk/ios/installation.md), [Android](https://userview.com/docs/sdk/android/installation.md), [Flutter](https://userview.com/docs/sdk/flutter/installation.md), and [React Native](https://userview.com/docs/sdk/react-native/installation.md) SDKs connect to your on-premise instance when you set the `onPremiseBaseEndpoint` configuration option to your `BASE_ENDPOINT`. The SDK then fetches its configuration from `{BASE_ENDPOINT}/sdk-config.json` and connects to `{BASE_ENDPOINT}/session` instead of our cloud servers, so the `region` option is ignored.

**iOS:**

```swift
let config = UpscopeConfiguration(
    apiKey: "YOUR_API_KEY",
    onPremiseBaseEndpoint: "https://cobrowsing.acmetech.com"
)

try Upscope.shared.initialize(with: config)
```

**Android:**

```kotlin
val config = UpscopeConfiguration.Builder("YOUR_API_KEY")
    .onPremiseBaseEndpoint("https://cobrowsing.acmetech.com")
    .build()

Upscope.initialize(applicationContext, config)
```

**Flutter:**

```dart
final config = UpscopeConfiguration(
  apiKey: 'YOUR_API_KEY',
  onPremiseBaseEndpoint: 'https://cobrowsing.acmetech.com',
);

await Upscope.instance.initialize(config);
```

**React Native:**

```typescript
import Upscope from "@upscopeio/react-native-sdk";

Upscope.initialize({
  apiKey: "YOUR_API_KEY",
  onPremiseBaseEndpoint: "https://cobrowsing.acmetech.com",
});
```

Everything else — installation, configuration options, and SDK functions — works exactly like the cloud version.

#### Your License Key

To run UserView, you'll need to retrieve your license key. The license key can be downloaded to your server or read automatically from our server every time the server starts.

You'll need to enter the license key into the `LICENSE_KEY` environment variable. The `LICENSE_KEY` environment variable can be one of:

- The license key content (note it's multi-line)
- A file path to the license key content
- The URL to the license key, the preferred method

If you don't have to restrict the instance's interactions with the internet, entering the URL provided on the [dashboard](https://app.upscope.io/settings/teams/_/on_prem) as the `LICENSE_KEY` environment variable is preferable as you won't need to update it when it expires.

**Good to Know:**
Your JavaScript SDK configuration is also embedded in your license key. This means you can still configure UserView on your dashboard and then restart the server to apply the changes.

#### Configuration

The following is configurable through environment variables:

| Environment Variable | Description | Default |
| --- | --- | --- |
| `BASE_ENDPOINT` | The base URL where this component will be mounted. For example, `https://cobrowsing.acmetech.com/`. It can be in a subdirectory. | (nil, **required**) |
| `LICENSE_KEY` | Your unique UserView license key (or a link to it). | (nil, **required**) |
| `SECRET_KEY` | A unique secret key used to sign internal JWTs. **It's very important this key is kept safe and it's at least 32 characters long.** | (nil, **required**) |
| `AUTH_ENDPOINT` | URL watch links will be redirected to for authentication. | `https://app.upscope.io/onprem_redirect/TEAM_IDENTIFIER` |
| `HOMEPAGE` | URL unrecognized requests will be redirected to. | `https://upscope.com/` |
| `LOOKUP_CODE_LENGTH` | The number of digits in visitor lookup codes. | `4` |
| `MONGO_URI` | URI to a single MongoDB instance, or MongoDB cluster | If omitted, `mongodb://localhost:27017/upscope`. (In Docker this starts MongoDB within the image). If set to an empty string, it will disable MongoDB. |
| `PORT` | The port the server will listen on. | `5002` |
| `REDIS_URI` | URI to Redis or a Redis cluster. | `redis://localhost:6379`. (In Docker this starts Redis within the image). |
| `REST_KEY` | The authentication API key for your on-premise REST API. Leave empty to disable the REST API. | (nil) |
| `SSL_REDIRECT` | When set to on, the server will automatically redirect all requests to https. | `off` |

If you use `MONGO_URI=mongodb://localhost/upscope` with the Docker image, a MongoDB server will be installed inside the container to serve the application.

If you use `redis://localhost/` with the Docker image, a Redis server will be installed inside the container to serve the application.

#### Integrating with the Dashboard

To use the UserView dashboard with UserView on-premise, head to your [on-prem settings](https://app.upscope.io/settings/teams/_/on_prem) and scroll down to cloud link.

You'll need to enter your `BASE_ENDPOINT` and your `SECRET_KEY`, and have an option to enter the email of who should be contacted if we need to reach out quickly if we find a vulnerability we can't patch from remote.

**Good to Know:**
To your Agents, everything will look just like the regular cloud version does, but behind the scenes, their browser will be in direct communication with your instance, so we never touch your Visitors' data.

#### What Doesn't Work On-Premise?

Although we've made our on-premise version as similar as possible to the original, there are a few missing functionalities. You'll need to use UserView cloud if you are interested in:

- Integrations with live chat software (other than a simple link in the attributes)
- Screenshots
- Presentation sharing (public link co-browsing)
- IP geolocation features
- Audio communication: audio calls are carried by AWS Chime, so the audio traffic can't stay on your infrastructure. Video communication works on-premise.

##### Usage Without MongoDB

We are aware some of our customers cannot use MongoDB due to compliance reasons.

UserView works fine without MongoDB, but the Search feature will be limited. You'll still be able to search by:

- **Lookup code**
- **Email**
- **Unique ID**
- **Integration IDs**

## Using UserView

Source: https://userview.com/docs/using-userview

This user guide walks you through all the aspects of using UserView effectively, from the initiation of sessions to real-time interaction, ending sessions, and everything in between. We've broken down everything into easy-to-follow instructions while providing tips, tricks, and best practices for more efficient co-browsing.

Let's dive in and explore how UserView can redefine your real-time collaboration and customer support experience!

### Initiating a Session

Source: https://userview.com/docs/using-userview/initiate-session

There are various ways to initiate a co-browsing session with UserView. No matter where your users are on your site or how you're communicating, locating them is quick and simple.

#### Methods to Initiate a Session

| Method                           | Description                                                                                      | Useful When                                                                                         |
|----------------------------------|--------------------------------------------------------------------------------------------------|-----------------------------------------------------------------------------------------------------|
| UserView app: User Credentials | Search using their name, email address, and any other information you've passed through our system. | You're on the phone with the user, and they're logged into their account.                           |
| UserView app: Lookup Code      | Search using a unique code linked to the user's screen.                                           | You're on a call, and they're logged out of their account. This is the most reliable way of searching, especially if a LiveDocument integration isn't working. |
| Live Chat Integrations           | Initiate a co-browsing session from the chat UI.                                              | If you want to avoid extra steps of searching for the user. UserView already identifies the user using live chat data. |

### UserView Session Basics

Source: https://userview.com/docs/using-userview/userview-session-basics

UserView offers a set of features to help guide your client through a session. Note that some features may not appear depending on what your team owner has enabled.

##### The Toolbar

![The Toolbar](https://cms-cdn.userview.com/www/docs/assets/team-training-2.png)

##### Picture in Picture

![Picture in Picture](https://cms-cdn.userview.com/www/docs/assets/team-training-4.png)

Take UserView with you wherever you go on your browser. This is particularly helpful for live chat interactions.

##### Cursor
![Cursor](https://cms-cdn.userview.com/www/docs/assets/team-training-5.png)

Use your cursor as you would on your own device. Navigate, scroll, click, and type to resolve issues faster.

##### Pen Tool
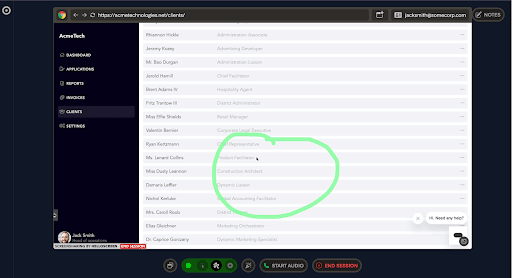
![Pen Tool](https://cms-cdn.userview.com/www/docs/assets/team-training-6.png)

Highlight parts of the page using the pen tool. This is especially useful for a more hands-off, educational approach.

##### Spotlight
![Spotlight](https://cms-cdn.userview.com/www/docs/assets/team-training-9.png)

Draw focus to any part of the page with the spotlight tool.

##### Audio Calling
![Audio Calling](https://cms-cdn.userview.com/www/docs/assets/team-training-10.png)

Start an audio call over the browser by clicking on the green phone icon at the bottom of the page. This is a browser-to-browser call, so the client will need a microphone and speaker.

**Audio Call Issues:**
If the audio call request for the client doesn't appear, it is most likely due to the client having an ad-blocker on their browser.

##### Notes
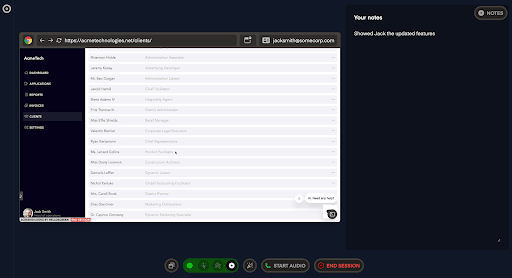
![Notes](https://cms-cdn.userview.com/www/docs/assets/team-training-12-1739294778.png)

Take notes during the call. If you have an Intercom integration, these notes will be pushed to the ticket.

##### Confetti
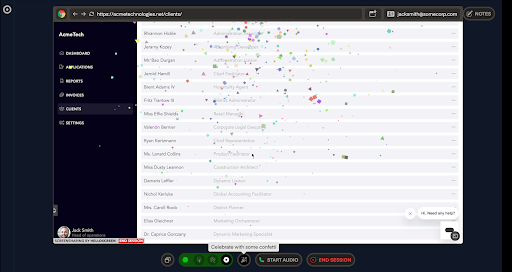
![Confetti](https://cms-cdn.userview.com/www/docs/assets/team-training-14.png)

Celebrate with customers with a bit of confetti.

##### Ending the Session
![Ending the Session](https://cms-cdn.userview.com/www/docs/assets/team-training-15.png)

The session ends when:

- You or the client click on `End Session` in the bottom left corner of the screen.
- The client closes the tab and any other tabs that have your site open.
- There are 10 minutes of inactivity (unless there is an active audio call).

#### UserView App

Source: https://userview.com/docs/using-userview/initiate-session/userview-app

The most reliable way of finding a user is via the UserView application. Here you can search for them using certain credentials.

We recommend this method for phone calls; however, if a live chat integration is returning a 'user not found', you can use the UserView app to find them instead.
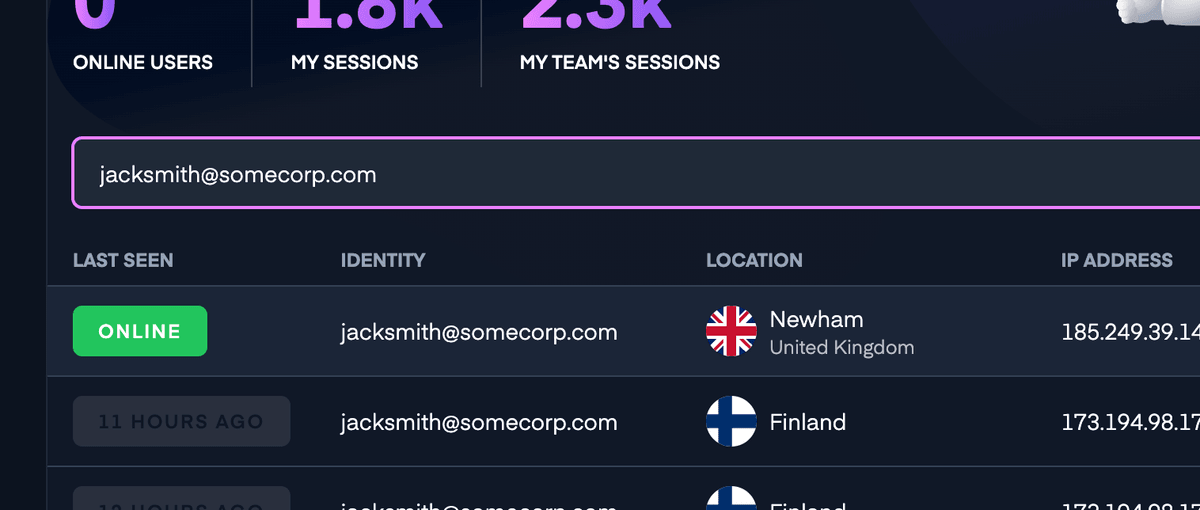
![](https://cms-cdn.userview.com/www/docs/assets/screenshot-2025-04-07-at-11.23.58.png)

##### Locate customers on the app using user information:

- The webpage they're on
- IP address
- Location derived from IP address

If you've passed information such as email address or name, you'll also be able to use those credentials. For example, you could use:

- Name
- Email
- Phone number
- Company

If you use either an Intercom or Zendesk integration, UserView will try to use their APIs to display the data, so you may not need to set anything up. However, if you only see IP addresses, you will need to follow [these instructions](https://userview.com/docs/sdk/identifying-the-visitor.md).

#### Lookup Code

Source: https://userview.com/docs/using-userview/initiate-session/lookup-code

##### Customer View
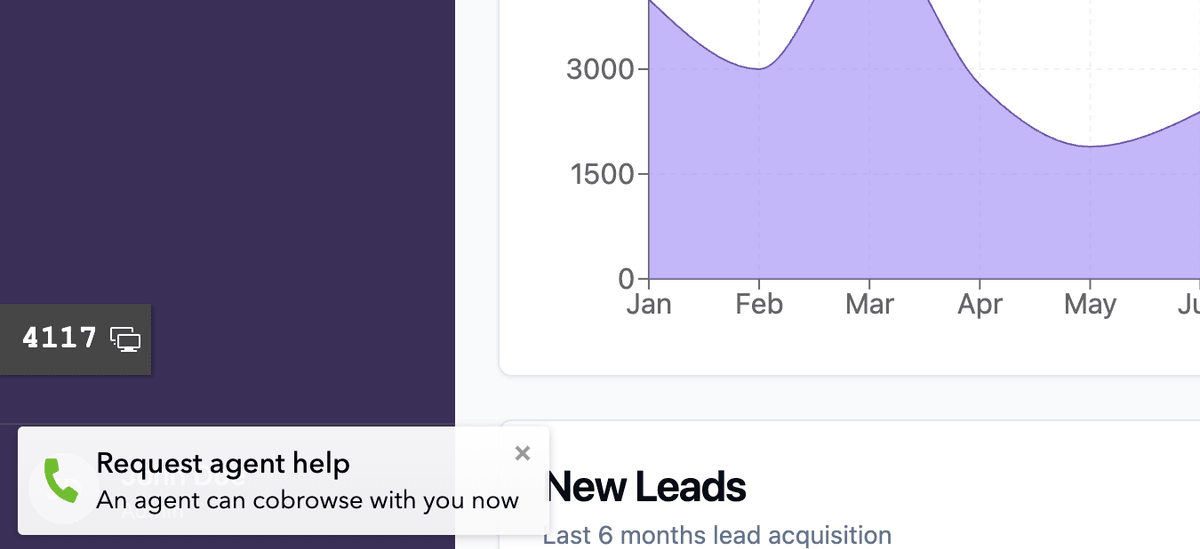
![](https://cms-cdn.userview.com/www/docs/assets/screenshot-2025-07-07-at-09.57.461.png)

##### Agent View

![](https://cms-cdn.userview.com/www/docs/assets/screenshot-2025-07-07-at-09.58.20.png) The Lookup code is the most reliable way of finding users. It allows you to find them even when they aren't logged out of their account, whatever page they're on as long as the UserView code is installed.

Each code is unique to every browsing session, therefore a user may have more than one code associated to them if they have your website open on mobile and desktop.

1. Enable the setting on [https://app.upscope.io/settings/teams/_/search](https://app.upscope.io/settings/teams/_/search)
2. When you want to connect, ask your customer to read out the Lookup code (See [display options for the Lookup code](https://userview.com/docs/sdk/the-lookup-code.md).)
3. Open [UserView app](https://userview.com/)
4. Paste the code into the search
5. Initiate co-browsing session

#### Request Agent Button

Source: https://userview.com/docs/using-userview/initiate-session/agent-request-button

Users can request a co-browsing session with a button placed on your site. Below is an example of how it would appear:
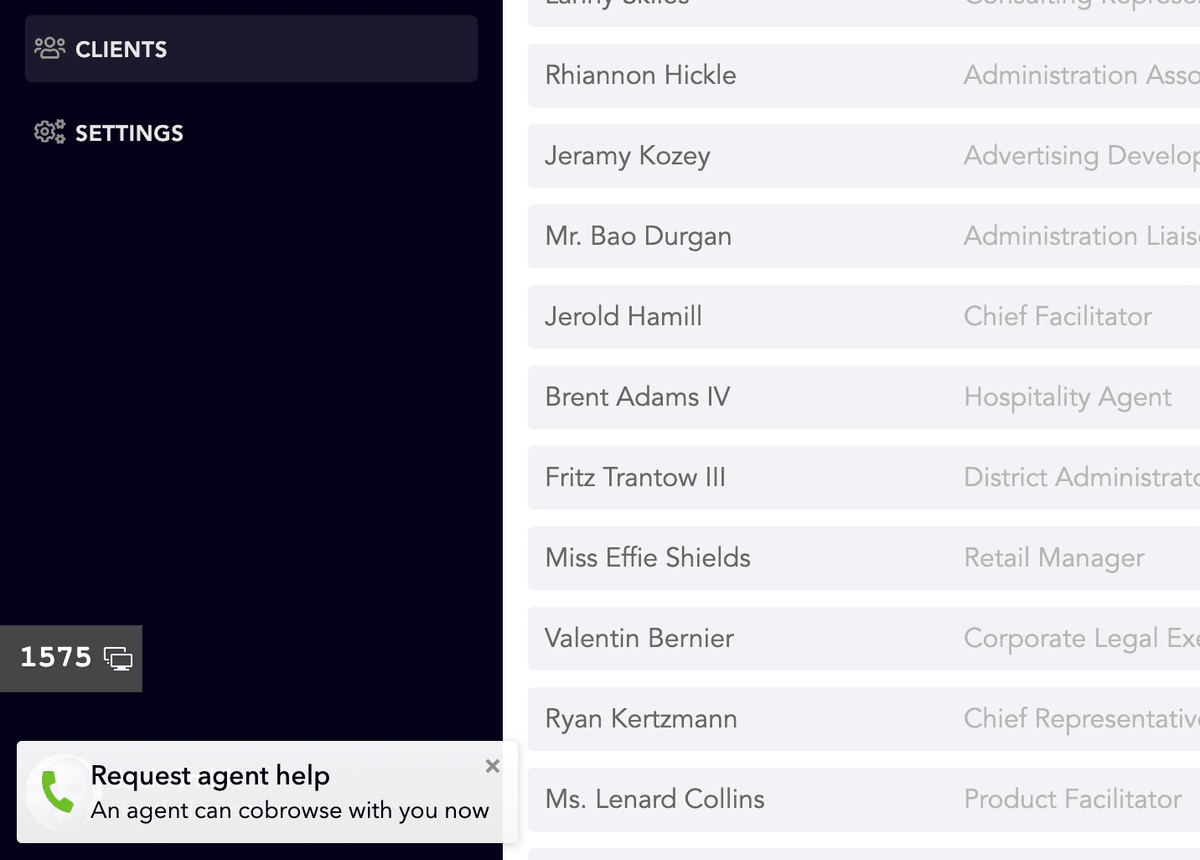
![Request Agent Button Example](https://cms-cdn.userview.com/www/docs/assets/screenshot-2025-02-14-at-11.11.34.png)

An alert is sent to the main app page, and the user requesting help will appear at the top of the page.
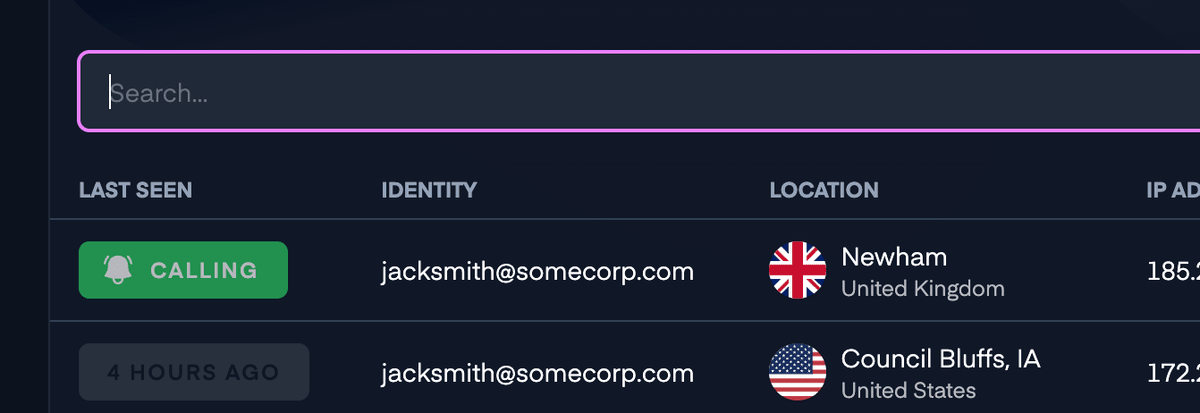
![Alert Example](https://cms-cdn.userview.com/www/docs/assets/screenshot-2025-04-08-at-11.30.55.png)

##### Activating the Request Agent Button

To activate this feature, navigate to `General Settings` » `Visitor Search` in your UserView account. Here, you can configure:

- When the button should appear (all the time, never, or when an agent is available)
- Where it's placed on your website
- The pop-up alert message

For more customization, you can also [build your own button](https://userview.com/docs/customization/custom-request-button) to maintain a consistent UI.

#### Troubleshooting

Source: https://userview.com/docs/using-userview/initiate-session/troubleshooting

##### It says User is offline, even though they are online

If the button to initiate a session is not available and there is a 'Last seen *x* hours ago' message:

- Make sure they are on a page where UserView is installed.
- Wait a moment; sometimes it takes a bit of time to register if someone is online.

##### I can't see any users at all, online or offline

If you don't see any users online at all:

- Make sure UserView is on a live page and not a local/sandbox environment.
- Check that the whole code is installed and in the *body* tag.

##### The user isn't showing up at all

If their name/email address is coming up completely empty and you're getting a 'No visitors found' error, it might be that they've not been on the site since installation.

- Check they're on a page where UserView has been installed.
- Ask if the user has any ad-blockers enabled; this might prevent the script from running.

##### My user can't find the Lookup code

If the user is struggling to locate the code:

- Find out how it's set up to be displayed in your settings; you may need to ask a team admin.
- In the settings, see if it has been enabled ([https://app.upscope.io/settings/teams/_/search](https://app.upscope.io/settings/teams/getupscope.com/search)); you will need admin access to view the page.

### Browser-to-Browser Audio Calls

Source: https://userview.com/docs/using-userview/audio-calls

Start an audio call to your user's browser. If you're already on the phone with them, it's a great alternative if the call drops for any reason. Audio calls also provide a smooth transition from live chat.
![Audio Call Screenshot](https://cms-cdn.userview.com/www/docs/assets/screenshot-2025-02-13-at-12.24.04.png)

#### Audio Troubleshooting

##### Can't Connect

###### Switch Your Input/Output

We have a new audio provider. Some issues may arise if headphones or headsets are not switched on. If you can't hear them, switch your output device. If they can't hear you, switch your input device.

###### Ensure Browser Permissions

Sometimes the device or microphone is not authorized. Users will usually be prompted to allow the device and need to authorize within 5 seconds. If not, they might need to call back again. Look for a small icon on the right-hand side of the address bar.

##### Can't See the Button

###### Enable the Feature

You might need to ask an account admin/owner to enable the feature under `Enable voice calls`. You can do so here: [Enable Voice Calls](https://app.upscope.io/settings/teams/_/co_browsing)

###### Check Your Plan

Not all legacy plans include audio calls. Verify if your plan supports this feature.

### Multi-Agent Session

Source: https://userview.com/docs/using-userview/multi-agent-session
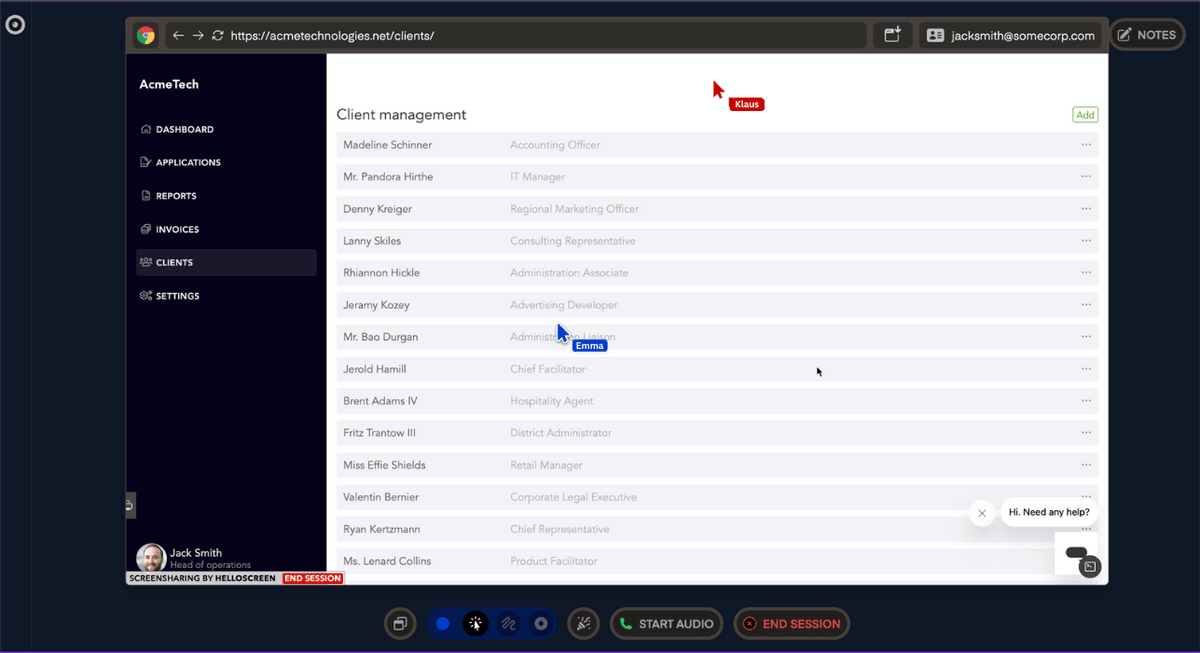
![](https://cms-cdn.userview.com/www/docs/assets/screenshot-2025-02-13-at-12.18.21.png)

Need to bring in the next tier support or a topic specialist? Send them the page URL and get them to join the session (including audio if on a call). Just make sure they also have an Upscope account!

Even if you leave, as long as the other person stays on the session, it can be handed off and continue without you.

![](https://cms-cdn.userview.com/www/docs/assets/team-training-13.png)

### Picture-in-Picture

Source: https://userview.com/docs/using-userview/picture-in-picture

Similar to how Youtube/Google Meet/Zoom works, you can take UserView with you wherever you go on your browser with picture-in-picture.

Particularly useful for when you need to carry on the live chat conversation or need to go into your CRM but still need to see what your customer is doing.
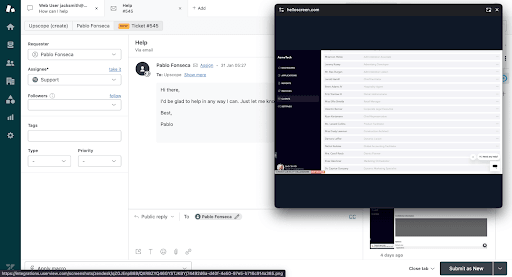
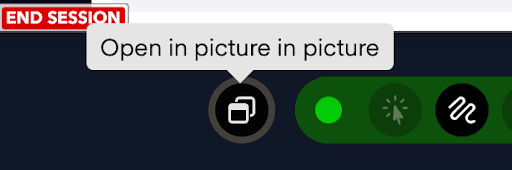
![](https://cms-cdn.userview.com/www/docs/assets/team-training-4.png)

![](https://cms-cdn.userview.com/www/docs/assets/team-training-3-1739458896.png)

### Session Recording

Source: https://userview.com/docs/using-userview/session-recording

Automatically record UserView sessions, capturing what happened so you can review it at a later date under the `Co-Browsing History` tab.

UserView admins can activate this feature by navigating to `Connection Settings` at [app.upscope.io/settings/teams/_/co_browsing](https://app.upscope.io/settings/teams/getupscope.com/co_browsing).
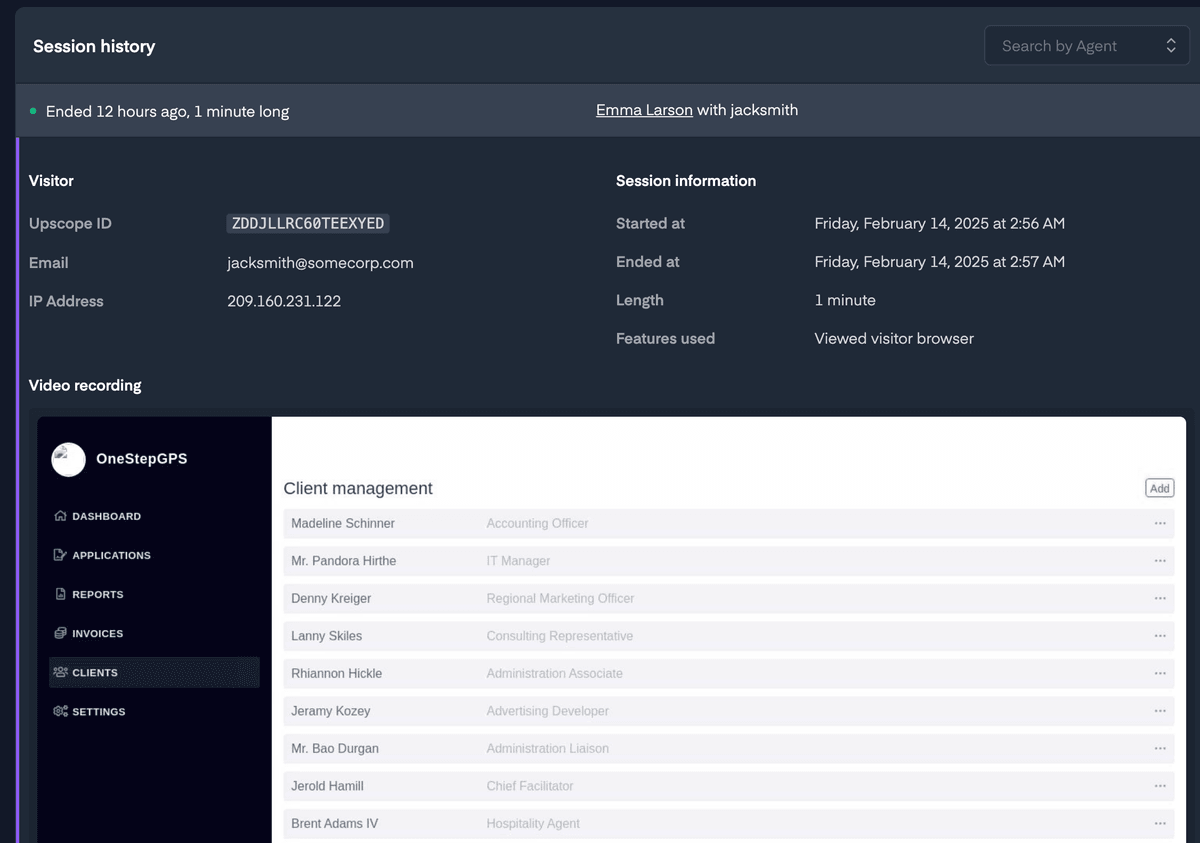
![UserView Connection Settings](https://cms-cdn.userview.com/www/docs/assets/screenshot-2025-02-14-at-15.05.25.png)

#### FAQ

##### Can I record my user's screen when a session isn't active?

*No, UserView only captures what happened when a co-browsing session is live; as soon as it ends, so does the recording.*

## Customization

Source: https://userview.com/docs/customization

## Integrations

Source: https://userview.com/docs/integrations

This dedicated section of the documentation is designed to assist you in seamlessly integrating UserView with your preferred live chat platform. Whether you're using Intercom, Zendesk, LiveChat, or any other platform, this guide makes integration with Upscope a breeze.

### Build Your Own Request Button

Source: https://userview.com/docs/customization/custom-request-button

Clients can request a co-browsing session with a button placed on your site. An alert is sent to the main app page, and the user requesting help will appear at the top of the page.

To activate this feature, navigate to `General Settings` » `Visitor Search`. Here, you can decide when the button should appear (all the time, never, or when an agent is available), where it's placed on your website, and what the pop-up alert message says.

#### How to Build Your Own Button

If you'd like to create your own button and customize its appearance, follow these steps:

1. Ensure your site has the code from [app.upscope.io/install](https://app.upscope.io/install) installed.
2. To display the button **only** when agents are online, listen for `agentsAvailable` events.
3. To request an agent, use `Upscope('requestAgent');`. You can cancel the request before it is accepted by calling `Upscope('cancelRequestAgent');`.
4. To know the status of the request, listen to the `agentRequestUpdate` event.

### Chatra

Source: https://userview.com/docs/integrations/chatra

UserView integrates with [Chatra](https://chatra.io/), allowing you to transition from chat to viewing a user's screen in seconds.

#### Integration Steps

To integrate UserView with Chatra, copy and paste the UserView installation code beneath the Chatra code.

**Example code**

```html
<!-- Begin Chatra code -->
<script type="text/javascript" async src="..." />
<!-- End Chatra code -->

<!-- BEGIN UserView code -->
<script>
// The UserView code you find in https://userview.com/install
</script>
<!-- END UserView code -->
```

#### Using the Integration

When you open Chatra and click on an individual chat, you'll see a `SCREENSHARE` link appear in the panel.
![Chatra Integration Step 1](https://cms-cdn.userview.com/www/docs/assets/integrations/integration_screenshots/chatra/chatra_1.png)

Click on that to go directly to their screen.
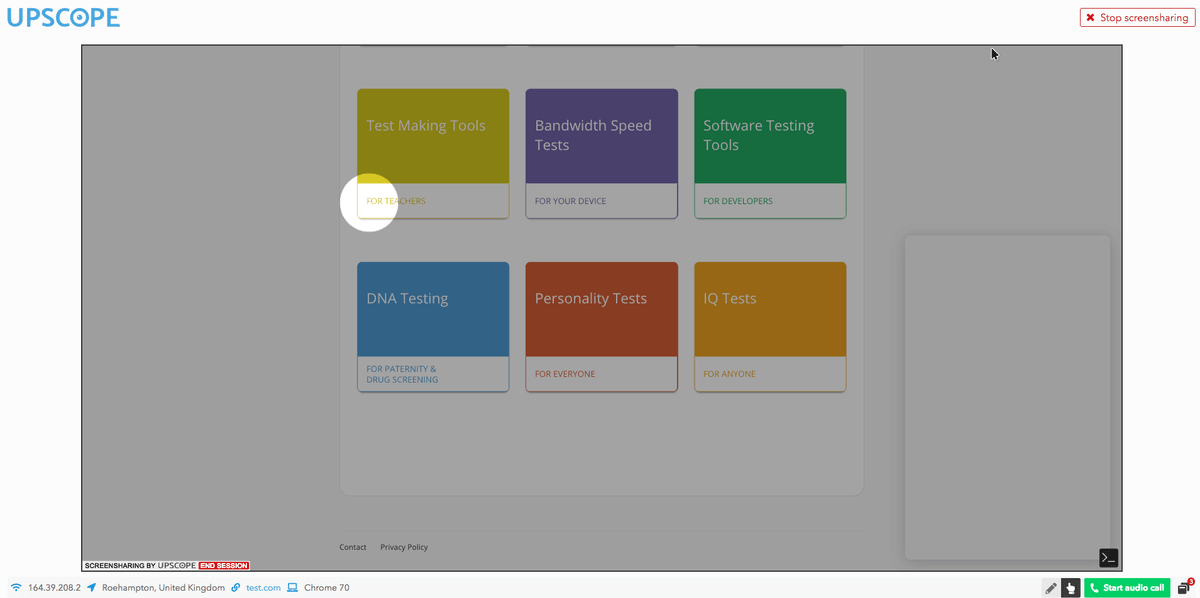
![Chatra Integration Step 2](https://cms-cdn.userview.com/www/docs/assets/integrations/integration_screenshots/chatra/chatra_2.png)

Click again to take control and guide your user on their machine as they sit back and watch.

### Drift

Source: https://userview.com/docs/integrations/drift

UserView Co-Browsing integrates with [Drift](https://drift.com/), allowing you to transition from chat to viewing a user's screen in seconds. You can also **send your mouse cursor over the internet to appear on their screen**, enabling you to scroll and click for them as if you're sitting right there at their computer.

#### Integrating UserView with Drift

To integrate UserView with Drift, follow these steps:

1. Copy and paste the UserView installation code beneath the Drift code on all the pages you wish to [co-browse](https://upscope.com/cobrowse) on. That's it. The integration is complete.

   **Example**

   ```html
   <!-- begin Drift code -->
   <script type="text/javascript" async>
   // Drift code here
   </script>
   <!-- end Drift code -->

   <!-- BEGIN UserView code -->
   <script>
   // The UserView code you find in https://userview.com/install
   </script>
   <!-- END UserView code -->
   ```

2. When you start a new chat with a customer, a **screenShare** link will be available on the right-hand side under `Show more attributes`.
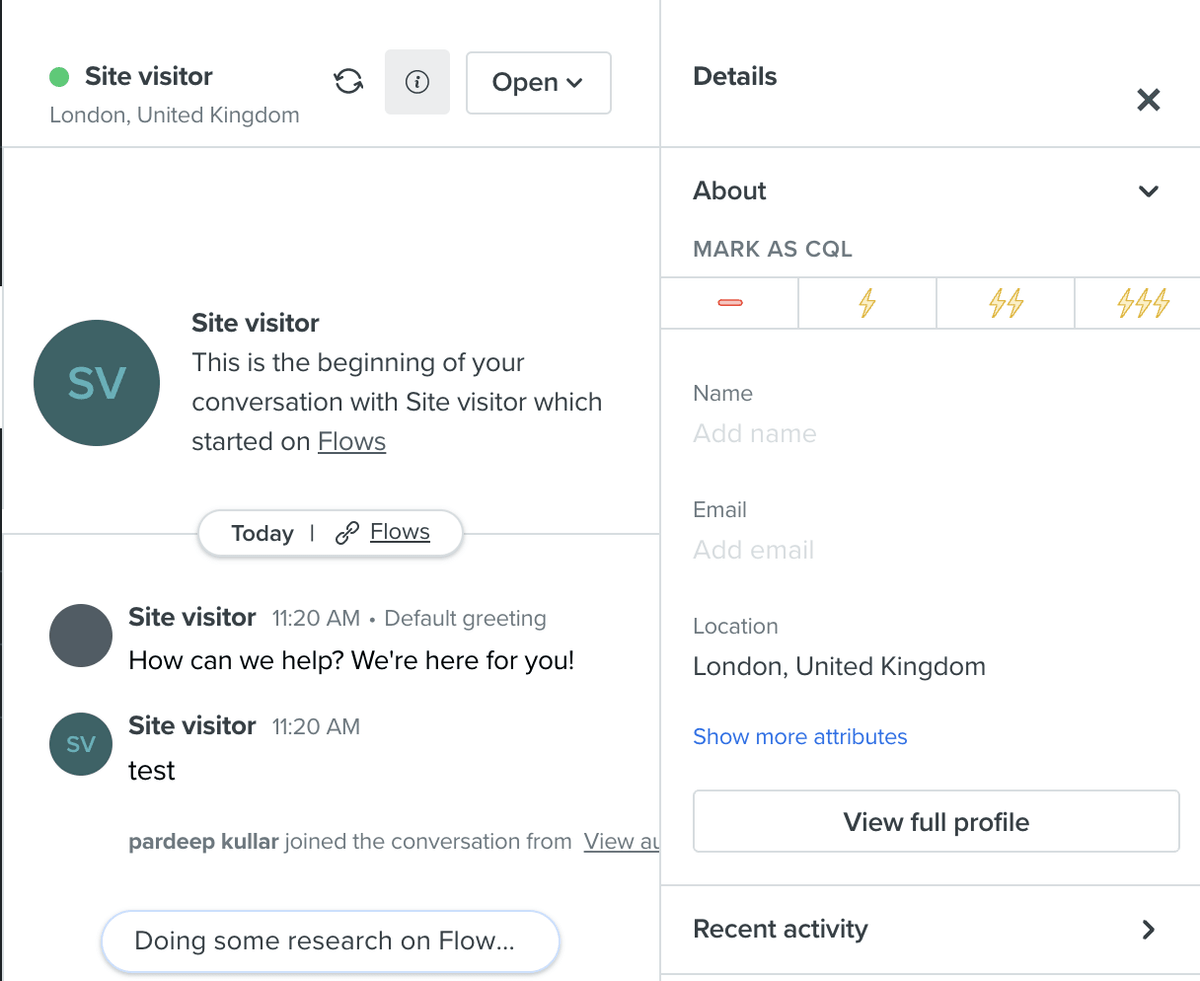
   ![Drift Screenshot 1](https://cms-cdn.userview.com/www/docs/assets/integrations/integration_screenshots/drift/drift_1.png)

   The link is not clickable at present, but you can copy and paste it into a new tab to instantly see the customer's screen and click and scroll for them.
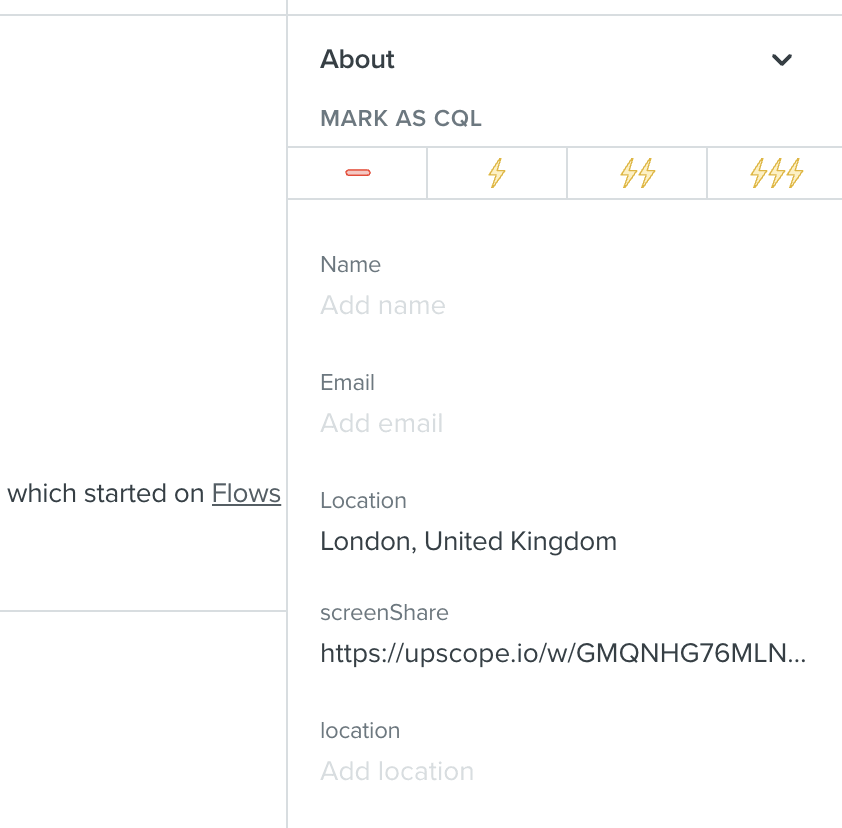
   ![Drift Screenshot 2](https://cms-cdn.userview.com/www/docs/assets/integrations/integration_screenshots/drift/drift_2.png)

   **Future Enhancement:**
   In the future, we hope that Drift allows clickable link attributes, enabling you to jump to the customer's screen in one click rather than copying and pasting.


### Freshchat

Source: https://userview.com/docs/integrations/freshchat

#### How to Integrate with Freshchat

Learn how to make the screenshare link appear on the side of the Freshchat interface, enabling you to instantly co-browse with any customer during chats.

UserView Co-Browsing offers instant and interactive screen sharing. A support agent chatting with a customer can not only see what the customer sees with just one click—without any downloads—but can also send their cursor over the internet to appear on the customer's screen, allowing them to click and scroll on behalf of the customer.

With Upscope, you can make even your least tech-savvy customers feel comfortable by clicking and scrolling for them on their screen as if you're sitting right there.

#### Integration Steps

To integrate UserView into [Freshchat](https://www.freshworks.com/live-chat-software/), follow these steps:

1. **Install Upscope**: Add the installation code to your page. The installation code can be found [here](https://app.upscope.io/install).
2. **Generate a Token**: In Upscope, navigate to `Settings` » `Integrations` and click on Freshchat to generate a token.
3. **Access Freshchat Marketplace**: Copy the token and go to the [Freshchat Marketplace](https://www.freshworks.com/apps/freshchat/upscope_screensharing).
4. **Install the App**: After installing the app, paste the token you copied from Upscope when prompted.
5. **Configure Freshworks**: Within Freshworks, go to `Admin Settings` » `Contacts`. Under `Basic information`, create a new text field called `upscope_screenshare`.
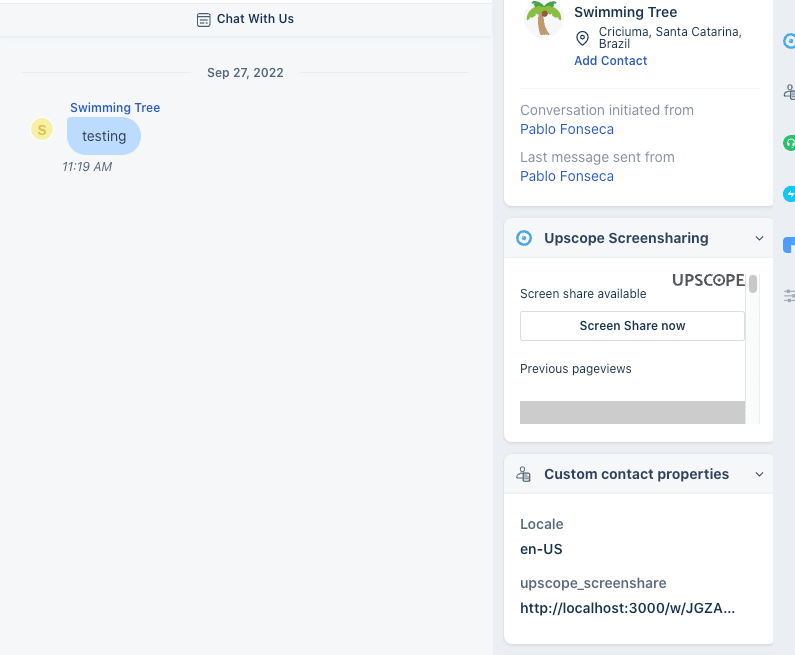
![Freshchat Integration Screenshot](https://cms-cdn.userview.com/www/docs/assets/integrations/integration_screenshots/freshdesk/freshchat_1.png)

### Front

Source: https://userview.com/docs/integrations/front

#### Add UserView Co-Browsing to Front Live Chat in 3 Steps

1. If you have not done so already, create your UserView account on [userview.com](https://userview.com/). There's a free trial available. You'll need to follow the instructions, including adding the JavaScript snippet to all pages you want to [co-browse](https://upscope.com/cobrowse) on.
2. Next, go to the [Front integrations store](https://app.frontapp.com/settings/apps/details/upscope/overview) and install Upscope. This will generate a unique Token. Copy that Token.
3. Log in to UserView, go to your `Settings` » `Integrations` and choose the **Front integration**. Paste the Token in there.

That's it, you're ready to test it.
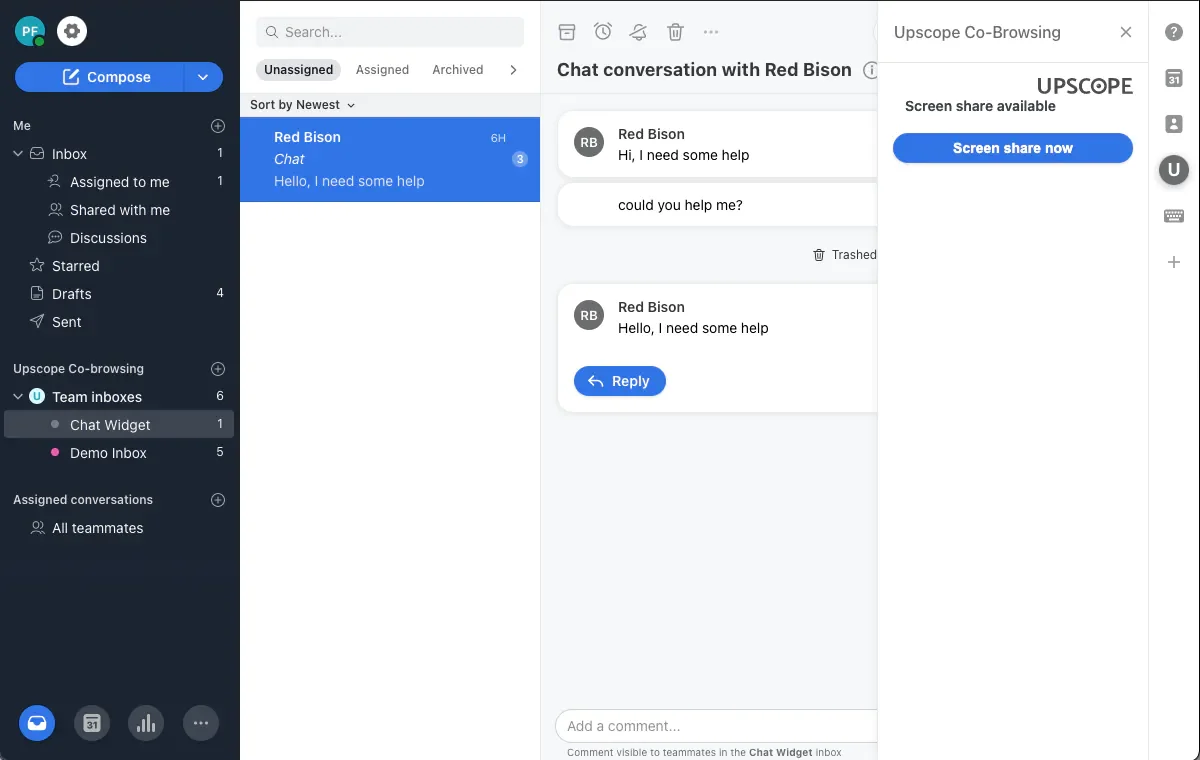
![Front Integration Screenshot](https://cms-cdn.userview.com/www/docs/assets/integrations/integration_screenshots/front/front_3.webp)

#### How to Run a Test of the Integration

To confirm that UserView is installed correctly, log into UserView, and you'll see a list of customers who are currently on your website.

##### Steps to Test the UserView Front Integration

1. Go onto your website and start a new live chat.
2. Within Front, you'll see the Upscope `Screen sharing` button appear on the right-hand side for that new chat.
3. Click the screen sharing button, and a pop-up will appear in the browser asking for permission to screen share.
4. Click yes and begin co-browsing.
5. You are able to not only scroll, click, and type for the customer but use the pen tool to draw on objects or around objects to bring the customer's attention to them.

#### How to Screen Share When the Customer Phones In

If the customer has phoned in rather than begun a live chat, you can identify their screen by asking them for their unique UserView 4-digit support code. This code can be added to your site footer or header or generated by the customer through tapping the `Ctrl` key 5 times.

Ask them to read out the code and enter that into the UserView Front app as below.

*Depending on your setup, it can either be pulled up by the customer pressing `Ctrl` on their keyboard 5 times or it can also be displayed somewhere on the page.* **[Find out more about the support code](https://userview.com/docs/using-userview/initiate-session/lookup-code.md)**
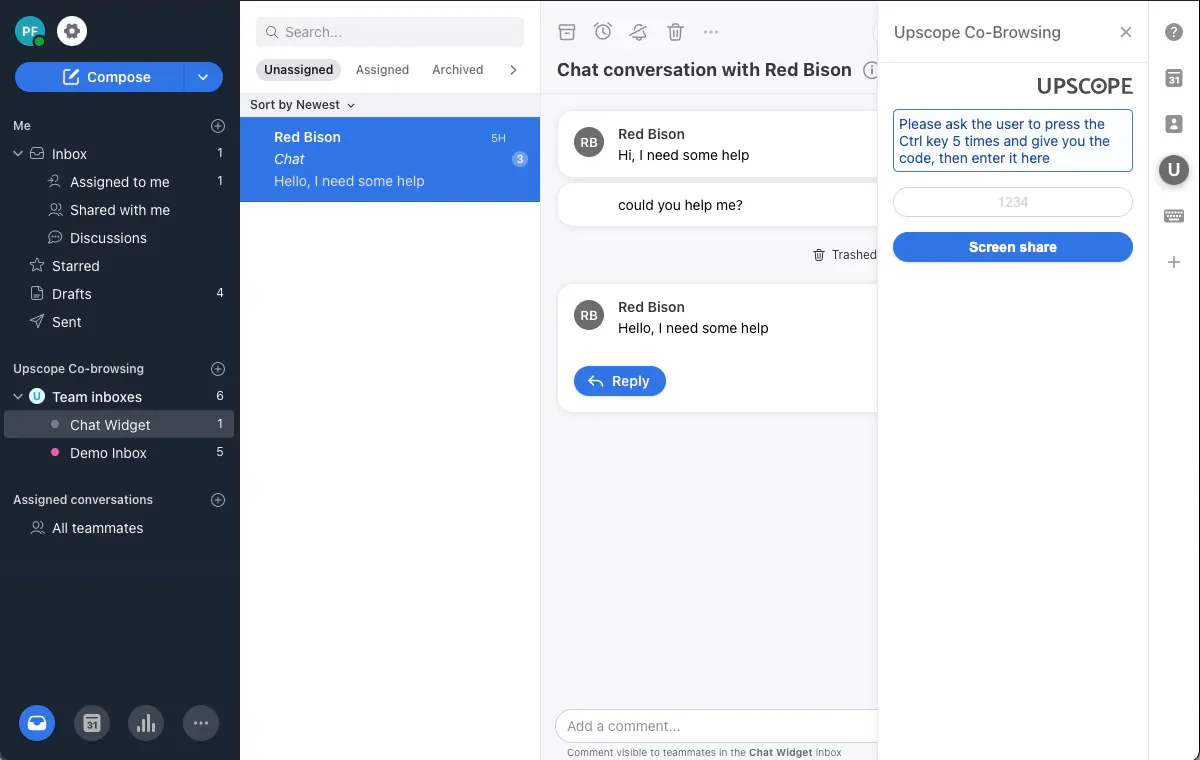
![Support Code Screenshot](https://cms-cdn.userview.com/www/docs/assets/integrations/integration_screenshots/front/front_2-1689855618.webp)

### HelpScout

Source: https://userview.com/docs/integrations/helpscout

Integrate Upscope and Beacon live chat by Helpscout to start a co-browsing session directly from a chat in Beacon. By installing Upscope on your website, the link will automatically appear within your chat window.

#### Steps to Integrate

1. **Install Upscope** on your website.
2. Add `Screenshare` as a custom property to [your custom properties page within HelpScout](https://secure.helpscout.net/settings/properties).

   **Important Note:**
   Please make sure to enter exactly the word `Screenshare`, including the capital 'S'.
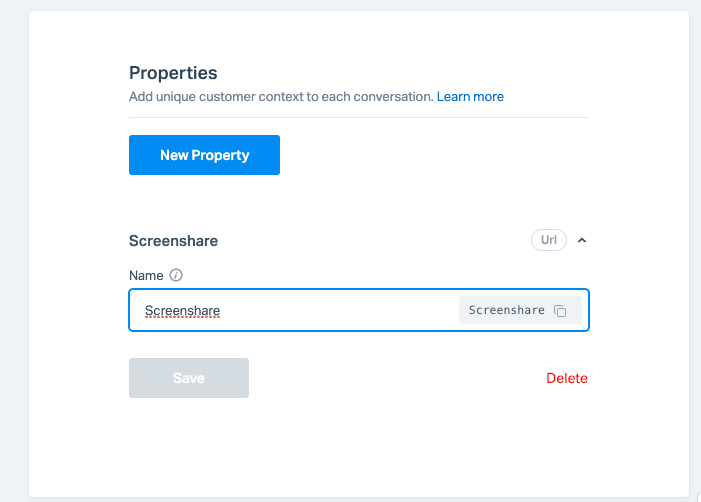
   ![](https://cms-cdn.userview.com/www/docs/assets/integrations/integration_screenshots/helpscout/helpscout_1.png)

3. Ensure both the agent's and customer's browser tabs are refreshed.
4. While in a conversation, click the `Screenshare` link on the right-hand side.
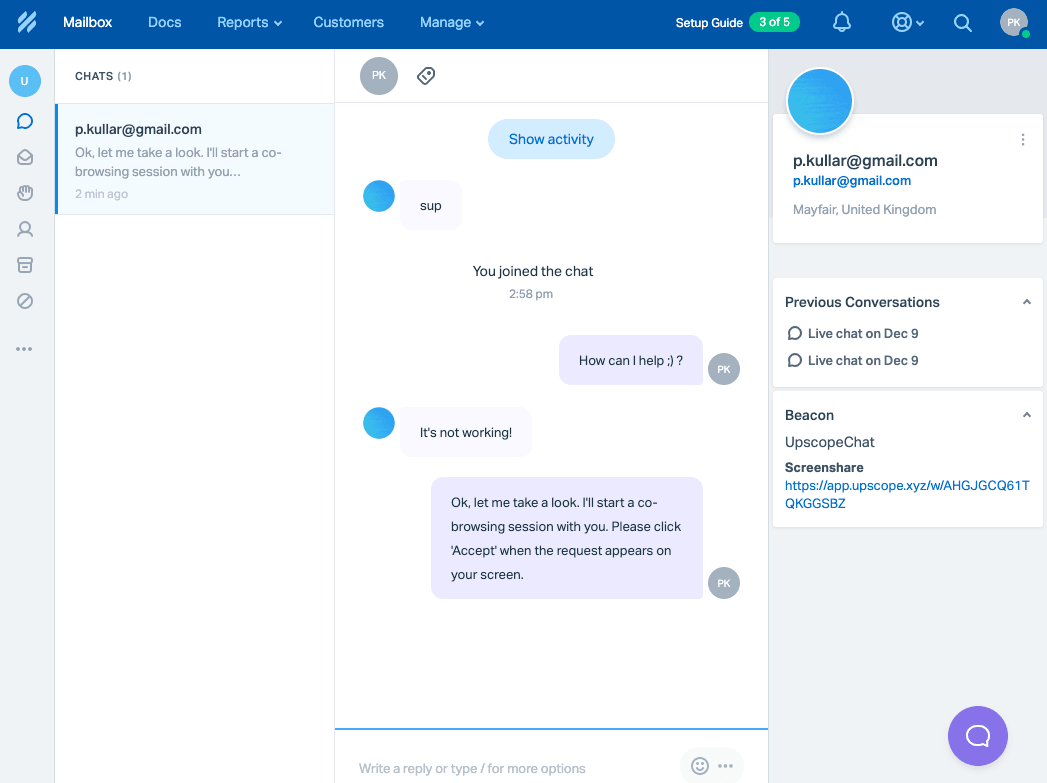
   ![](https://cms-cdn.userview.com/www/docs/assets/integrations/integration_screenshots/helpscout/helpscout_2.png)

   This will open up a co-browsing session in another tab. By default, it will ask the customer for permission to begin the co-browsing session. Once they accept, you can start co-browsing and use the cursor tool to scroll, click, and type for them.

You're set up and running 🎉

For any questions, please schedule a call at [userview.com/demo](https://userview.com/demo) or email [sales@upscope.io](mailto:sales@upscope.io) for other inquiries.

### Intercom

Source: https://userview.com/docs/integrations/intercom

### JivoChat

Source: https://userview.com/docs/integrations/jivochat

Here are the steps to integrate UserView with [JivoChat](https://www.jivochat.co.uk/).

The objective is to create a screen-sharing link within JivoChat to instantly screen-share with a customer when they need help. Below, you can see how the screen-sharing link appears on the right-hand side of the JivoChat panel and is labeled "Start a screen share".
![JivoChat Screen Sharing Link](https://cms-cdn.userview.com/www/docs/assets/integrations/integration_screenshots/jivochat/jivochat_!.png)

#### How to Create Your Own Screen Sharing Link Within JivoChat

##### Step 1: Add the Upscope JavaScript Snippet

Add the Upscope JavaScript snippet to all the pages you wish to screen share on. You can find your Upscope snippet within your settings under `Installation` [here](https://app.upscope.io/install).

##### Step 2: Allow Clickable Links in JivoChat

Allow clickable links within JivoChat by navigating to `JivoChat` » `Settings` » `Channels` and clicking on `Integration settings for developers` [here](https://app.jivosite.com/settings/channels). Then, enter `https://upscope.io` into the `Safe Base Url` field.

##### Step 3: Add Extra Code for Screen-Sharing Link

To make the screen-sharing link appear within JivoChat, add the following code to your pages below the widget code:

```html
<script type="text/javascript">
  function jivo_onLoadCallback() {
    Upscope('getWatchLink', function(link) {
      jivo_api.setCustomData([
        {
          content: "Start a screenshare",
          link: link
        }
      ]);
    });
  }
</script>
```

###### What Does This Code Do?

1. It waits for JivoChat to load.
2. It then uses the UserView `getWatchLink` function to generate a unique URL for that user's screen, which you can use to screen share.

Now, for all new chats, you'll see a screen share link appear within the JivoChat panel. Please be sure to refresh both JivoChat and the client side if you're testing.

### LiveChat

Source: https://userview.com/docs/integrations/livechat

If you're using [LiveChat](https://livechatinc.com/) and want the ability to instantly see the screen of the customer, directly from your chat with that customer, then here are the simple steps to get going.

1. Start by signing up for the free [UserView](https://userview.com/) trial. You can do this by visiting the home page of the UserView website.
2. Once signed up, proceed to add the provided JavaScript snippet to your site. This step is crucial for the Upscope functionality to work properly.
3. Next, request your LiveChat administrator to install the UserView Co-Browsing app. This can be done by directing them to the appropriate link on the [LiveChat marketplace](https://www.livechat.com/marketplace/apps/upscope-co-browsing/).

Once these steps are completed, you are set to begin co-browsing. This will allow you to view the customer's screen directly from your chat.

When you start a new chat, a screen share button appears on the right hand side of the LiveChat panel as below.

#### Using the App

To confirm that Upscope is installed correctly:

1. Log into Upscope and see a list of customers who are currently on your website.
2. You can **run a test of the Upscope LiveChat integration** by going onto your website and starting a chat. You'll see the Upscope 'Screen sharing' button appear on the right hand side for that customer's chat.
3. Click the screen sharing button and, if permissions are enabled, a pop-up will appear in the browser asking the customer for permission to screen share.
4. Click yes and begin co-browsing.
5. You'll see screenshots appear on the right hand side in the LiveChat interface for that UserView's chat feed.

You are able to not only scroll, click and type for the customer but use the pen tool to draw on objects or around objects to bring the customer's attention to them.

**Initial Refresh After Upscope-LiveChat Installation:**
Please be sure to refresh the page when you've first installed Upscope with LiveChat.

#### Use the support code when customers phone in

You can also find the customer by using their support code when they phone in.

The phone support code is a 4 digit unique code which, on entry, leads you to that customer's specific screen without them having to start a chat on LiveChat.
![](https://cms-cdn.userview.com/www/docs/assets/integrations/integration_screenshots/livechat/livechat_3.png) Ask for their code (make sure you have it enabled [here](https://app.upscope.io/settings/teams/_/search))

1. Plug the code into the Upscope widget.
2. Click the '**Screen share**' button.

*Depending on your set-up, it can either be pulled up by the customer pressing 'control' on their keyboard 5 times or it can also be displayed somewhere on the page. **[Find out more about the support code](#)*

### Olark

Source: https://userview.com/docs/integrations/olark

Here are the steps to integrate UserView with Olark:

#### Add Upscope to instantly view a customer's screen from Olark

As with all live chat integrations, the process of adding Upscope is simple. You don't need to set up and create any special integrations between the two apps, simply paste the Upscope installation code below the Olark code as below.

Example Code:

```html
<!-- BEGIN Olark code -->
<script type="text/javascript" async>
;(function(o,l,a,r,k,y){if(o.olark)return;
r="script";y=l.createElement(r);r=l.getElementsByTagName(r)[0];
y.async=1;y.src="//"+a;r.parentNode.insertBefore(y,r);
y=o.olark=function(){k.s.push(arguments);k.t.push(+new Date)};
y.extend=function(i,j){y("extend",i,j)};
y.identify=function(i){y("identify",k.i=i)};
y.configure=function(i,j){y("configure",i,j);k.c[i]=j};
k=y._={s:[],t:[+new Date],c:{},l:a};
})(window,document,"static.olark.com/jsclient/loader.js");
/* Add configuration calls below this comment */
olark.identify('YOUR_SITE_ID');</script>
<!-- END Olark code -->

<!-- BEGIN Upscope code -->
<script>
// The Upscope code you get at https://upscope.io/install
</script>
<!-- END Upscope code -->
```

When you open Olark and click on an individual chat, you'll see a screen share link appear on the right-hand side, as below, under Advanced info:
![](https://cms-cdn.userview.com/www/docs/assets/integrations/integration_screenshots/olark/olark_1.png)

In one click you can see the problem to resolve it faster. No more asking for screenshots or 'what do you see on your screen?'. You're in customer support heaven with [Olark](https://www.olark.com/) and [Upscope](https://upscope.io/)

### Re:amaze

Source: https://userview.com/docs/integrations/reamaze

#### Re:amaze Live Chat Integration

[Re:amaze](https://www.reamaze.com/) has an incredible feature set with multiple integrations that include e-commerce platforms like Bigcommerce, Woocommerce, Magento, Shopify, etc. It's an understated application on the surface that is a beast underneath.

Once you've created your account, you'll need to install their JavaScript code which you build using their [awesome widget builder](https://reamaze.reamaze.com/kb/video-tutorial-series/widget-builder). Paste this code above the closing `</head>` tag and you're running.

As with all live chat integrations, the process of adding Upscope is simple. You don't need to set up and create any special integrations between the two apps; simply paste the Upscope installation code **below** the [Re:amaze](https://www.reamaze.com/) code.

You can see that the Re:amaze code sits above the closing `</head>` tag and below that we've pasted the Upscope installation code that sits within your settings.

That's it. Done.
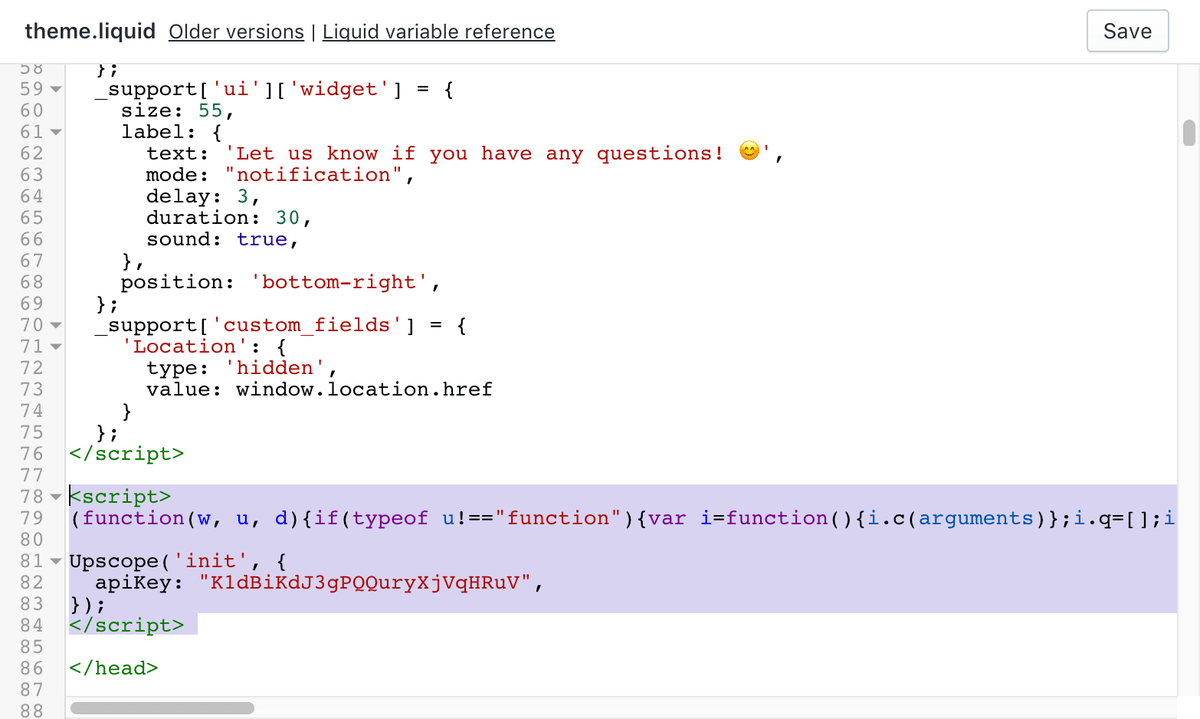
![](https://cms-cdn.userview.com/www/docs/assets/integrations/integration_screenshots/reamaze/reamaze_integration_1.png) When customers message you via the Re:amaze Shoutbox or [Lightbox](https://www.reamaze.com/developer/widget_lightbox), the incoming message displayed within the Re:amaze UI will now include a screen sharing link.
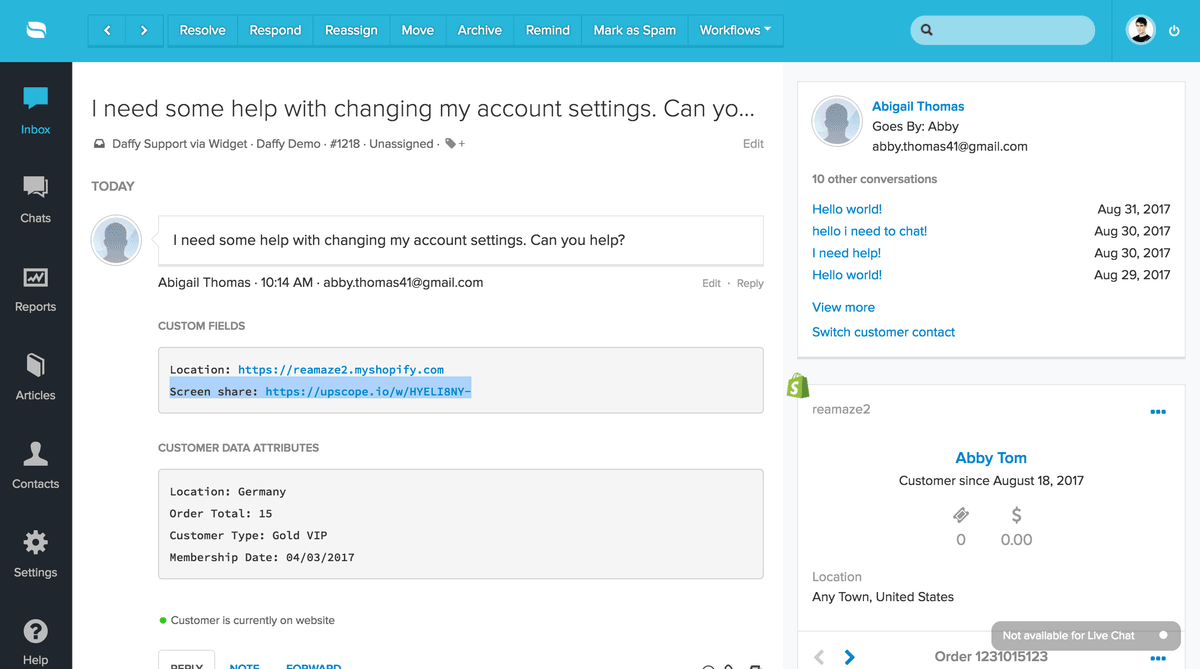
![](https://cms-cdn.userview.com/www/docs/assets/integrations/integration_screenshots/reamaze/reamaze_integration_2.png) Please reference [Re:amaze's support article](https://support.reamaze.com/kb/3rd-party-integrations/upscope-dot-io-co-browsing-and-screensharing-how-to) on the Upscope integration for further information and their recommendations.

### Salesforce

Source: https://userview.com/docs/integrations/salesforce

### Tawk.to

Source: https://userview.com/docs/integrations/tawkto

UserView integrates with [Tawk.to](https://tawk.to/), allowing you to transition from a chat to viewing a customer's screen in seconds.

#### Integrate Tawk.to with UserView

To integrate UserView with Tawk.to, follow these steps:

1. Paste the UserView code on the same pages as the Tawk.to code.
2. Add the following function to those pages:

   ```javascript
   Tawk_API.onLoad = function() {
       Upscope('getWatchLink', function(link) {
           Tawk_API.setAttributes({
               'Screenshare': link
           }, function(error) {});
       });
   };
   ```

You can find the UserView code within your UserView account settings under `Installation instructions`.

Your unique Tawk.to code snippet can be found when you first sign up or log into Tawk.to and navigate to `Settings` at the bottom left of their interface.

The Tawk.to snippet and the additional function will combine to look like this:

```html
<!--Start of Tawk.to Script-->

<script type="text/javascript">
var Tawk_API=Tawk_API||{}, Tawk_LoadStart=new Date();
(function() {
    var s1=document.createElement("script"),s0=document.getElementsByTagName("script")[0];
    s1.async=true;
    s1.src='https://embed.tawk.to/YourTawktoUniqueCode/default';
    s1.charset='UTF-8';
    s1.setAttribute('crossorigin','*');
    s0.parentNode.insertBefore(s1,s0);
})();

Tawk_API.onLoad = function() {
    Upscope('getWatchLink', function(link) {
        Tawk_API.setAttributes({
            'Screenshare': link
        }, function(error) {});
    });
};
</script>
```

#### Test Your First Screen Sharing Session

Once you've added the Tawk.to snippet, the extra function, and the UserView snippet on your site, you're ready to test it out.

- Create your first test chat.
- Tawk.to will notify you of the incoming chat.
- Open Tawk.to and click on the individual incoming customer chat; you'll see a `Screenshare` link appear in the panel on the right-hand side.
- This is your one-click interactive screen sharing link that takes you directly to the customer's browser.

### Tidio

Source: https://userview.com/docs/integrations/tidio

Integrating UserView with [Tidio](https://www.tidio.com/) allows you to create a screen-sharing link within Tidio, enabling instant screen-sharing with a customer when they need help. Below, you can see how the screen-sharing link appears on the right-hand side of the chat panel.

#### Create Your Own Screen Sharing Link Within Tidio

##### Step 1: Add the Upscope JavaScript Snippet

Add the Upscope JavaScript snippet to all the pages you wish to screen share on. You can find your Upscope snippet within your settings under `Installation`: [https://app.upscope.io/install](https://app.upscope.io/install).

##### Step 2: Create a New Contact Property

Create a new contact property within `Tidio` » `Settings` » `Contact properties`: [https://www.tidio.com/panel/settings/contact-properties](https://www.tidio.com/panel/settings/contact-properties).

- Choose `URL` as the property type.
- Name it `Screen sharing` or whatever you prefer.

Below, we've labeled the contact property as 'Screen sharing' and the internal property name is `screen_share`.
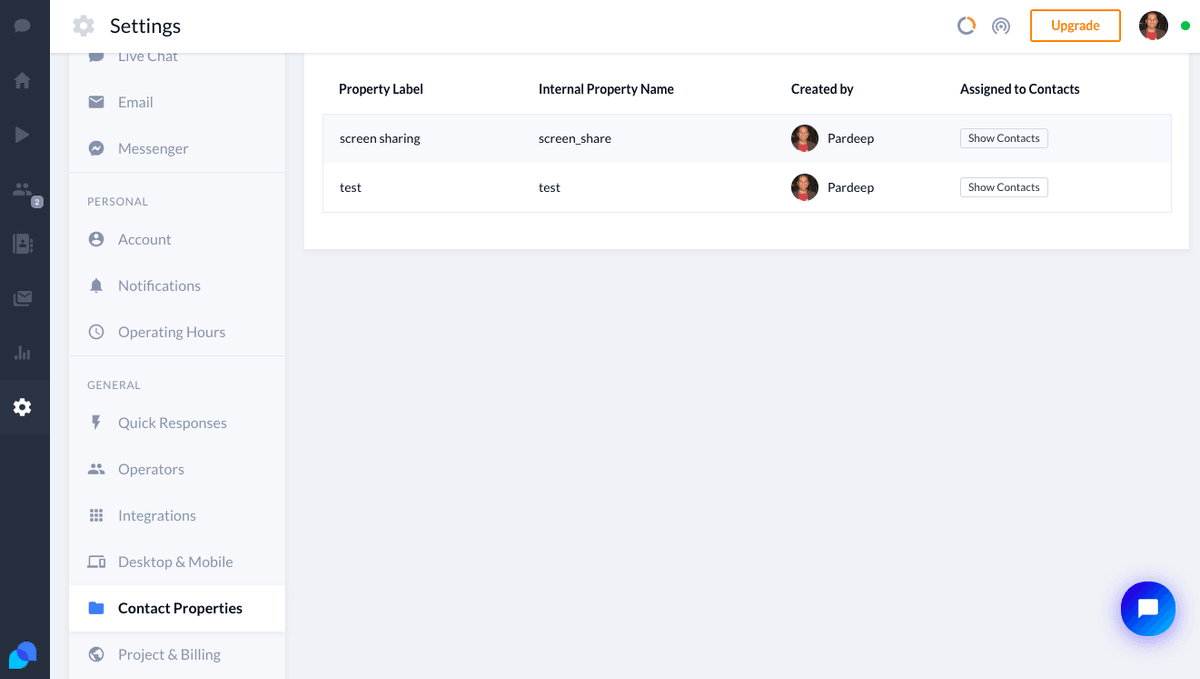
![Tidio Contact Property](https://cms-cdn.userview.com/www/docs/assets/integrations/integration_screenshots/tidio/tidio_2.png)

##### Step 3: Enable Contact Properties Within Tidio

To enable contact properties within Tidio, you need to add some extra code to your pages. Ensure that the contact property name you set up is identical to the property you add to the code. Below, we've used `screen_share`.

```javascript
<script type="text/javascript">
(function() {
  function onTidioChatApiReady() {
    // Code after chat loaded
    Upscope('getWatchLink', function(link) {
      tidioChatApi.setContactProperties({
        screen_share: link,
      });
    });
  }
  if (window.tidioChatApi) {
    window.tidioChatApi.on("ready", onTidioChatApiReady);
  } else {
    document.addEventListener("tidioChat-ready", onTidioChatApiReady);
  }
})();
</script>
```

#### Code Explanation

1. **Waits for the Tidio chat to load.**
2. **Uses the Upscope `getWatchLink` function** to generate a unique URL for that user's screen, which you can use to screen share.

Now, for all new chats, you'll see a screen share link appear within the Tidio chat panel. Please be sure to refresh both Tidio and the client side if you're testing.
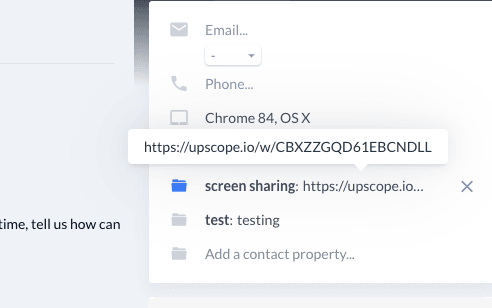
![Tidio Chat Panel](https://cms-cdn.userview.com/www/docs/assets/integrations/integration_screenshots/tidio/tidio_3.png)

When you're in a chat with a customer, you can copy and paste that screen sharing link into a new tab to begin screen sharing. By default, it will ask for permission. You can make changes to the messages and permissions within your settings.

**Note:**
The screen sharing link is not a clickable link at present. We hope that Tidio will allow clickable links in the near future.

For further assistance, you can schedule a call by visiting [UserView Demo](https://userview.com/demo).

### Trengo

Source: https://userview.com/docs/integrations/trengo

Follow these steps to add Upscope Co-Browsing to Trengo chat so you can instantly see what your customer sees and guide them.

The objective is to create a screen-sharing link within Trengo to instantly screen-share with a customer when they need help. Below you can see how the screen-sharing link appears on the right-hand side in the Trengo panel and is labeled `Screenshare`.

#### How to Create Your Own Screen Sharing Link within Trengo

##### Step 1: Add the Upscope JavaScript Snippet

Add the Upscope JavaScript snippet to all the pages you wish to screen share on. You can find your Upscope snippet within your settings under `Installation` or by visiting [this link](https://app.upscope.io/install).

##### Step 2: Add Screenshare as a New Custom Field

Add `Screenshare` as a new custom field within Trengo. You can find the custom fields section under your settings or go directly to this [link](https://app.trengo.eu/admin/custom_fields/).
![](https://cms-cdn.userview.com/www/docs/assets/integrations/integration_screenshots/trengo/trengo_2.png)

Create a new custom field called `Screenshare` under the type `Contact`, choose sort order 1, and make a note of the custom field identification number.
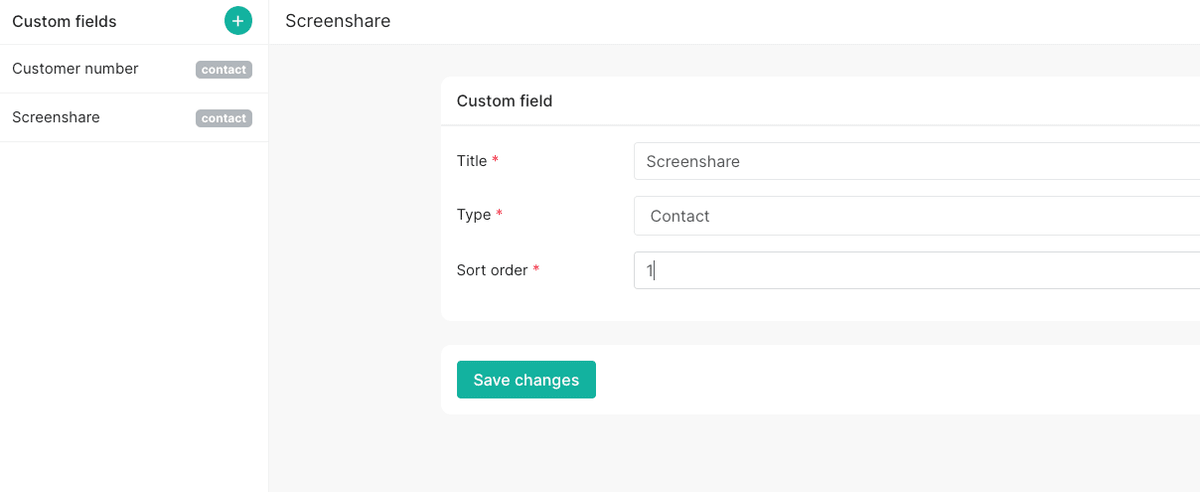
![](https://cms-cdn.userview.com/www/docs/assets/integrations/integration_screenshots/trengo/trengo_3.png)

You can see the custom field identification number in the URL of that page. For example, the field ID for this `Screenshare` custom field is within the URL as `90590`.

##### Step 3: Add Extra Code to Your Pages

To make the screen-sharing link appear within Trengo, you need to add some extra code to your pages below the widget code. Along with your Upscope and Trengo default code, add the following snippet. Please be sure to change the `field_id` to whatever field ID number was given to you when you created the screen sharing custom field.

```javascript
window.Trengo.on_ready = function() {
    Upscope('getWatchLink', function(link) {
        // make sure to change the field id number to YOUR field id number
        window.Trengo.contact_data = {
            custom_fields: [{
                field_id: 90590,
                value: link
            }]
        };
    });
};
```

**Note:**
The screen sharing link is not currently clickable, but you can copy and paste that link into your browser.

###### What Does This Code Do?

1. It waits for Trengo to load.
2. It then uses the Upscope `getWatchLink` function to generate a unique URL for that user's screen, which you can use to screen share.

Now, for all new chats, you'll see a screen share link appear within the Trengo panel. Please be sure to refresh both Trengo and the client side if you're testing.

### Zendesk

Source: https://userview.com/docs/integrations/zendesk

#### Setup

If you have not done so already, create your UserView account on [https://userview.com/signup](https://userview.com/signup). There's a free trial available. You'll need to install the Upscope JavaScript code first.

##### Install and Use the Upscope App for Zendesk in 3 Steps

Please note that you must be signed into Zendesk and Upscope as an admin.

1. In Upscope, go to `Settings` » `Integrations` and click on `Connect to Zendesk` to generate a Token.
2. Copy that Token and go to the [Zendesk Marketplace](https://www.zendesk.com/apps/directory/?q=upscope).
3. There's an Upscope app for support (tickets) and for chat. Choose the one you use and install the app. Enter the Token when prompted.

###### Zendesk Messaging

If you have Messaging enabled, you can [enable authenticated visitors](https://developer.zendesk.com/documentation/zendesk-web-widget-sdks/sdks/web/enabling_auth_visitors/#workflow) and set the `uniqueId` on Upscope:

```html
<script>
  Upscope('updateConnection', {uniqueId: "YOUR_USER_ID"})
</script>
```

The value for `uniqueId` must be the same as the one you used for `externalId` when signing a new JWT token on Zendesk.

**Please Note - for Zendesk Support (Tickets):**
If you're installing the Upscope app for Zendesk Support, you need to have "Show Lookup Code" enabled in your Upscope co-browsing settings.

Go to your settings [here](https://app.upscope.io/settings/teams/_/search) and enable it.

#### Connect Your Zendesk Account (OAuth)

After installing the app, you can optionally connect your Zendesk account via OAuth. This enables advanced features like automatic ticket tagging and session summary notes.

1. In Upscope, go to `Settings` » `Integrations` and open your Zendesk integration.
2. Under the OAuth section, enter your Zendesk subdomain (e.g. `yourcompany` for `yourcompany.zendesk.com`).
3. Click `Connect` and authorize Upscope in the Zendesk consent screen.

Once connected, you'll see a confirmation with your connected subdomain. Upscope requests read access to users and read/write access to tickets.

**Tip:**
If your Zendesk account is already connected to a different Upscope team, you'll need to disconnect it from the other team first.

#### Ticket Tagging

When OAuth is connected, Upscope automatically tags Zendesk tickets with `userview:cobrowsing` whenever a co-browsing session ends. This lets you filter and report on tickets where co-browsing was used.

No configuration is needed — tagging happens automatically for any session linked to a Zendesk ticket.

#### Session Summary Notes

When OAuth is connected, Upscope can post a summary of each co-browsing session as a **private internal note** on the associated Zendesk ticket when the session ends.

The summary includes:
- Agent and visitor names
- Session duration
- Video recording link (if available)
- Audio/video call duration
- User and agent ratings and feedback
- Agent notes

##### Enable or Disable

1. Go to `Settings` » `Integrations` and open your Zendesk integration.
2. Under **Session summary**, set the option to `Yes` or `No`.

Session summary notes are enabled by default. The note is only visible to agents (not customers).

**Please Note:**
Session summary notes require the `zendesk_session_summary` feature on your plan. If the option is disabled, contact support to check your plan's availability.

#### Using the App

To confirm that Upscope is installed correctly:

1. **Run a test of the Upscope Zendesk integration** by going onto your website and starting a chat.
2. Within Zendesk, you'll see the Upscope `Screen sharing` button appear on the right-hand side. Click that to start co-browsing.

You can not only scroll, click, and type for the user but also use the pen tool to draw on or around objects to bring the user's attention to them.

**Tip:**
Please be sure to refresh the page when you've first installed Upscope with Zendesk.

#### Use the Support Code When Users Phone In

You can also find the user by using their support code when they phone in. The phone support code is a 4-digit unique code which, on entry, leads you to that user's specific screen without them having to start a chat on Zendesk.
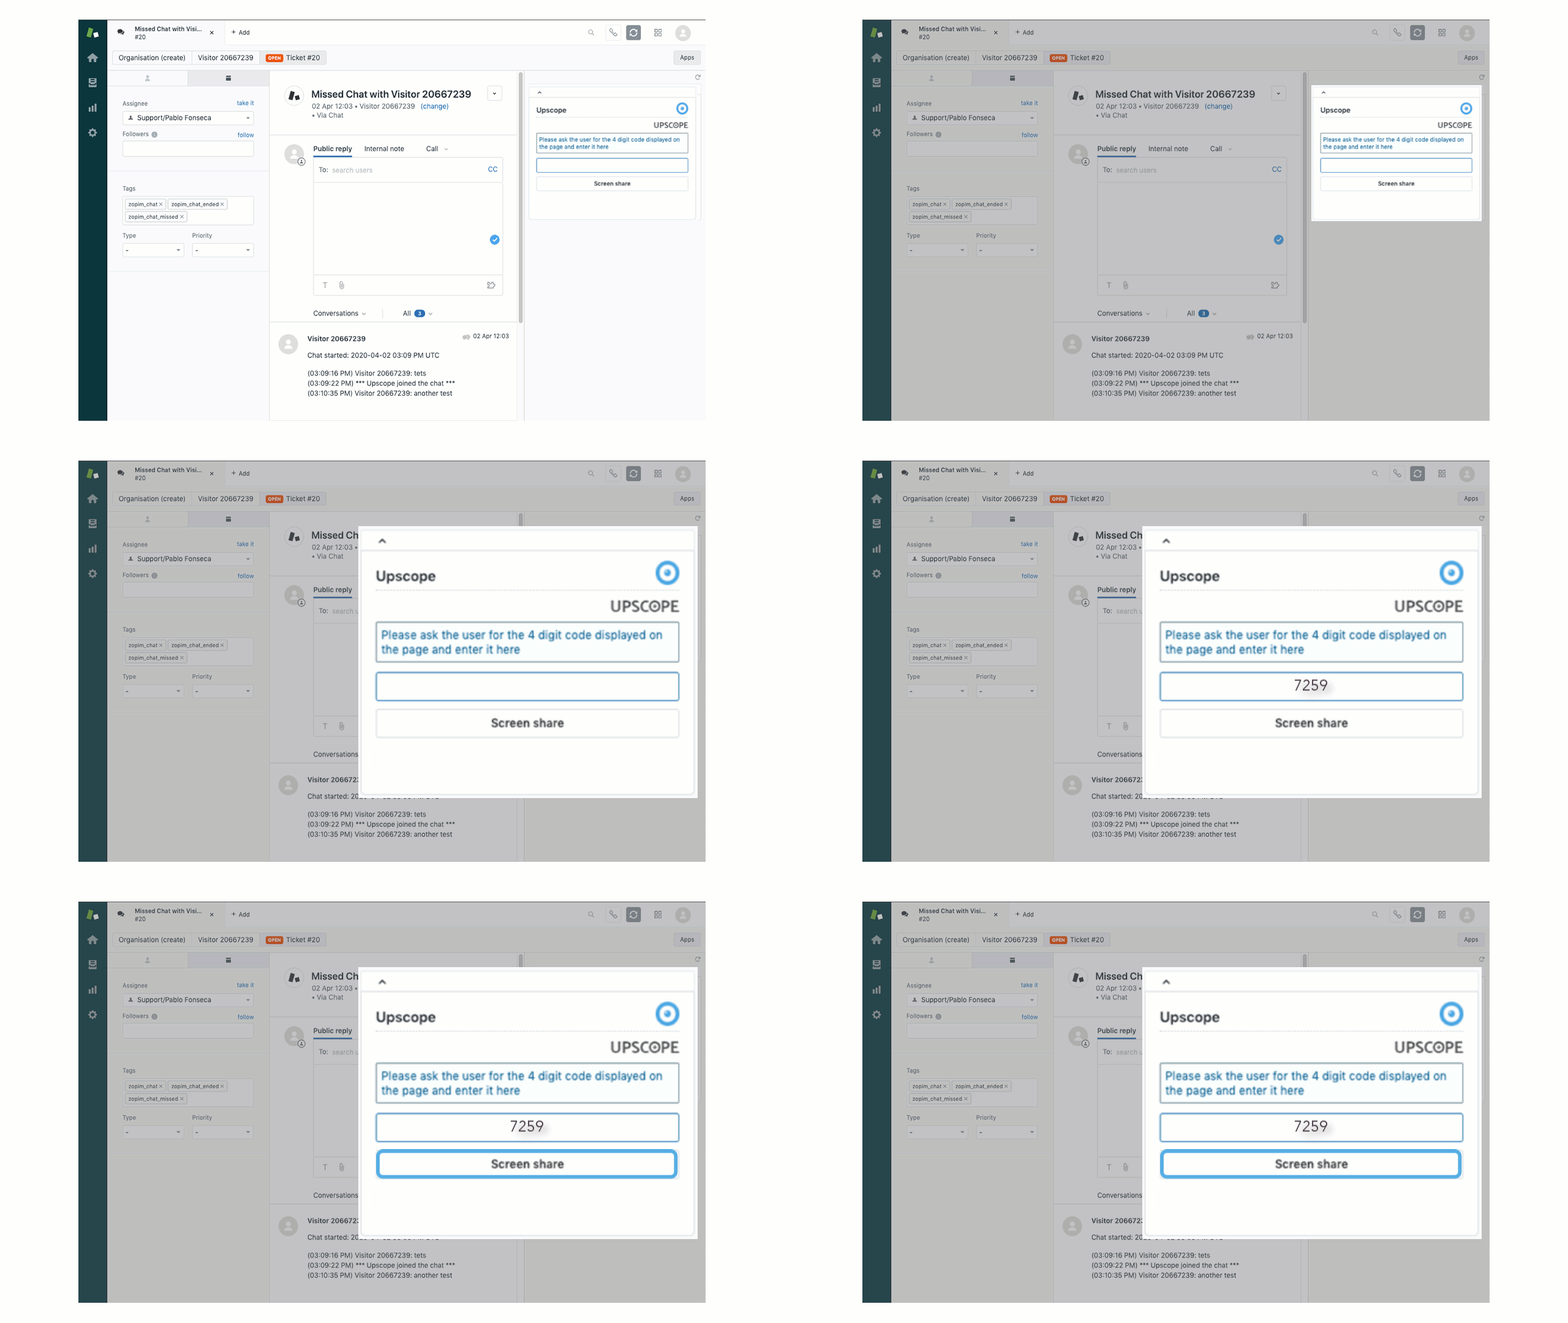
![Zendesk Integration Screenshot](https://cms-cdn.userview.com/www/docs/assets/integrations/integration_screenshots/zendesk/zendesk_1.gif)

1. Ask for their code (make sure you have it enabled [here](https://app.upscope.io/settings/teams/_/search)).
2. Plug the code into the Upscope widget.
3. Click the `Screen share` button.

*Depending on your setup, it can either be pulled up by the user pressing `control` on their keyboard 5 times or it can also be displayed somewhere on the page.* Find out more about the support code.

#### Setup

Source: https://userview.com/docs/integrations/intercom/setup

##### Install UserView with Intercom

Integrating UserView with Intercom allows you to enhance your customer support experience by enabling screen sharing capabilities. Follow these steps to set up the integration.

###### Install the UserView JavaScript Code

To begin, add the UserView JavaScript snippet to all pages where you wish to enable screen sharing.

For detailed instructions, refer to the [UserView Installation Guide](https://userview.com/docs/sdk/web/installation.md).

###### Install the Upscope App from the Intercom App Store

Next, download the Upscope app from the Intercom App Store to facilitate the integration.

[Download the Upscope App](https://app.intercom.com/a/apps/jjuq5mvv/appstore?app_package_code=upscope-shni)

###### Connect Intercom and UserView

Finally, connect Intercom with UserView by navigating to `Settings` » `Integrations` in the Upscope General Settings and enabling the integration.

Visit the [Integrations Page](https://app.upscope.io/settings/teams/_/integration) to complete this step.

#### Adding UserView to your Intercom Sidebar

Source: https://userview.com/docs/integrations/intercom/adding-userview-to-your-intercom

Before adding the UserView app to your Intercom chat sidebar, ensure **UserView is installed and connected to Intercom**.

###### Installation and Integration

- See: [How to install UserView](https://userview.com/docs/sdk/web/installation.md)
- Connect the integration here: [UserView Integration Settings](https://app.upscope.io/settings/teams/getupscope.com/integration)

###### Adding UserView to Intercom

To make UserView accessible on Intercom, follow these steps:

1. Scroll to the bottom of your side panel on a conversation.
2. Click on `Edit Apps`.
3. Pin the UserView app and drag the module up to a more visible area.
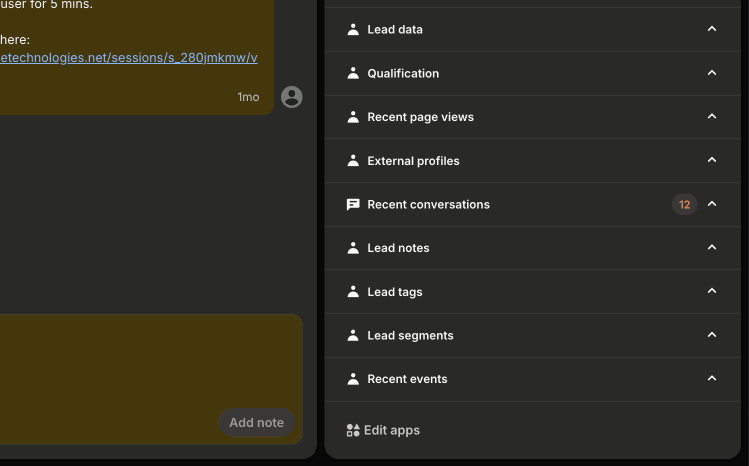
![Edit Apps Screenshot](https://cms-cdn.userview.com/www/docs/assets/screenshot-2025-05-19-at-10.57.23.png)

If you don't see the option to view their screen, refresh the page.
![Pin UserView Screenshot](https://cms-cdn.userview.com/www/docs/assets/screenshot-2025-05-19-at-10.59.33.png)
![Visible Area Screenshot](https://cms-cdn.userview.com/www/docs/assets/screenshot-2025-05-19-at-11.03.17.png)

For further guidance on using the Intercom integration, refer to [How to use the Intercom integration](https://userview.com/docs/integrations/intercom/user-guide.md).

#### User Guide

Source: https://userview.com/docs/integrations/intercom/user-guide

The Intercom/UserView integration allows you to:

- Get more context on what the user was doing before opening the chat through automated screenshots.
- Send a co-browsing request through the chat to have a record of it.
- Start a co-browsing session from Intercom.
- View the co-browsing session whilst still on Intercom with picture-in-picture.
- Get a summary of a session in the chat UI after the session ends.
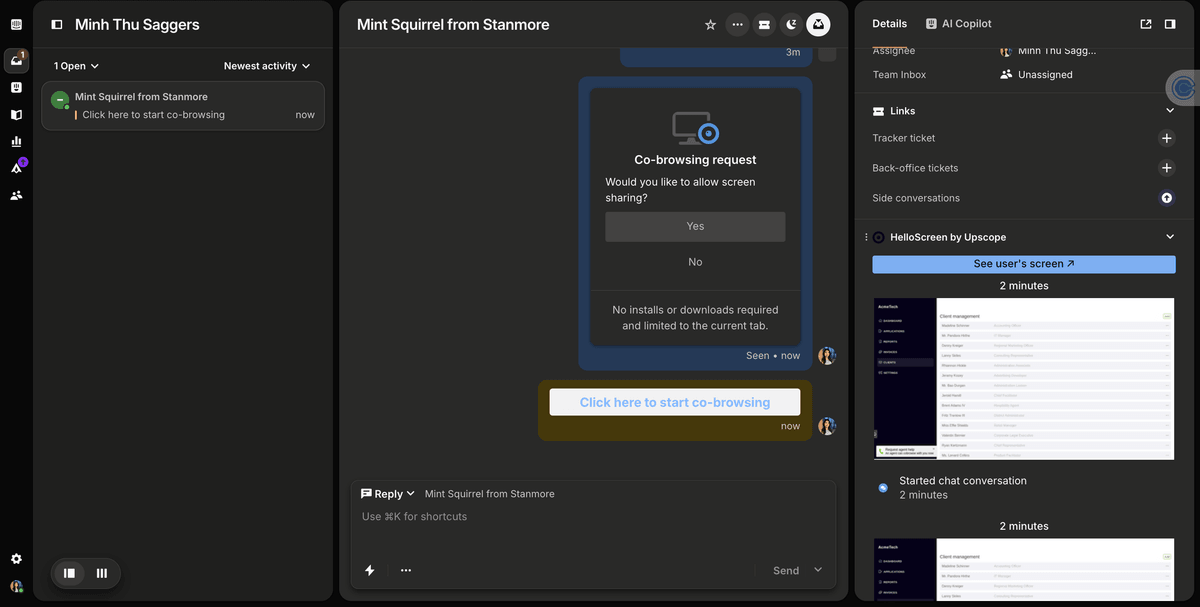
![Intercom/UserView Integration](https://cms-cdn.userview.com/www/docs/assets/screenshot-2025-02-12-at-10.49.53-1739379620.png)

##### How to Initiate a Session

###### Side Panel Widget

1. Make sure UserView is visible by going into `Edit apps` on the chat UI.
   ![Edit Apps](https://cms-cdn.userview.com/www/docs/assets/screenshot-2025-02-12-at-10.47.55.png)

2. You'll then see the widget appear in the right-side panel. On new chats, you'll see screenshots of previous pages the customer has been on.

###### Send a Request in the Chat

Sending a co-browsing request in the chat allows you to start the session from there, have a record of when it occurred, and receive a summary of the session.

1. When you're speaking to a user, click on `shortcuts`.
   ![Shortcuts](https://cms-cdn.userview.com/www/docs/assets/screenshot-2025-02-12-at-10.47.42-1739368601.png)

2. This will send a request through the chat, and once the user has approved, you'll receive an internal note with the link to [co-browse](https://upscope.com/cobrowse).

###### Picture-in-Picture

Continue the conversation by taking UserView with you back into Intercom using picture-in-picture.
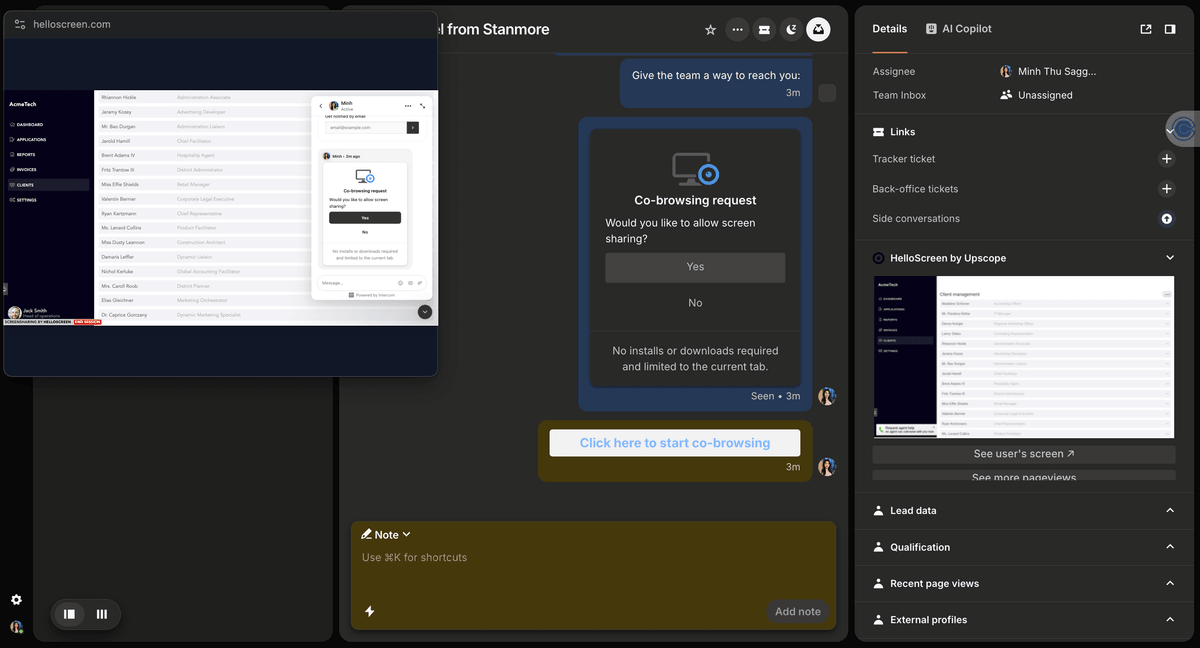
![Picture-in-Picture](https://cms-cdn.userview.com/www/docs/assets/screenshot-2025-02-12-at-16.50.19.png)

Select picture-in-picture mode in the toolbar.
![Toolbar](https://cms-cdn.userview.com/www/docs/assets/screenshot-2025-02-12-at-16.57.56.png)

###### Post-Session Notes

After the session has ended, you'll get a note in the Intercom chat summarizing the details of the session.

#### Troubleshooting

Source: https://userview.com/docs/integrations/intercom/troubleshooting

Below we've listed some key points on fixing common issues with UserView's Intercom integration.

##### Reload Intercom and Ask the Customer to Reload Their Page

Intercom will need to be reloaded after you add a new attribute. Make sure you and all your agents reload the Intercom app.

The customer might already be on your site when you've added the UserView JavaScript snippet. They'll need to reload the page for the snippet to be active. Once they've refreshed, they'll appear within the [UserView user list](https://app.upscope.io/) and the UserView Intercom integration will also work.

##### Ensure the Code is on the Page You Wish to Screen Share On

The UserView JavaScript snippet needs to be on all pages that you wish to screen share on. The most common reason for "User not found" type errors is not having the code on the page along with not having refreshed the page after you've installed UserView for the first time.

##### Check Whether UserView Sees Intercom

After the page has loaded, open up the inspector/console. Then type the following:

```javascript
alert(Upscope._integrations);
```

An alert should open up with the word `intercom` in it.

###### If the Alert Does Not Have Intercom in It

- If the alert has the word `undefined` or `null` in it, ensure that the UserView code snippet is loaded after Intercom. Paste our code below Intercom's.
- If the alert has any other word in it, you might have multiple live chat systems installed on your website. Please get in touch with our team for help.

##### Take a Look at the Console Log

On your page, open the console/inspector and type the following:

```javascript
localStorage.debug = 'upscope:integrations';
```

Then, reload the page while keeping the console open. You should see debugging information about the integration.

##### Contact Our Team

If none of the above fixed the problem, you will need to contact our team through Intercom or at [team@userview.com](mailto:team@userview.com).

**Provide Access for Assistance:**
Please provide a way for our tech team to access the page you are attempting to integrate UserView and Intercom on, as we wouldn't be able to assist you otherwise. If you can't provide access, please provide a pastebin link with the code that loads both Intercom and UserView.

**Ensure Proper Permissions:**
Make sure you are the owner or have permissions to change settings within UserView. How to give access to other team members.


#### Salesforce Chat

Source: https://userview.com/docs/integrations/salesforce/salesforce-chat

##### Step 1: Create a Custom Field

Create a new custom `Screen Share` field in the `ChatTranscript` object with the type set to `url`. You can make it read-only and visible to the agent.

##### Step 2: Ensure Salesforce Chat and UserView are Installed on the Same Page

UserView will automatically detect Salesforce Chat. To verify if the Chat SDK is available, look for the `embedded_svc` object in the browser inspector.

###### Different Field Name?

UserView will automatically add the chat link to a field named `Screen_Share__c`. If your field name is different, you can change it in the UserView installation script.

```javascript
// ... rest of installation script

Upscope('init', {
  "sfdcFieldId": "Co_Browse__c", // <- Field ID here
  // ... all other custom options
});
```

**Automatic Session Link:**
The link to start a session will be automatically added to all incoming chats!
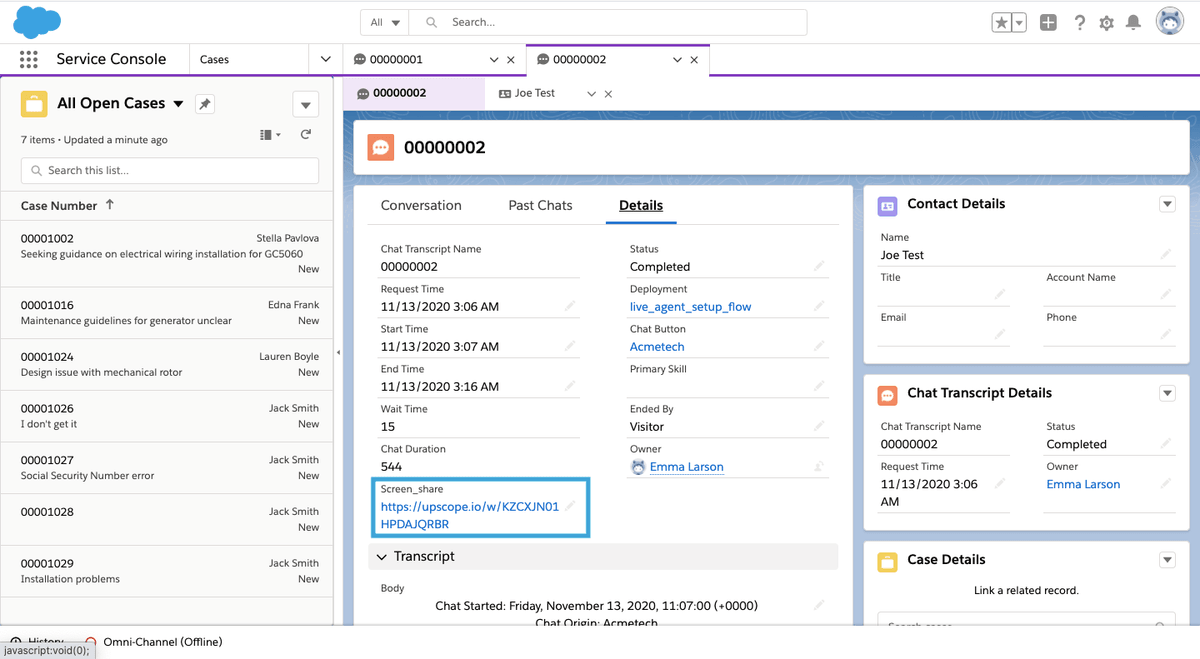
![Salesforce Chat Integration Screenshot](https://cms-cdn.userview.com/www/docs/assets/integrations/integration_screenshots/salesforce_chat/salesforce_chat_1.png)

#### Salesforce CRM

Source: https://userview.com/docs/integrations/salesforce/salesforce-crm

Learn how to connect Upscope to your Salesforce instance

There are a couple of options to integrate Upscope into Salesforce. You can either add a button that links to another tab with the co-browsing session, or you can embed Upscope directly into Salesforce.

##### Connect Upscope

Connecting takes two steps: a Salesforce admin installs the Upscope package in your org once, then any user can connect their account.

###### Step 1: Install the Upscope Package

A Salesforce administrator needs to install the Upscope package before anyone can connect. This is a one-time setup per org.

1. Open the [Upscope package installer](https://app.upscope.io/integrations/salesforce/install) and log in as an administrator.
2. Choose who should have access. `Install for All Users` is the simplest option.
3. Once installed, go to `Setup` » `External Client App Manager`, open **UserView for Salesforce**, and click `Edit Policies`. Allow your users to authorize the app, either by letting them self-authorize or by pre-approving them with a permission set.

**Sandboxes:**
The package is copied into sandboxes created or refreshed after installation. To connect a sandbox that predates the install, install the package in that sandbox directly.

###### Step 2: Connect Your Account

In Upscope, go to `Settings` » `Integrations` and choose Salesforce. Pick **Regular Salesforce** for a production org or **Salesforce Sandbox** for a sandbox, then approve the permissions Salesforce asks for.

**Seeing an error about the package?:**
If Upscope tells you the package isn't installed, your org hasn't completed Step 1, or your admin hasn't granted you access to the app yet. Ask them to check the policies in `External Client App Manager`.

###### Turn on Call Creation

You can set Upscope to create a Task whenever you start a session from Salesforce. To enable this, click `Customize`, then select **Yes** for "*Create an object in Salesforce from the session?*" You can further customize the Task or other object we create based on your SFDC configuration.

![Salesforce Integration Screenshot 1](https://cms-cdn.userview.com/www/docs/assets/integrations/integration_screenshots/salesforce/salesforce_1.png)

```json
{
  "Task": {
    "WhoId": "=sfdc_target_id",
    "WhatId": "=sfdc_case_id",
    "OwnerId": "=sfdc_admin_id",
    "Subject": "Call",
    "Status": "Closed",
    "Description": "=information"
  }
}
```

To customize the object, edit the field mapping JSON by using the pre-defined one as a reference. The single top-level key is the Salesforce object to create, so you can point it at `Event`, a custom `__c` object, or anything else your org uses. Values that start with `=` are dynamic and will be based on the specific session. The available ones are:

| Value | What it resolves to |
| --- | --- |
| `=sfdc_target_id` | The contact, lead, or account the session was started from |
| `=sfdc_contact_id` | The contact the session was started from |
| `=sfdc_lead_id` | The lead the session was started from |
| `=sfdc_account_id` | The account the session was started from |
| `=sfdc_case_id` | The case the session was started from |
| `=sfdc_admin_id` | The Salesforce user who ran the session |
| `=information` | A summary of the session |
| `=video_url` | A link to the session recording |
| `=started_at` | When the session started |
| `=ended_at` | When the session ended |

Any value that doesn't start with `=` is used as-is, like `"Subject": "Call"` above. At least one value must start with `=sfdc`.

##### Option 1: Create Screen Share Button in SFDC

1. From the bottom of that page, copy the start session URL.
2. Use the following path in your Salesforce to create a button for the Upscope link:

   ```plaintext
   [YOUR_SALESFORCE_BASE_URL]/lightning/setup/ObjectManager/Case/ButtonsLinksActions/newButtonOrLink
   ```
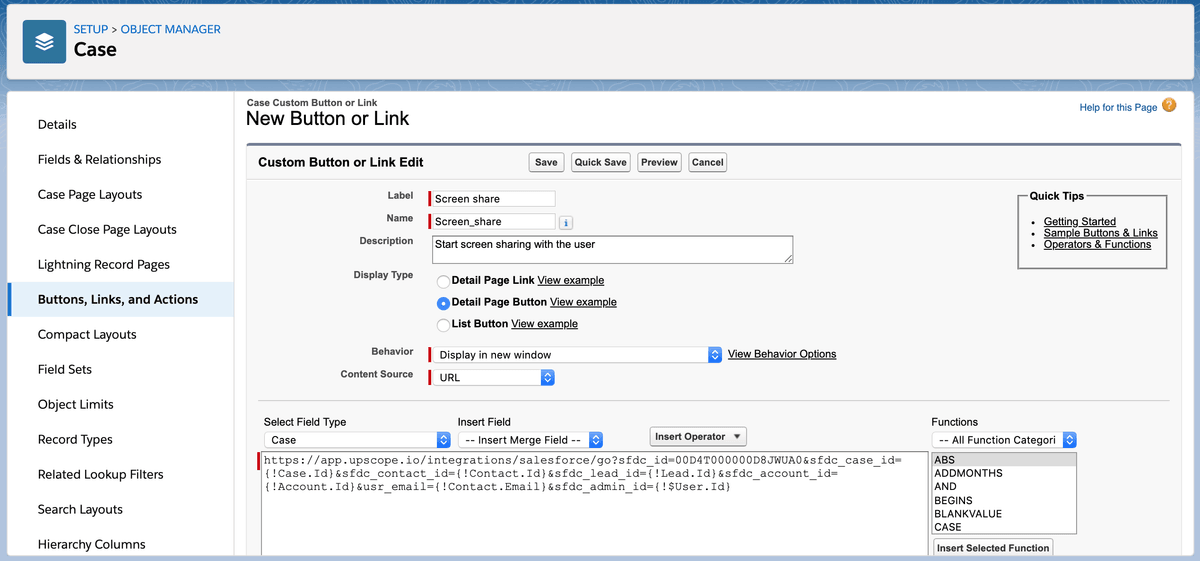
   ![Salesforce Integration Screenshot 3](https://cms-cdn.userview.com/www/docs/assets/integrations/integration_screenshots/salesforce/salesforce_3.png)

   **Button Type:**
   Make sure that you choose the option 'Detail Page Button'.

3. Click `Save`.

###### Adding a Button to a Page

In `Setup`, go to `Object Manager` and select the object you want to add the button to, we suggest `Cases` and `Contacts`.

In this case, we'll use `Cases`: go into `Case Page Layouts` » `Case Layout` and drag the "Screen share" button onto the Case details section of the page.

4. Click `Save`.

##### Option 2: Adding Upscope to Lightning App Page

Smooth out the workflow for users by inserting an Upscope iframe into Salesforce, meaning they won't need to leave to [co-browse](https://upscope.com/cobrowse).

Either add to an existing Lightning App Page or create a new one. To create a new one:

1. Go to `Setup` » `Custom Code` » `Visualforce page` » `New`.
2. Select `Record Page`, choose a label and target Object, we suggest you add Upscope to `Cases` and `Contacts`.
3. Make sure you check "Available for Lightning Experience, Experience Builder sites, and the mobile app". Add the Visual Force Page code found under `Upscope Settings` » `Integrations` » `Customize Salesforce` and paste it in the Visualforce Markup.
4. Click `Save`.
5. Go to `Lightning App Builder` and choose which app you'd like to add Upscope to.
6. Find Upscope under `Components`.
7. Drag it to the location you'd like to add it to, we suggest adding it next to "Feed" and "Related".
8. Click `Save`.

While on a case, click the "Screen share" link to start a session.
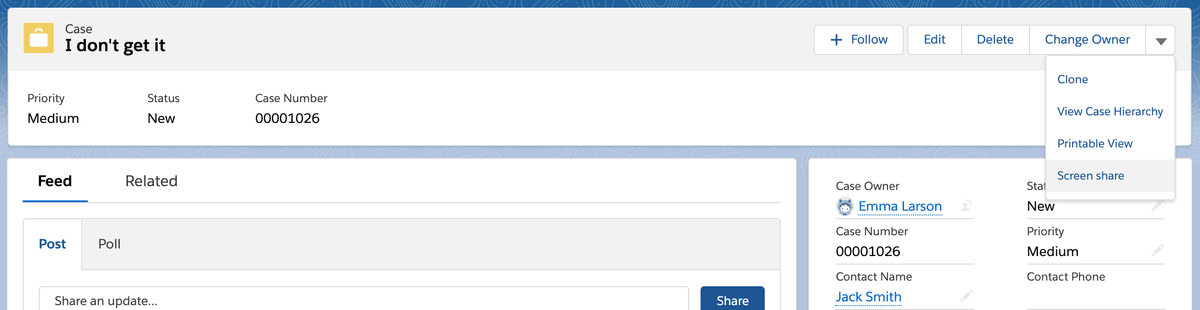
![Salesforce Integration Screenshot 5](https://cms-cdn.userview.com/www/docs/assets/integrations/integration_screenshots/salesforce/salesforce_5.png)

You will be redirected to the user's screen if they are online, and the search page if they are not.

###### Embed

Wherever you've decided to add the embedded iframe, you'll find the search page. Make sure you're logged into an Upscope account.
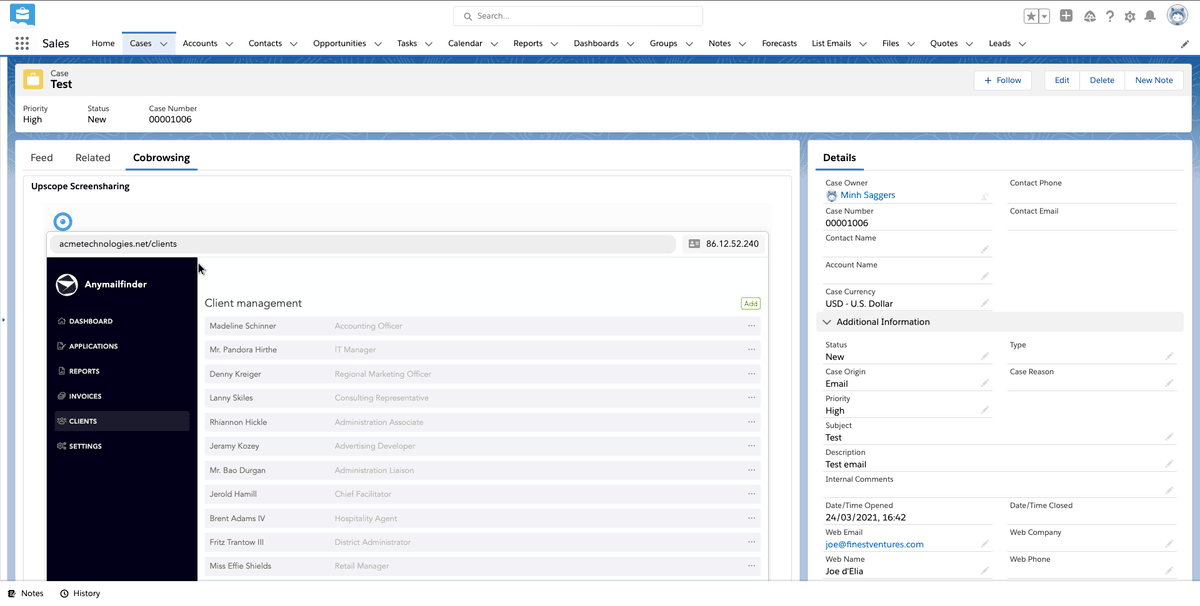
![Salesforce Integration Screenshot 6](https://cms-cdn.userview.com/www/docs/assets/integrations/integration_screenshots/salesforce/salesforce_6.png)

**User's Email:**
Make sure to add the user's email in the JavaScript for a smoother process.

After you are done, the call will be logged on the case feed.