
Salesforce CRM
Learn how to connect Upscope to your Salesforce instance
There are a couple of options to integrate Upscope into Salesforce. You can either add a button that links to another tab with the co-browsing session, or you can embed Upscope directly into Salesforce.
Connect Upscope
Connecting takes two steps: a Salesforce admin installs the Upscope package in your org once, then any user can connect their account.
Step 1: Install the Upscope Package
A Salesforce administrator needs to install the Upscope package before anyone can connect. This is a one-time setup per org.
- Open the Upscope package installer and log in as an administrator.
- Choose who should have access.
Install for All Usersis the simplest option. - Once installed, go to
Setup»External Client App Manager, open UserView for Salesforce, and clickEdit Policies. Allow your users to authorize the app, either by letting them self-authorize or by pre-approving them with a permission set.
Sandboxes
Step 2: Connect Your Account
In Upscope, go to Settings » Integrations and choose Salesforce. Pick Regular Salesforce for a production org or Salesforce Sandbox for a sandbox, then approve the permissions Salesforce asks for.
Seeing an error about the package?
External Client App Manager.Turn on Call Creation
You can set Upscope to create a Task whenever you start a session from Salesforce. To enable this, click Customize, then select Yes for "Create an object in Salesforce from the session?" You can further customize the Task or other object we create based on your SFDC configuration.

{
  "Task": {
    "WhoId": "=sfdc_target_id",
    "WhatId": "=sfdc_case_id",
    "OwnerId": "=sfdc_admin_id",
    "Subject": "Call",
    "Status": "Closed",
    "Description": "=information"
  }
}
To customize the object, edit the field mapping JSON by using the pre-defined one as a reference. The single top-level key is the Salesforce object to create, so you can point it at Event, a custom __c object, or anything else your org uses. Values that start with = are dynamic and will be based on the specific session. The available ones are:
| Value | What it resolves to |
|---|---|
=sfdc_target_id | The contact, lead, or account the session was started from |
=sfdc_contact_id | The contact the session was started from |
=sfdc_lead_id | The lead the session was started from |
=sfdc_account_id | The account the session was started from |
=sfdc_case_id | The case the session was started from |
=sfdc_admin_id | The Salesforce user who ran the session |
=information | A summary of the session |
=video_url | A link to the session recording |
=started_at | When the session started |
=ended_at | When the session ended |
Any value that doesn't start with = is used as-is, like "Subject": "Call" above. At least one value must start with =sfdc.
Option 1: Create Screen Share Button in SFDC
- From the bottom of that page, copy the start session URL.
- Use the following path in your Salesforce to create a button for the Upscope link:
[YOUR_SALESFORCE_BASE_URL]/lightning/setup/ObjectManager/Case/ButtonsLinksActions/newButtonOrLink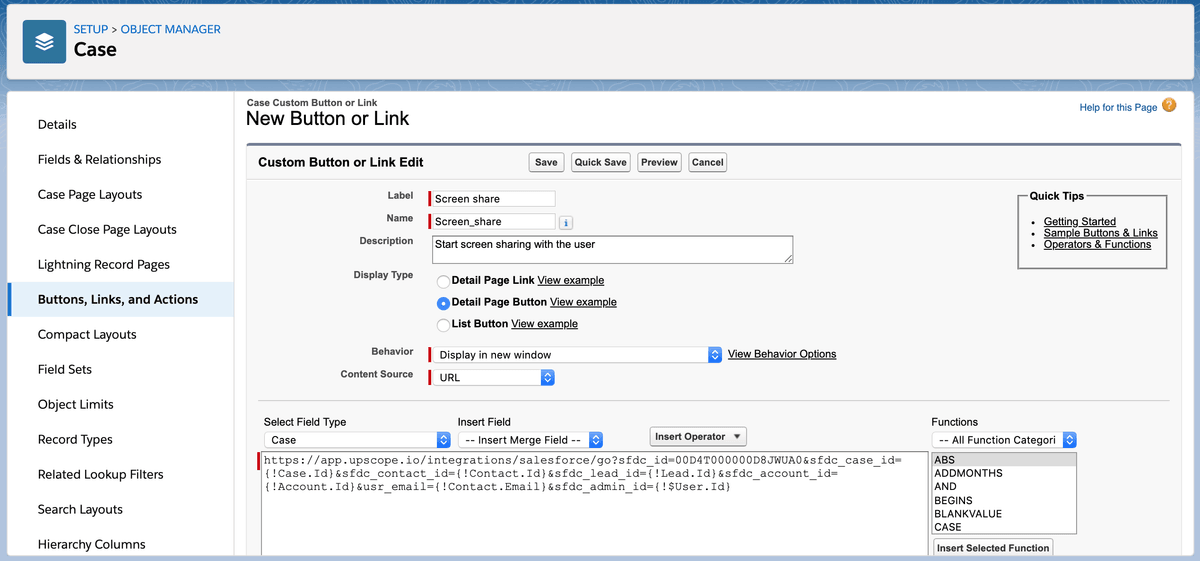
Button Type
Make sure that you choose the option 'Detail Page Button'. - Click
Save.
Option 2: Adding Upscope to Lightning App Page
Smooth out the workflow for users by inserting an Upscope iframe into Salesforce, meaning they won't need to leave to co-browse.
Either add to an existing Lightning App Page or create a new one. To create a new one:
- Go to
Setup»Custom Code»Visualforce page»New. - Select
Record Page, choose a label and target Object, we suggest you add Upscope toCasesandContacts. - Make sure you check "Available for Lightning Experience, Experience Builder sites, and the mobile app". Add the Visual Force Page code found under
Upscope Settings»Integrations»Customize Salesforceand paste it in the Visualforce Markup. - Click
Save. - Go to
Lightning App Builderand choose which app you'd like to add Upscope to. - Find Upscope under
Components. - Drag it to the location you'd like to add it to, we suggest adding it next to "Feed" and "Related".
- Click
Save.
While on a case, click the "Screen share" link to start a session.
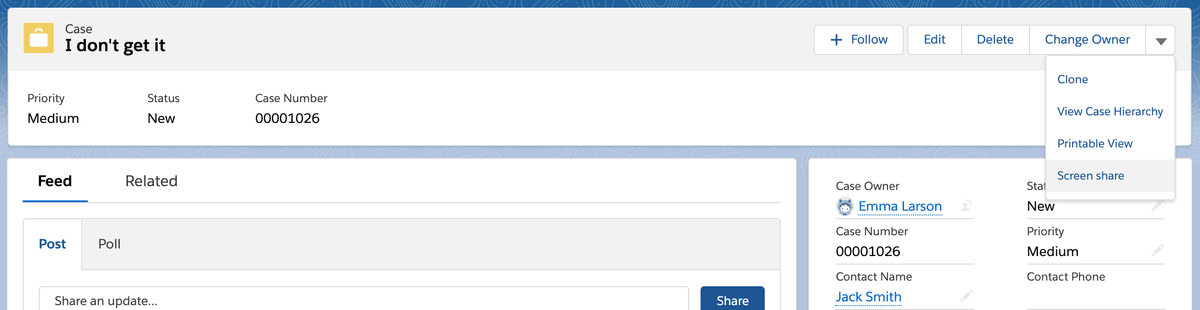
You will be redirected to the user's screen if they are online, and the search page if they are not.
Embed
Wherever you've decided to add the embedded iframe, you'll find the search page. Make sure you're logged into an Upscope account.
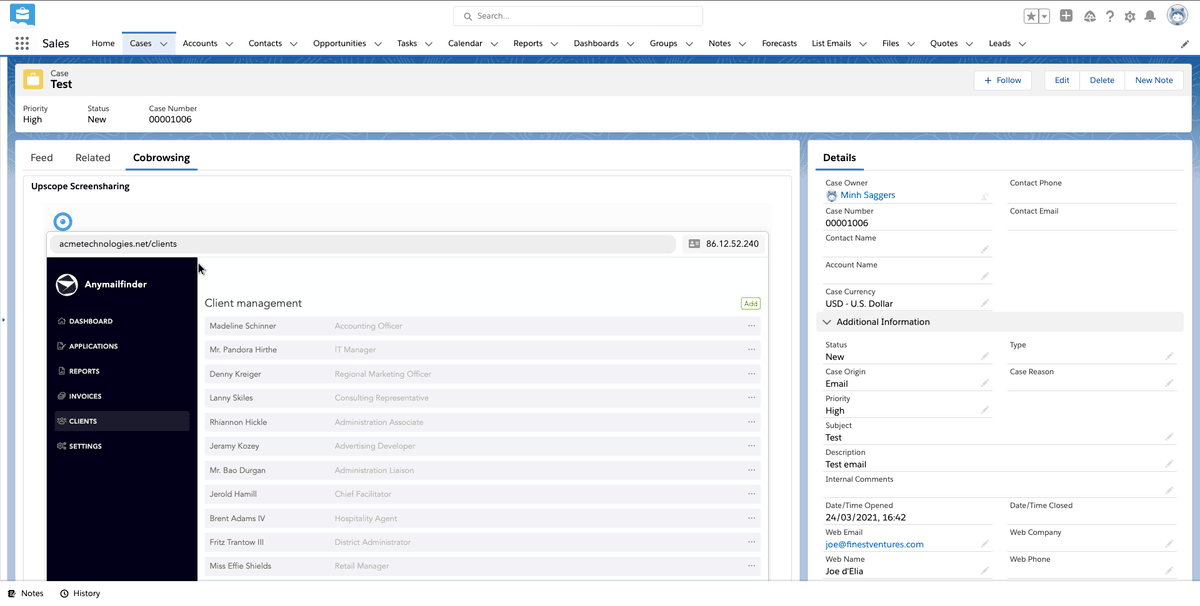
User's Email
After you are done, the call will be logged on the case feed.